
(by Corbo Eng)
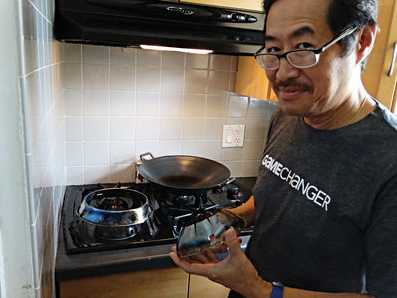
Glen Lee with the WokMon in his hands (photo courtesy of The Hudson Reporter)
Glen Lee knows many things. He’s worked as an aerospace engineer and, currently, as an actor—having appeared in commercials, TV, and films (such as Big Trouble in Little China and The Amazing Spider-Man 2). But, it’s his additional role as an inventor that allowed us to cross paths. His being one might sound like an incongruous circumstance—certainly, for someone who might otherwise be memorizing a script and entertaining the public; but, Glen’s always possessed an inquisitive mind—seeing things that ought to be and trying to make them happen.
That’s, obviously, the case with his dearest and latest invention, which he calls the “WokMon” and which, curiously, draws upon his previous incarnation as an aerospace engineer. The invention, on its face, appears to be rather simple. It’s a dome-shaped metal contraption, less than 12 inches long, that looks like a miniature model of a football stadium with an opening at the top and window-like vents on the side. When set in place atop a stove over a gas burner, its function and likely ties to aerospace engineering comes into full and magnificent view. What it does is create an intense flame by concentrating all of the gas from the burner into a centralized point, rising almost two feet high—which could, more accurately, be described as a shaft of fire (like something that might come roaring out of a jet engine).
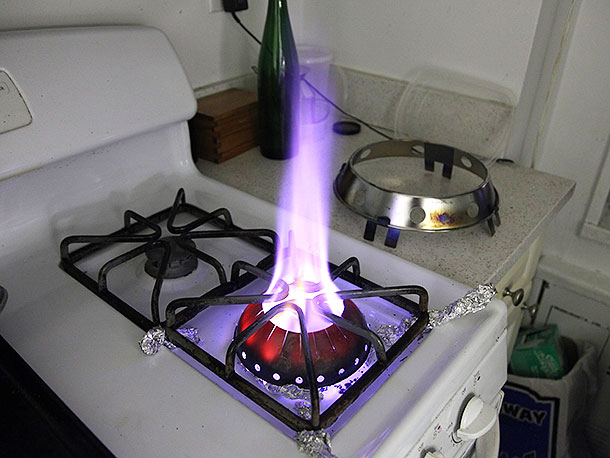
the WokMon’s impressive shaft of fire (photo by J. Kenji López-Alt)
The ultimate purpose of the WokMon isn’t necessarily to emit such a flame in and of itself. Rather, along with its specially designed wok ring, its purpose is to help home cooks stir-fry with the firepower that’s necessary for such a task. Home cooks intent on stir-frying the right way have always been stymied, knowingly or not, by how Western-style burners emit flames in a circular pattern—with what Glen calls a “dead spot” right in the middle. That so-called dead spot, when stir-frying, is centered directly beneath the wok (or a flat-bottomed pan). When a conventional round-bottomed wok is deployed and set on a wok ring to stabilize it, rather than heating the bottom of the wok, the flame from a Western-style burner inefficiently sends heat up the sides of the wok or, otherwise, radiates heat outwardly into the ambient space around the stove.
While it may not seem like a big deal to stir-fry under such conditions, it is—because to stir-fry correctly and as it was intended (taking the long history of stir-frying in China and Hong Kong into consideration), a home cook must have intense heat at his disposal so that meat sears properly, juices from proteins and vegetables evaporate accordingly, and food therein may have the opportunity to possess what the Chinese call “wok hei” (the breath of the wok), a coveted, almost ethereal, smokiness. Here in the U.S., other than at restaurants, “wok hei” is elusive and almost always absent in most stir-fries. Many factors may come into play; but, an insufficiently heated wok is one major reason. People invariably end up slowly stewing their food thinking that they’re really stir-frying it.

Michael Alan taking photos for the WokMon Cookbook (with Glen looking on)
Glen’s invention solves a longstanding problem, of course; and, it’s for this reason that he began a crowdfunding campaign (with Crowdzu) to move beyond his initial prototype, to mass produce it, and make the WokMon a reality for everyone. It was during the time when the crowdfunding campaign was launched that Glen contacted me to help him write a “cookbook,” which would be offered as a crowdfunding gift, and that would be a sort of product guide that also features some recipes in it—recipes that account for the WokMon’s firepower. Not being shy about Chinese food, obviously, or stir-fries and, more importantly, being excited about the WokMon and its potential, I agreed to co-author the cookbook and collaborate with him (and Michael Alan, a fitness trainer and former culinary professional who was already on board testing Glen’s prototype and putting it through its paces).
What follows, then, is the cookbook as I wrote it, in Glen and Michael’s voices, after we brainstormed recipes, settled on the dishes that we wanted to prepare, and after they diligently and skillfully cooked up some delicious food with the WokMon in tow and as I observed and took notes. Later, I tested the recipes, made adjustments as needed, and, over the span of a few months, typed up the final draft. It was a joy to work on.
—————————————————————————————————————————-
Introduction
by Glen Lee

Here I am cooking up a storm in cartoon form (illustration courtesy of Glen Lee)
For Chinese families, cooking with a wok is something that’s just vital and ingrained. It’s what Chinese families do and is part and parcel of our food culture. But, for my family, the Lee family, it was just a bit more pronounced; that’s because my parents owned a Chinese restaurant where, of course, woks were essential. So, I learned how important woks were from multiple fronts. However, the dazzling stir-frying that was commonplace at our restaurant was impossible to duplicate at home; and, my mother would always complain about that. Although she used a wok to make family meals, the food would be sub-par compared to what we prepared in our restaurant kitchen in Brooklyn or what we ate when we dined out at other Chinese restaurants in Chinatown.
Without enough firepower under our wok at home, the food always lacked “wok hei,” that hard-to-achieve charred and smoky flavor that is captured in the English expression, the “breath of the wok.” That “breath of the wok,” which is a Cantonese concept, is highly valued and coveted by the people of Guangdong Province and Hong Kong. Many immigrant families, however, who were thwarted by their wimpy burners and insufficient BTUs ultimately resigned themselves to lackluster stir-frying. Some families even gave up using traditional woks altogether and began using conventional flat-bottomed cooking vessels and adopted Western cooking methods to make Chinese food. But, witnessing all of this in my formative years, I knew it didn’t have to be like this. It just took me a long time (with a stint in the aerospace industry along the way), however, to figure out just how to address the problem.

Michael Alan (photo courtesy of Michael Alan)
Now, with the WokMon, stir-frying can approximate what is possible at Chinese restaurants. The WokMon’s unprecedented firepower quite literally changes the game. Home cooks who have stir-fried under less than optimal conditions can now strive for the real deal. While they may have once frustratingly dealt with and adapted to the limitations of their feeble gas or electric stoves and became accustomed to its timing and idiosyncrasies, which may have felt “normal” over time, the presence of the WokMon now necessitates quicker instincts, a faster approach, and an overall more energetic and alert style of stir-frying. Gone are the days of lazily leaving ingredients to cook (or, more accurately, stew) in a flat-bottomed wok or frying pan on an electric burner or even a convex carbon-steel wok that may have rested on a wok ring above a conventional flame with a burner’s dead spot centered underneath it. The recipes that follow account for the ferocity of the WokMon and help those using it to adjust to shorter cooking times (the way it should be). It’s Woksanity!
But, the ensuing recipes also focus on good food as well—which is two pronged: “good” in the sense of its being healthy and “good” in the sense of its being delicious. The two senses of the word are present in each recipe. Michael Alan, my collaborator, who contributed so dearly to this cookbook, is a personal trainer, fitness enthusiast, former culinary professional, and an avid home cook who was drawn to stir-frying and wok cooking for its health benefits. That interest and original inspiration is creatively present in his food. Plus, he meticulously tested the WokMon for months during its prototype phase and he, more so than anyone else, learned just how to harness the power of the WokMon and suggested ways to improve it.
I come to stir-frying, as I’ve mentioned, from a different angle. I invented the WokMon. So, my recipes in this cookbook grew out of my intimate understanding of how it functions. But, also, what I present to you comes from my family, from tradition, from Cantonese food culture—which cherishes practicality, simplicity, natural flavors, and freshness.
—————————————————————————————————————————-
Seasoning Your New Wok
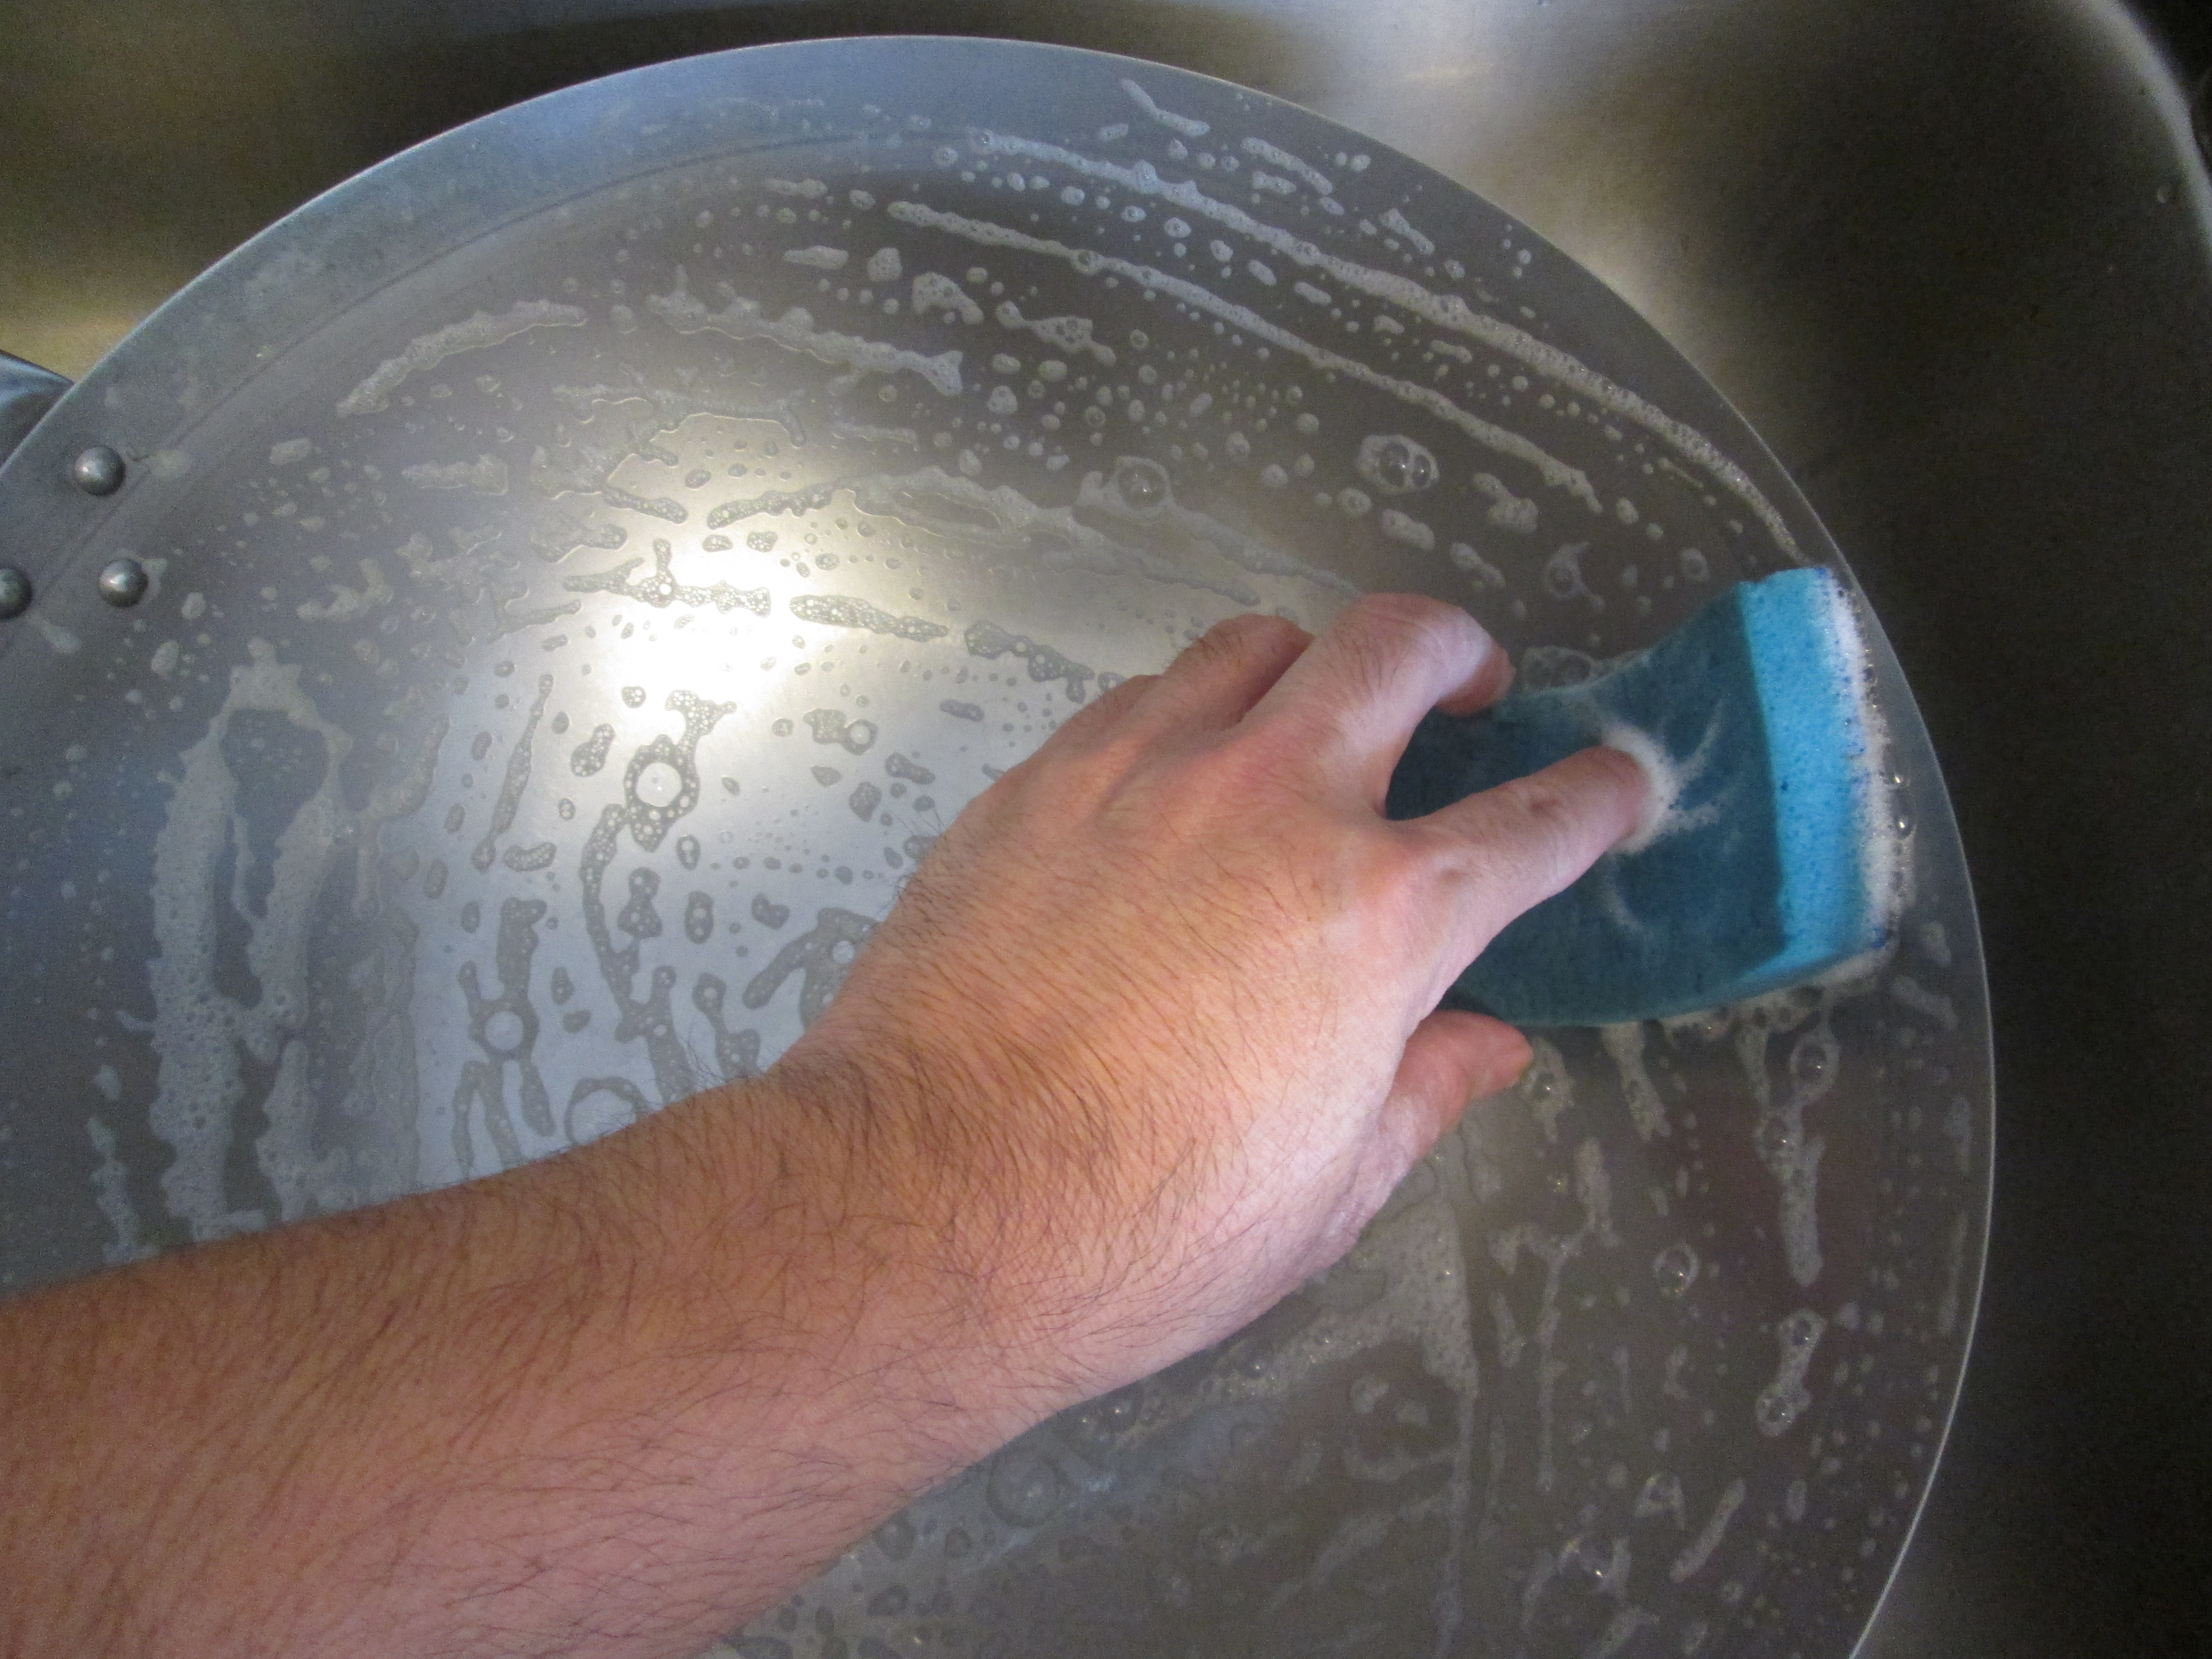
washing the interior of the wok with soap and water using a downward spiral
A new wok must be “seasoned” before it can be used. To season a wok basically means treating the metal and preparing it for use. There are essentially three reasons for doing so. One is to protect the entire wok from rusting, and the second is to give the wok’s concave interior a non-stick surface (one which will only grow more pronounced over time and repeated stir-frying). A third reason is to prevent any metallic taste, if the wok is unseasoned, from transferring to your food (especially, the first couple of times it is used).
Many of you may own a carbon-steel wok as this is the most ubiquitous type (more than likely a pow wok with a hollow metal handle, a round-bottomed wok with the wooden “ear” handle on one end and a long wooden handle at the other, or even a Cantonese style wok with two “ear” handles on each side). These woks and others as well are thinly rubbed with an industrial-grade oil in the factory after they’ve been manufactured in order to prevent rusting due to oxidation and air moisture and to protect the metal during shipping. This oily residue, as it shouldn’t be ingested, must first be removed.
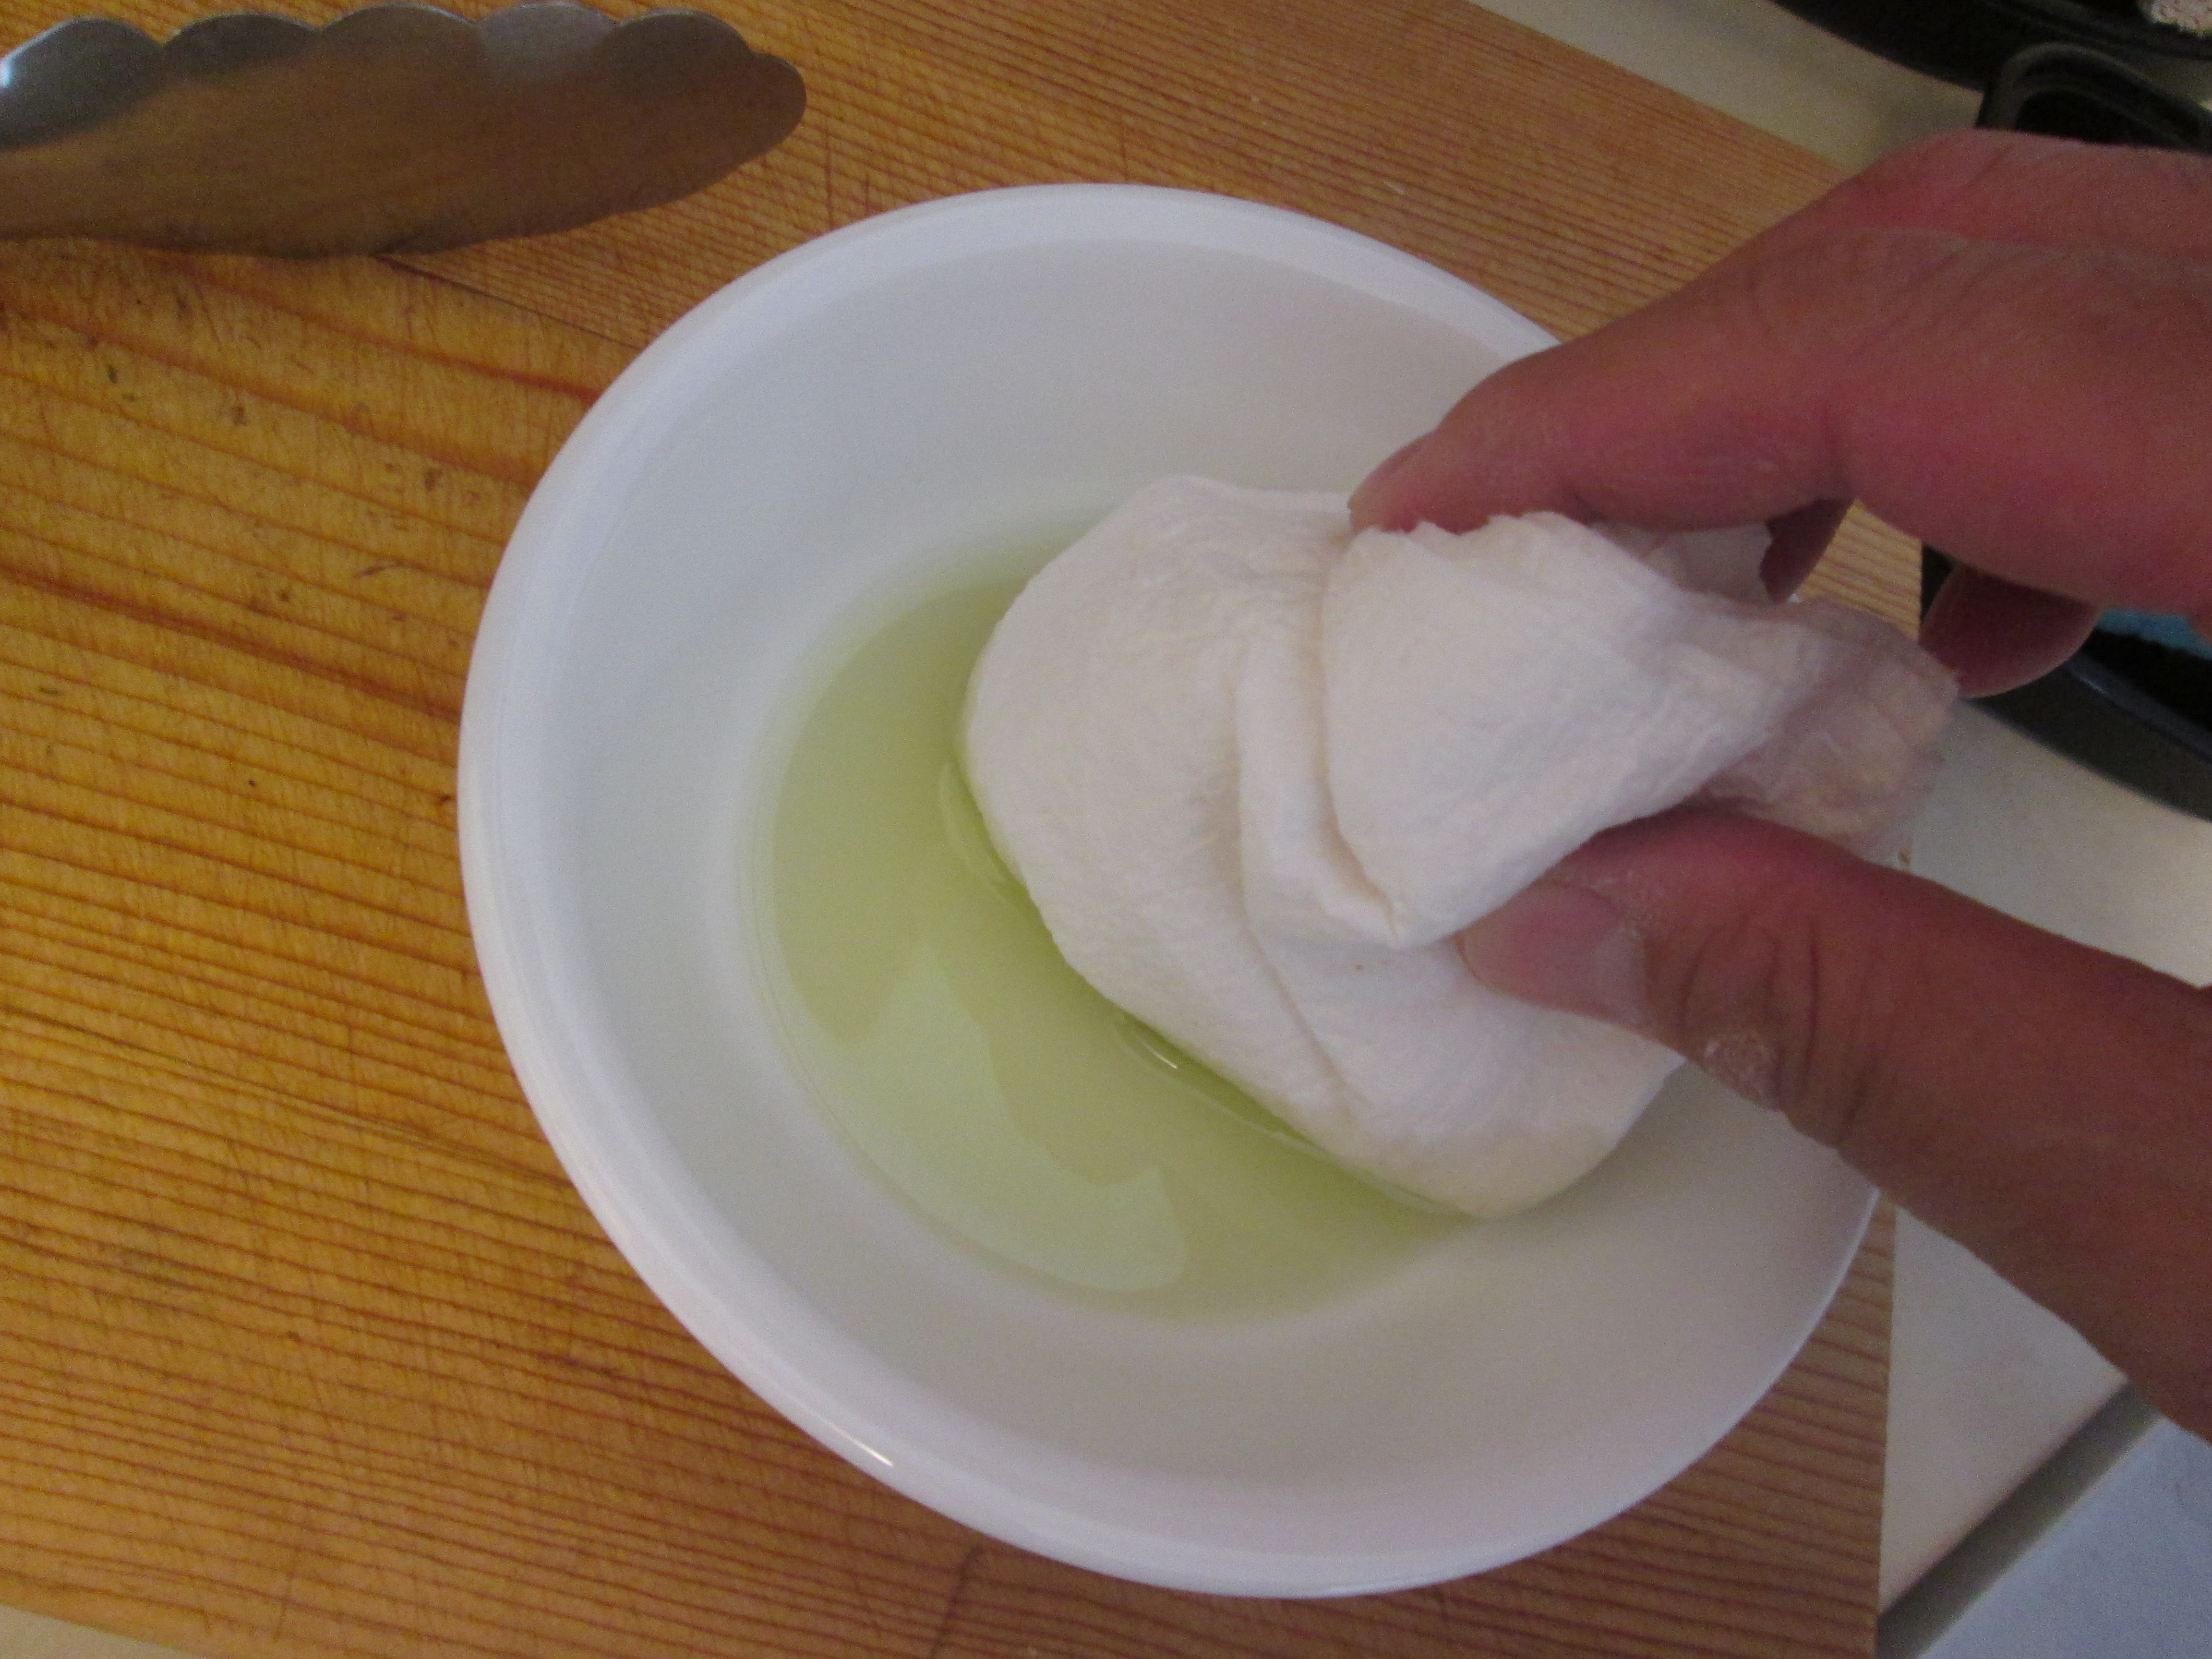
dabbing a wad of paper towels in a dish of grape seed oil
To do this, place your wok in a sink and squirt in some dishwashing detergent. Run a bit of warm water into the wok—just enough to lubricate the process. Don’t allow the wok to be overrun with suds and bubbles. A slightly more viscous surface is better than a watery one. Take a non-abrasive sponge (such as those that are especially made to scrub Teflon pans) or a Scotch-Brite or Brillo pad and, starting from the interior rim, scrub vigorously and downwardly in a spiraling manner—roughly following the concentric lines imprinted on the metal (i.e., the “grain of the steel”). Scrubbing back-and-forth “against the grain” may scratch or mar the wok’s interior. Once done, rinse the wok thoroughly. Repeat the process, if necessary, in order to remove all of the factory oil. Next, flip the wok over; and clean the exterior of the wok in the same way. Starting from the top of the “dome,” clean the wok by following the grain of the steel in the same spiraling manner. Rinse thoroughly, and, using a towel, dry the wok completely—leaving no moisture.
The next step involves heating up the wok and “burning” the metal. First, pour out about two tablespoons of oil (one with a high smoke point such as peanut, grape seed, or canola oil) into a shallow dish. Create a wad of about two or three sheets of paper towels and dab it the dish. Ensure that the wad is damp with oil but not soaked and dripping. Now, flipping the wok over so that the outside of the wok is facing up (and appearing like a dome), rub a very thin coating of oil over the entire exterior. Make sure that the layer of oil isn’t too thick or excessive. Optimally, the oil will appear as a glossy sheen rather than as a pronounced coating. Next, turning the wok over, set it aside or rest it upon its wok ring.
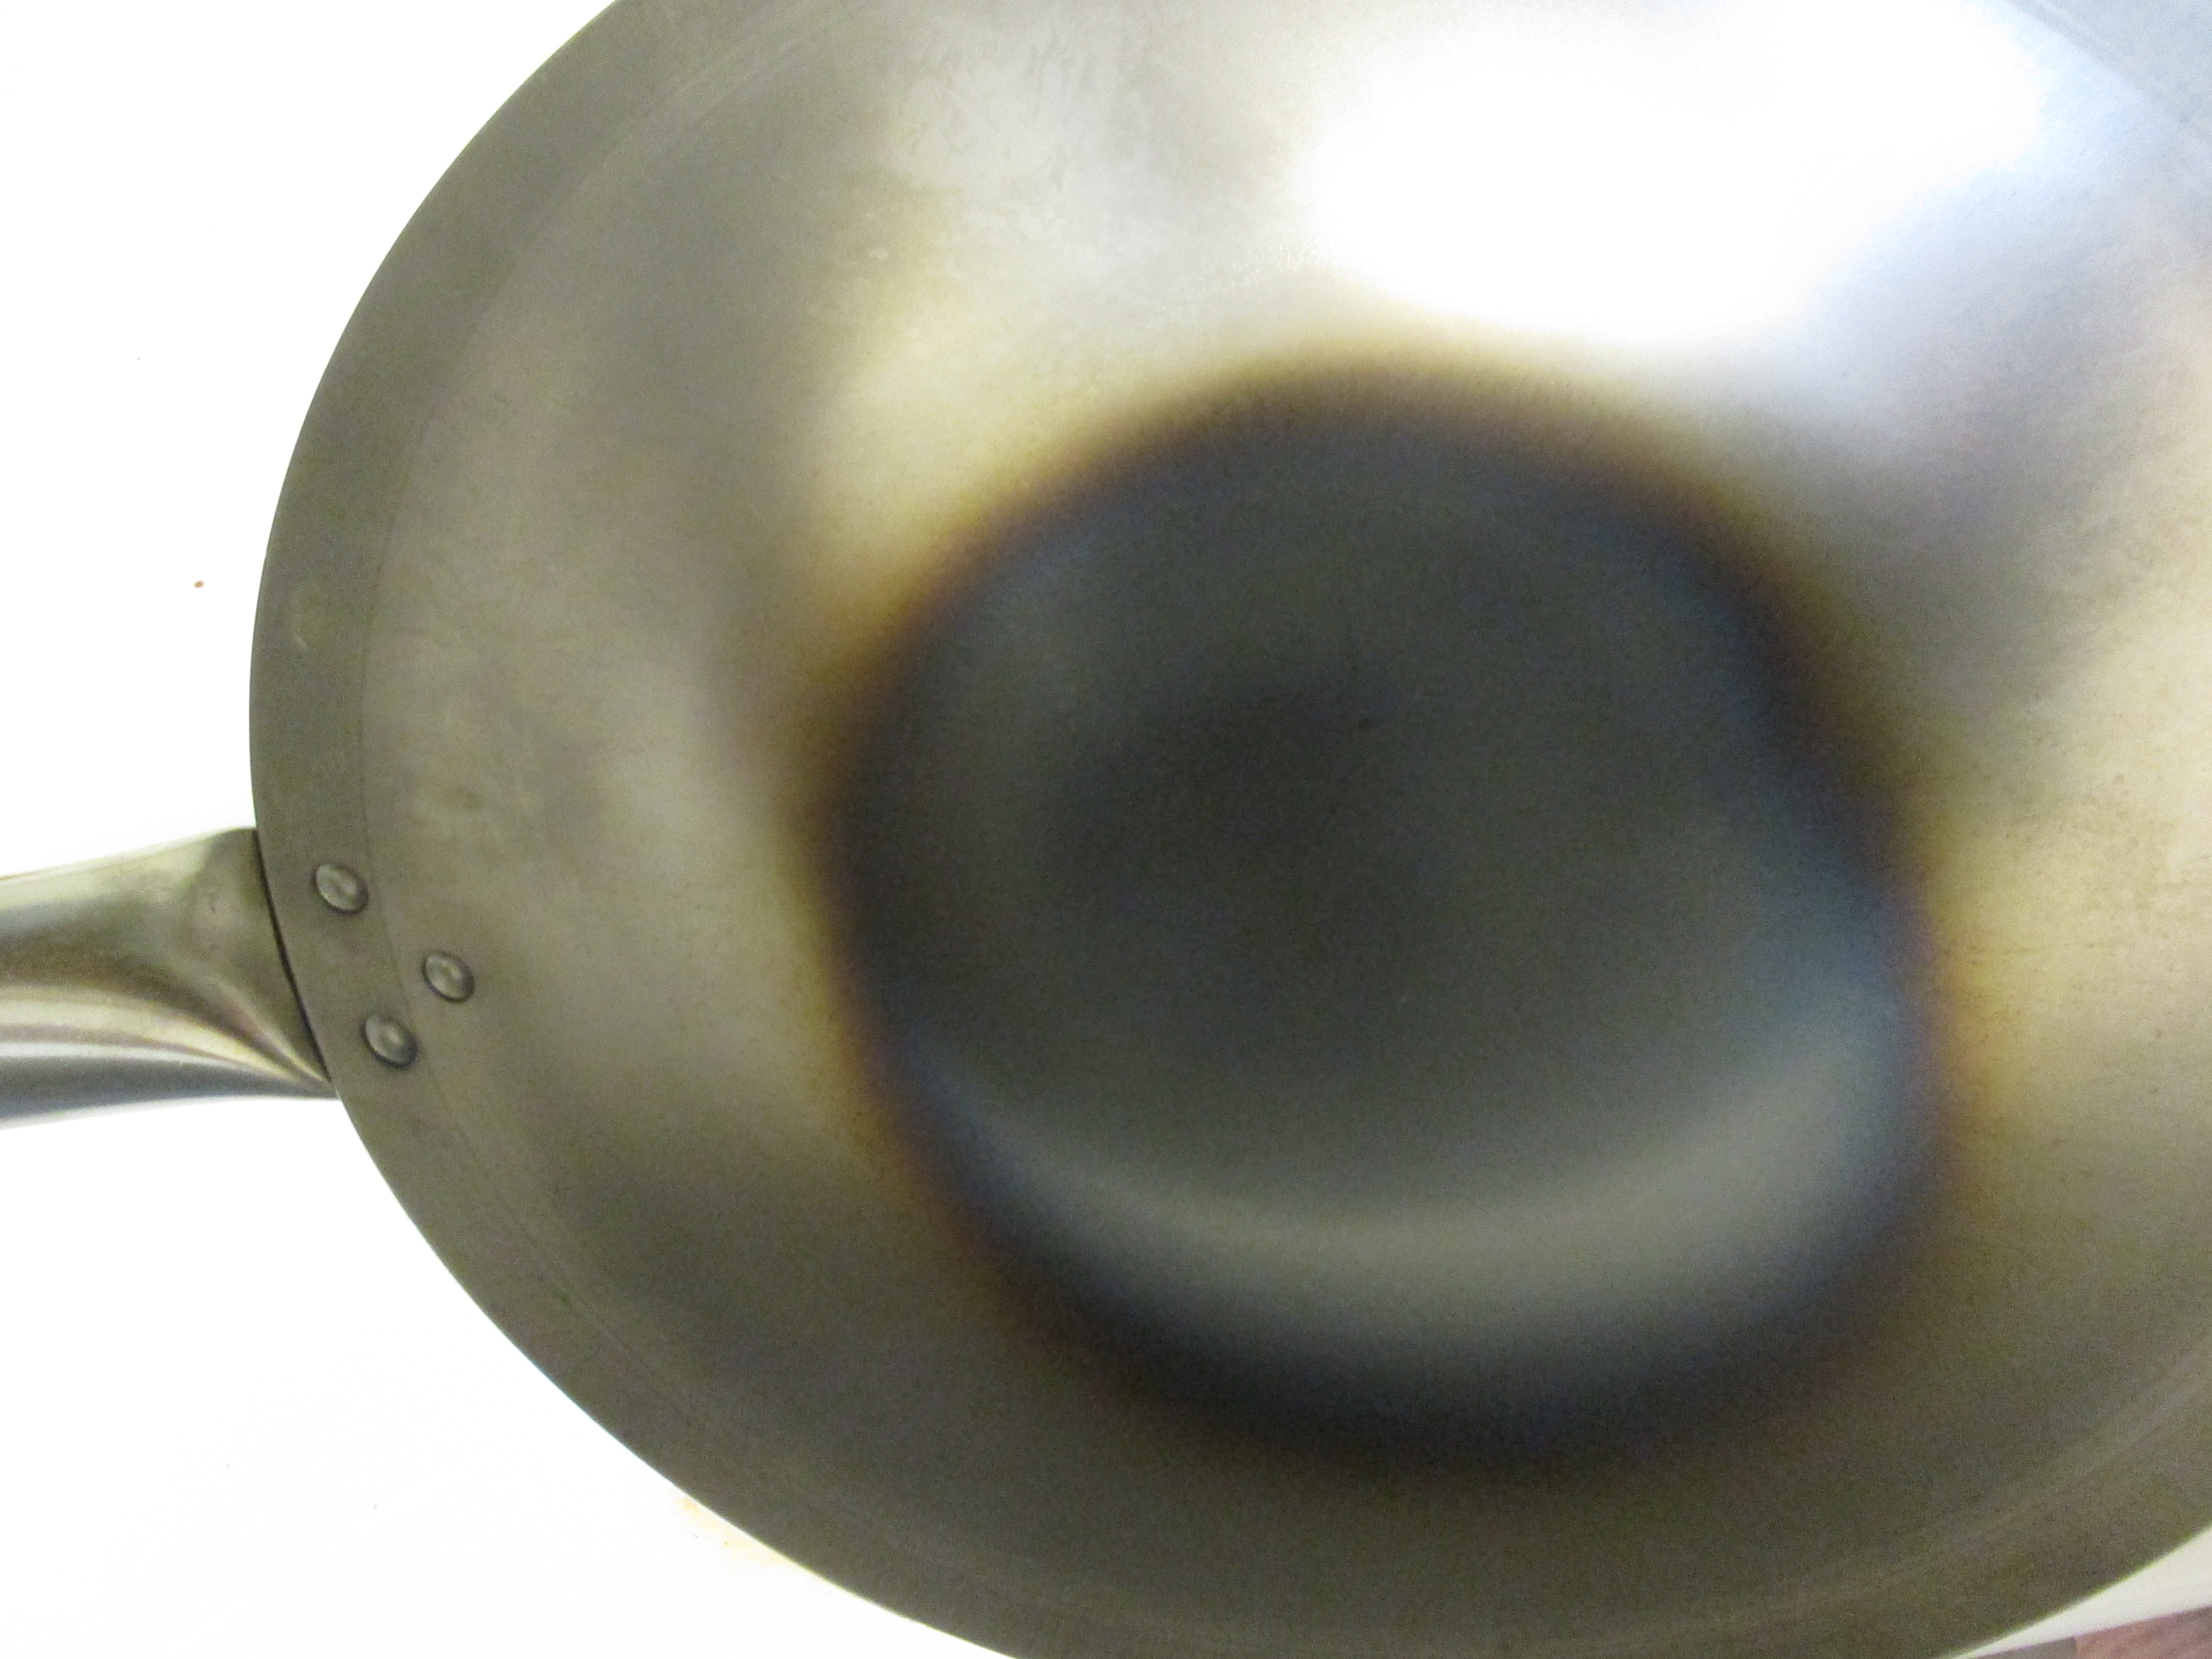
the color of the wok at the beginning of the burning process
Now, before turning on the flame and burning the wok, wrap the wooden ear handle (if it’s present on your model) in one or two layers of aluminum foil as a precaution. Also, before starting, ensure that there is adequate ventilation. Turn on the exhaust fan in your kitchen; or, otherwise, open the windows nearby. Once these measures have been completed, turn on the burner and set it on high. The bottom of the wok should heat up fast and transform from a silvery color to a glowing, metallic blue. There should be a dark leading edge as the metallic color begins to spread. Once that leading edge has approached the sides, it will have difficulty spreading all the way to the top; so, tilt the wok to allow one side of the wok to face the WokMon flame.

the metallic blue rising up the sides with the wok at an angle to the flame
Make sure that the wok is still resting on its ring securely and not in danger of falling over from too severe an angle. While wearing an oven mitt (if using a wok lacking a wooden handle), hold the wok handle to steady the wok during this process. When the side that’s in contact with the flame changes color, begin rotating the wok in a clockwise manner (always keeping one side jutting upwardly and the wok at an angle) so that, in turn, all sections of the interior sides have a chance to rest directly over the WokMon flame. Let the carbon steel in each section burn to the desired metallic blue before rotating the wok as needed. Once the entire interior has changed color, return the wok to its proper, stationary position on its wok ring.
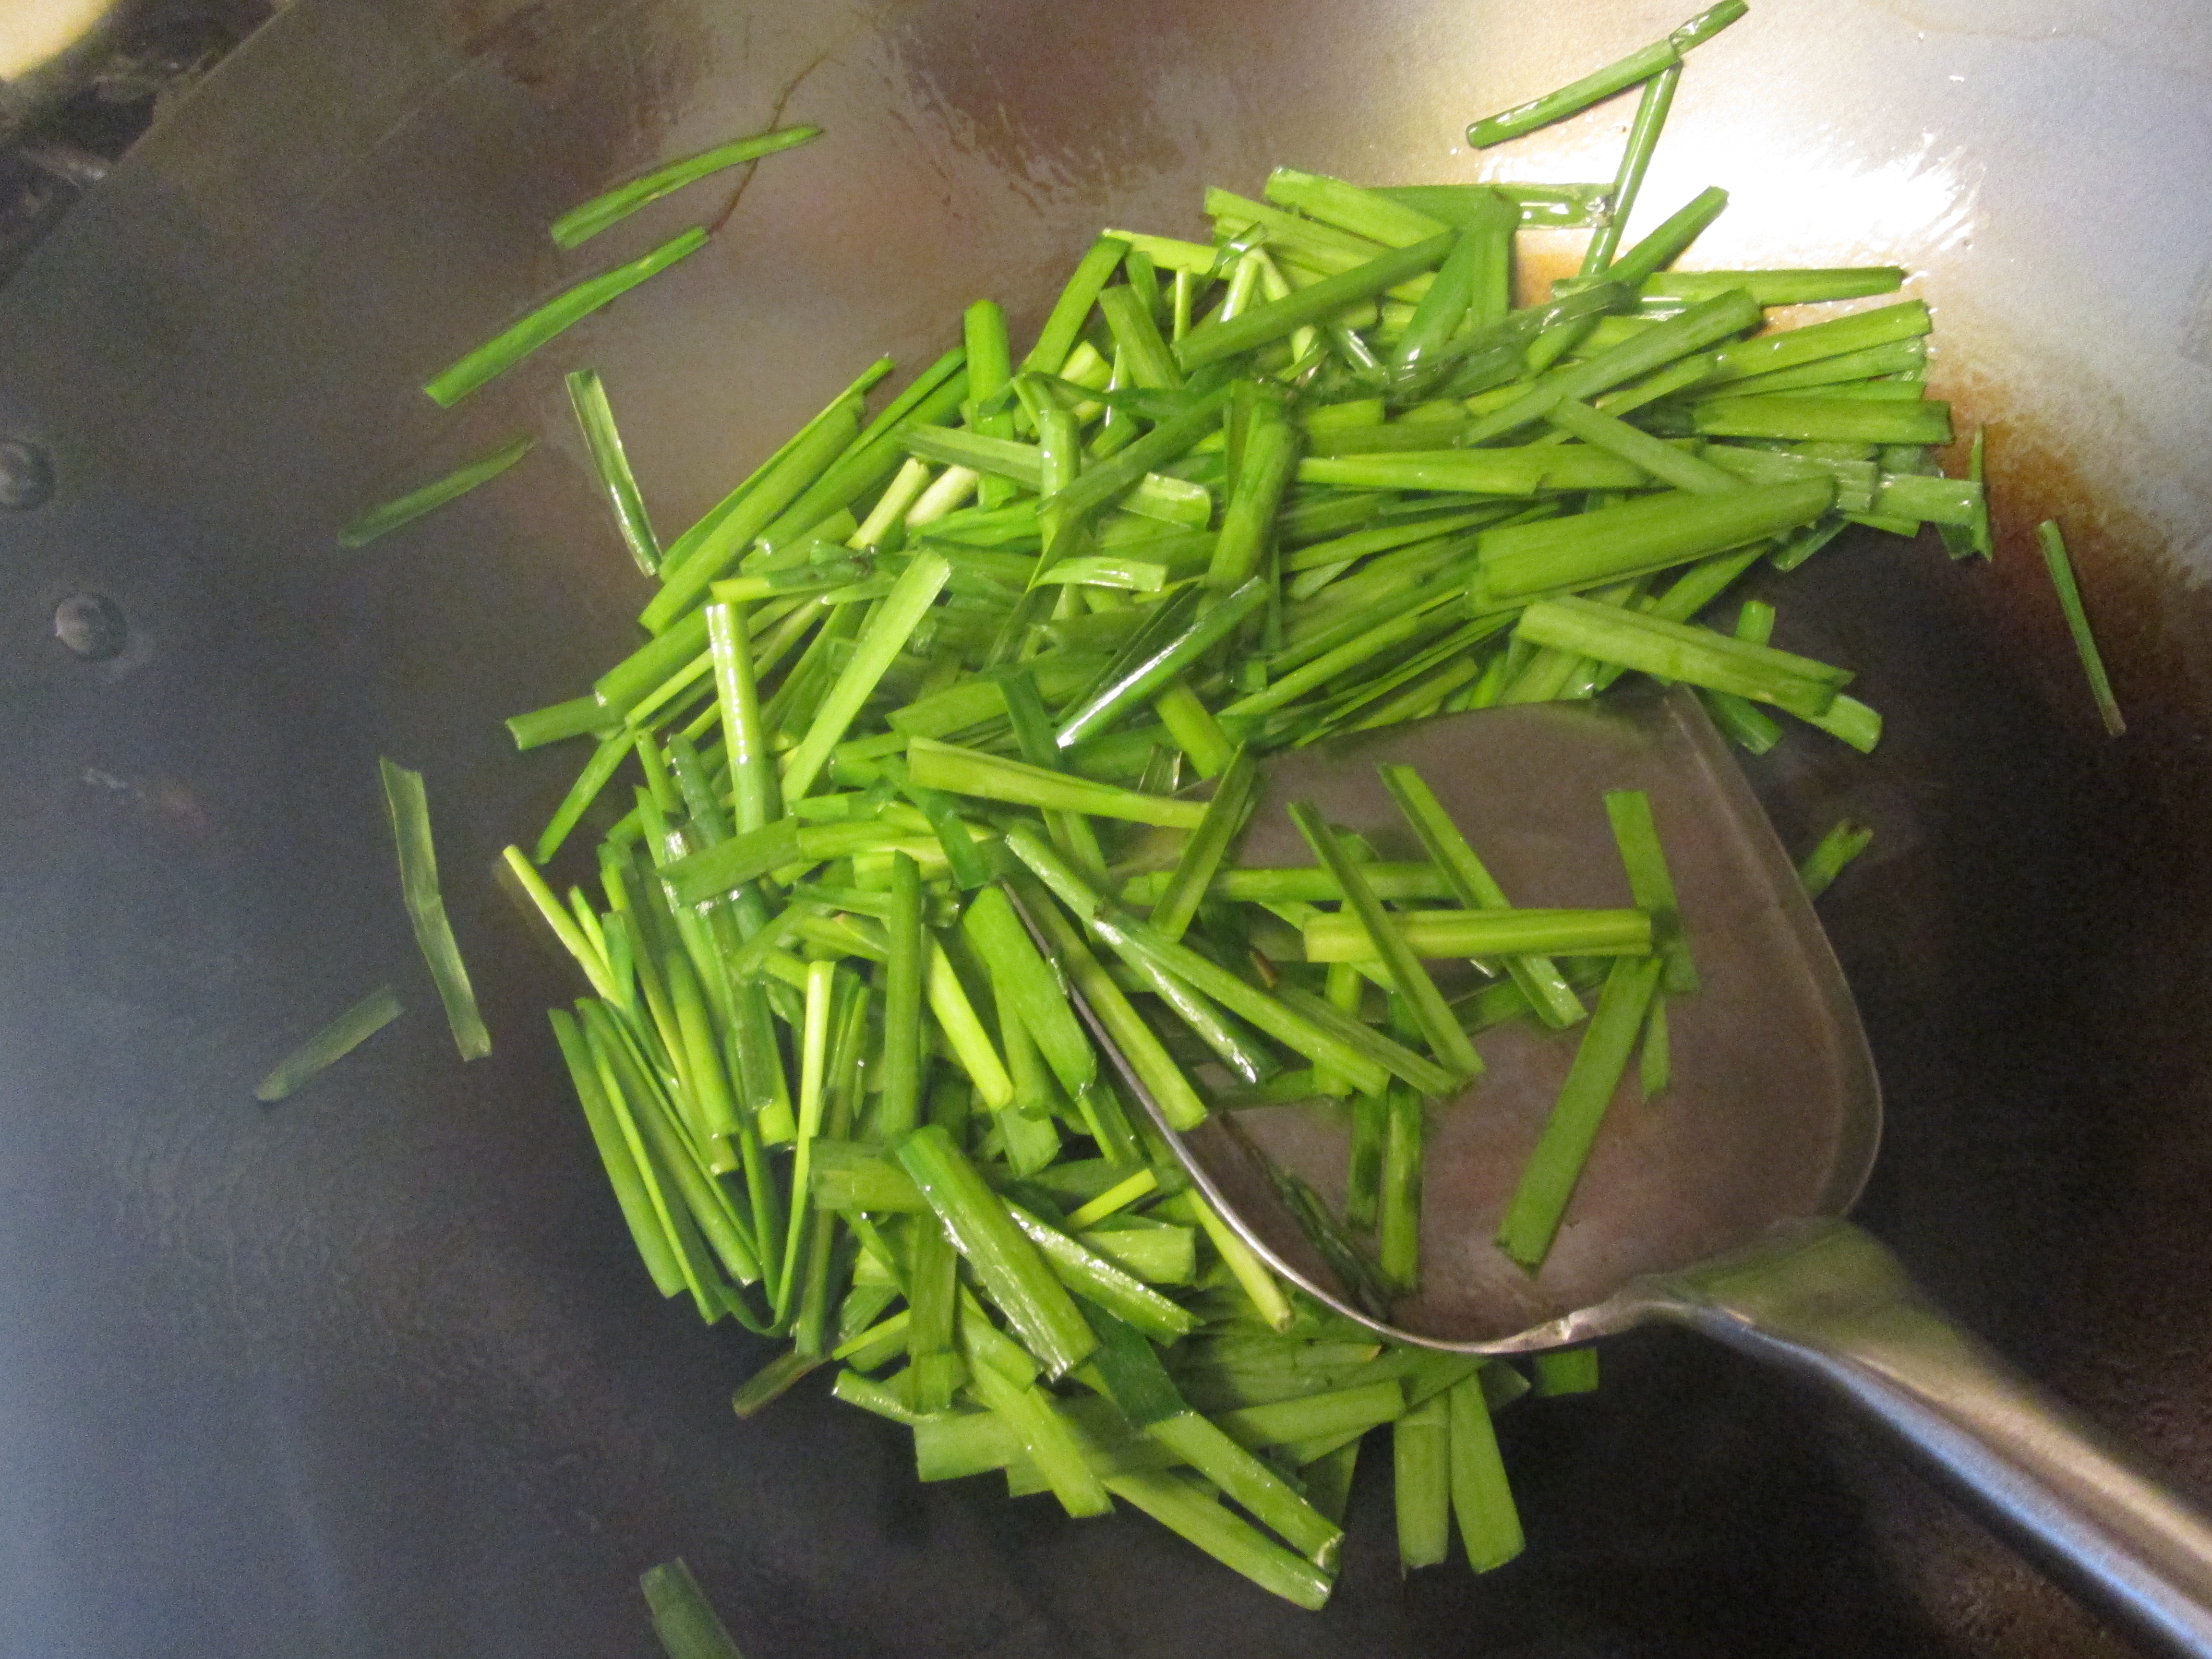
stir-frying Chinese chives during the last step
Next, allow the wok to heat back up. After about a minute, re-dab the wadded paper towel used previously and smear oil over the interior in a circular pattern (starting from the interior rim down to the bottom). Follow the “grain of the steel.” Do so vigorously and rapidly. The oil, once it contacts the hot wok, will smoke. Again, be mindful to apply the oil very, very thinly so that the wok darkens gradually with each pass. Repeat this dabbing and smearing process, allowing the wok to rest and absorb the oil, until the wok darkens to a tannish black finish. However, don’t overdo it. The darkened color of the wok should appear to be an inherent feature of the metal itself rather than like a gloppy burnt-on layer resting on its surface. The darkest part of the wok will be its bottom (with an increasingly lighter color up the interior sides). Also, the wok won’t be uniformly tannish black at this point, and don’t expect it to be.
The final step, part ritual and part necessity, involves giving the wok a cleansing stir-fry to remove any impurities or metallic taste. Traditionally, Cantonese home cooks have used Chinese chives for this (the flat chives, not the rounded garlic chives with the small bulbs at the tip). Chinese chives are sold at Asian grocery stores in a bunch (clutched together with a rubber band). Cut up about ¾ of one bunch into one inch segments. Turn on the WokMon and set at medium heat. Once the wok begins to smoke, swirl in some cooking oil (1 tablespoon) and allow it to stand for a few seconds and, then, toss in the segmented Chinese chives. With a wok spatula or a wooden spoon, work the chives around the wok to help the chives release their fragrance and oils. Push the chives around the entire interior (up the sides) so that no section of the wok is untouched or untreated. Allow the chives to rest; and, then, stir again. Continue in this way until the chives have turned brown or have become charred and brittle. The interior bottom of the wok will likely be darker after stir-frying the chives. Turn off the flame, and discard the chives. The seasoning of the wok is now complete—for the time being.
—————————————————————————————————————————-
Maintenance and Care of Your Wok
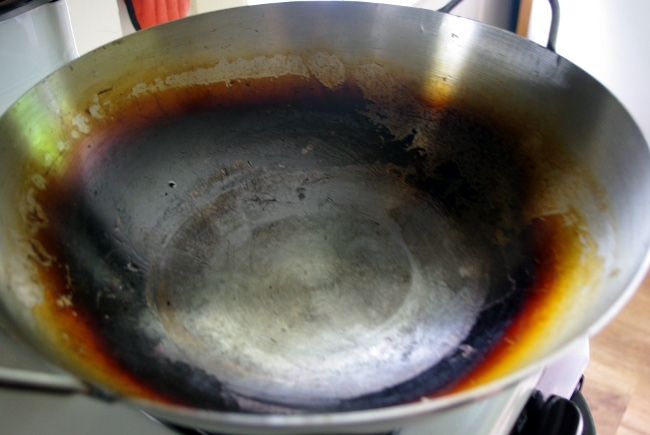
a wok after initial burning (photo courtesy of Meg Cowen)
The color of the wok at this juncture is merely a precursor of things to come. The wok will become more uniform in color (and fully seasoned), achieving its black patina, which will provide on-going protection against rust and an enduring nonstick cooking surface, with repeated use over a span of weeks, months—even years. The process of being heated repeatedly and coming in contact with hot oil and animal fat from meats cooked within it, will blacken the metal’s color and deepen it to the point that it will resist mutating. Like a good cast-iron skillet, a wok just gets better with each use. So, the more you use your wok (and your WokMon), the quicker the wok will develop that permanent patina. However, unlike a cast-iron skillet (which is uniformly black), a carbon steel wok will less likely have such a uniform finish. Blemishes are common; and, it’s typical that the upper reaches of the sides remain lighter because it’s subjected to less intense heat. However, if a more uniform appearance is desired, you can apply oil and burn the wok in the same clockwise manner while holding the sides at an angle over the WokMon flame until the desired color is achieved.
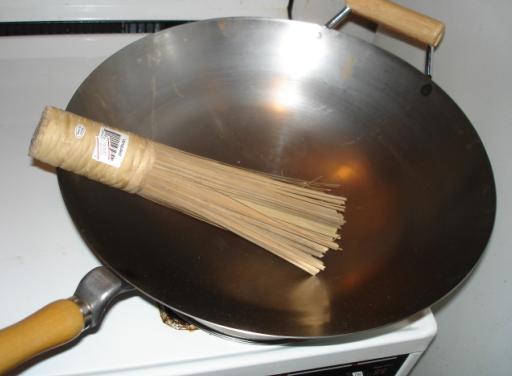
a wok with traditional scrub brush with bamboo bristles (photo courtesy of W.K. Leung)
Of course, to get the wok to where it’s properly worn in requires that you take care of it correctly. The first rule is, perhaps, the most important—to never scour the wok once it has been seasoned. The patina that you would have worked so hard to build up over time will become scratched and compromised (perhaps, to the point where you would have to start over again and re-season the wok). The second rule is to never use liquid detergent of any kind to clean the wok. The abrasive chemicals in dish detergent can easily weaken the patina. The third rule is to prevent a hot wok from coming in contact with cold water. A rapid change in temperature (such as immersing the wok into cold water, running cold water over it, or simply pouring cold water into it) is a shock to the wok’s surface since a hot wok, with its metal having expanded due to its being heated, will contract suddenly and potentially tarnish the surface.
With these rules in mind, then, the best way to maintain a wok is to clean it with a traditional brush with bamboo bristles or a non-abrasive pad (such as those used on Teflon pans but not a scouring pad). Set the wok into the sink (once it has cooled to the touch) and rinse it with hot tap water. Keeping a circular pattern that follows along the grain of the steel (from the top of the wok to the bottom), use the brush or non-abrasive pad to dislodge any burnt-on pieces of food or sauce. Use a bit more force in spots were particles are particularly stubborn. If you find that using mere water is insufficient, set the wok on a secure surface and sprinkle some kosher salt or sea salt into the areas in question. Allow the salt to stand for a few minutes, and deploy the bamboo brush or non-abrasive pad as you normally would under the sink with hot water. Once cleaned, it is best not to use a dish cloth of any kind. Rather, set the wet wok onto its wok ring and turn on the burner beneath it. The flame will quickly evaporate any remaining moisture. Using a wad of paper towels, rub the wok (both the interior and exterior) with some cooking oil (just enough to glaze the surface) before allowing the wok to cool down completely and storing it away. Don’t apply so much oil that it pools or forms thick streaks. Having some oil on the wok will keep the patina nicely bright and prevent the wok from rusting from exposure to air.
—————————————————————————————————————————-
Cooking Tips and Tricks of the Trade
The recipes that follow certainly provide a way for you to start your stir-frying adventures with the WokMon; and, of course, many of you will have existing or favorite recipes that you’ll want to make with the WokMon’s additional firepower.
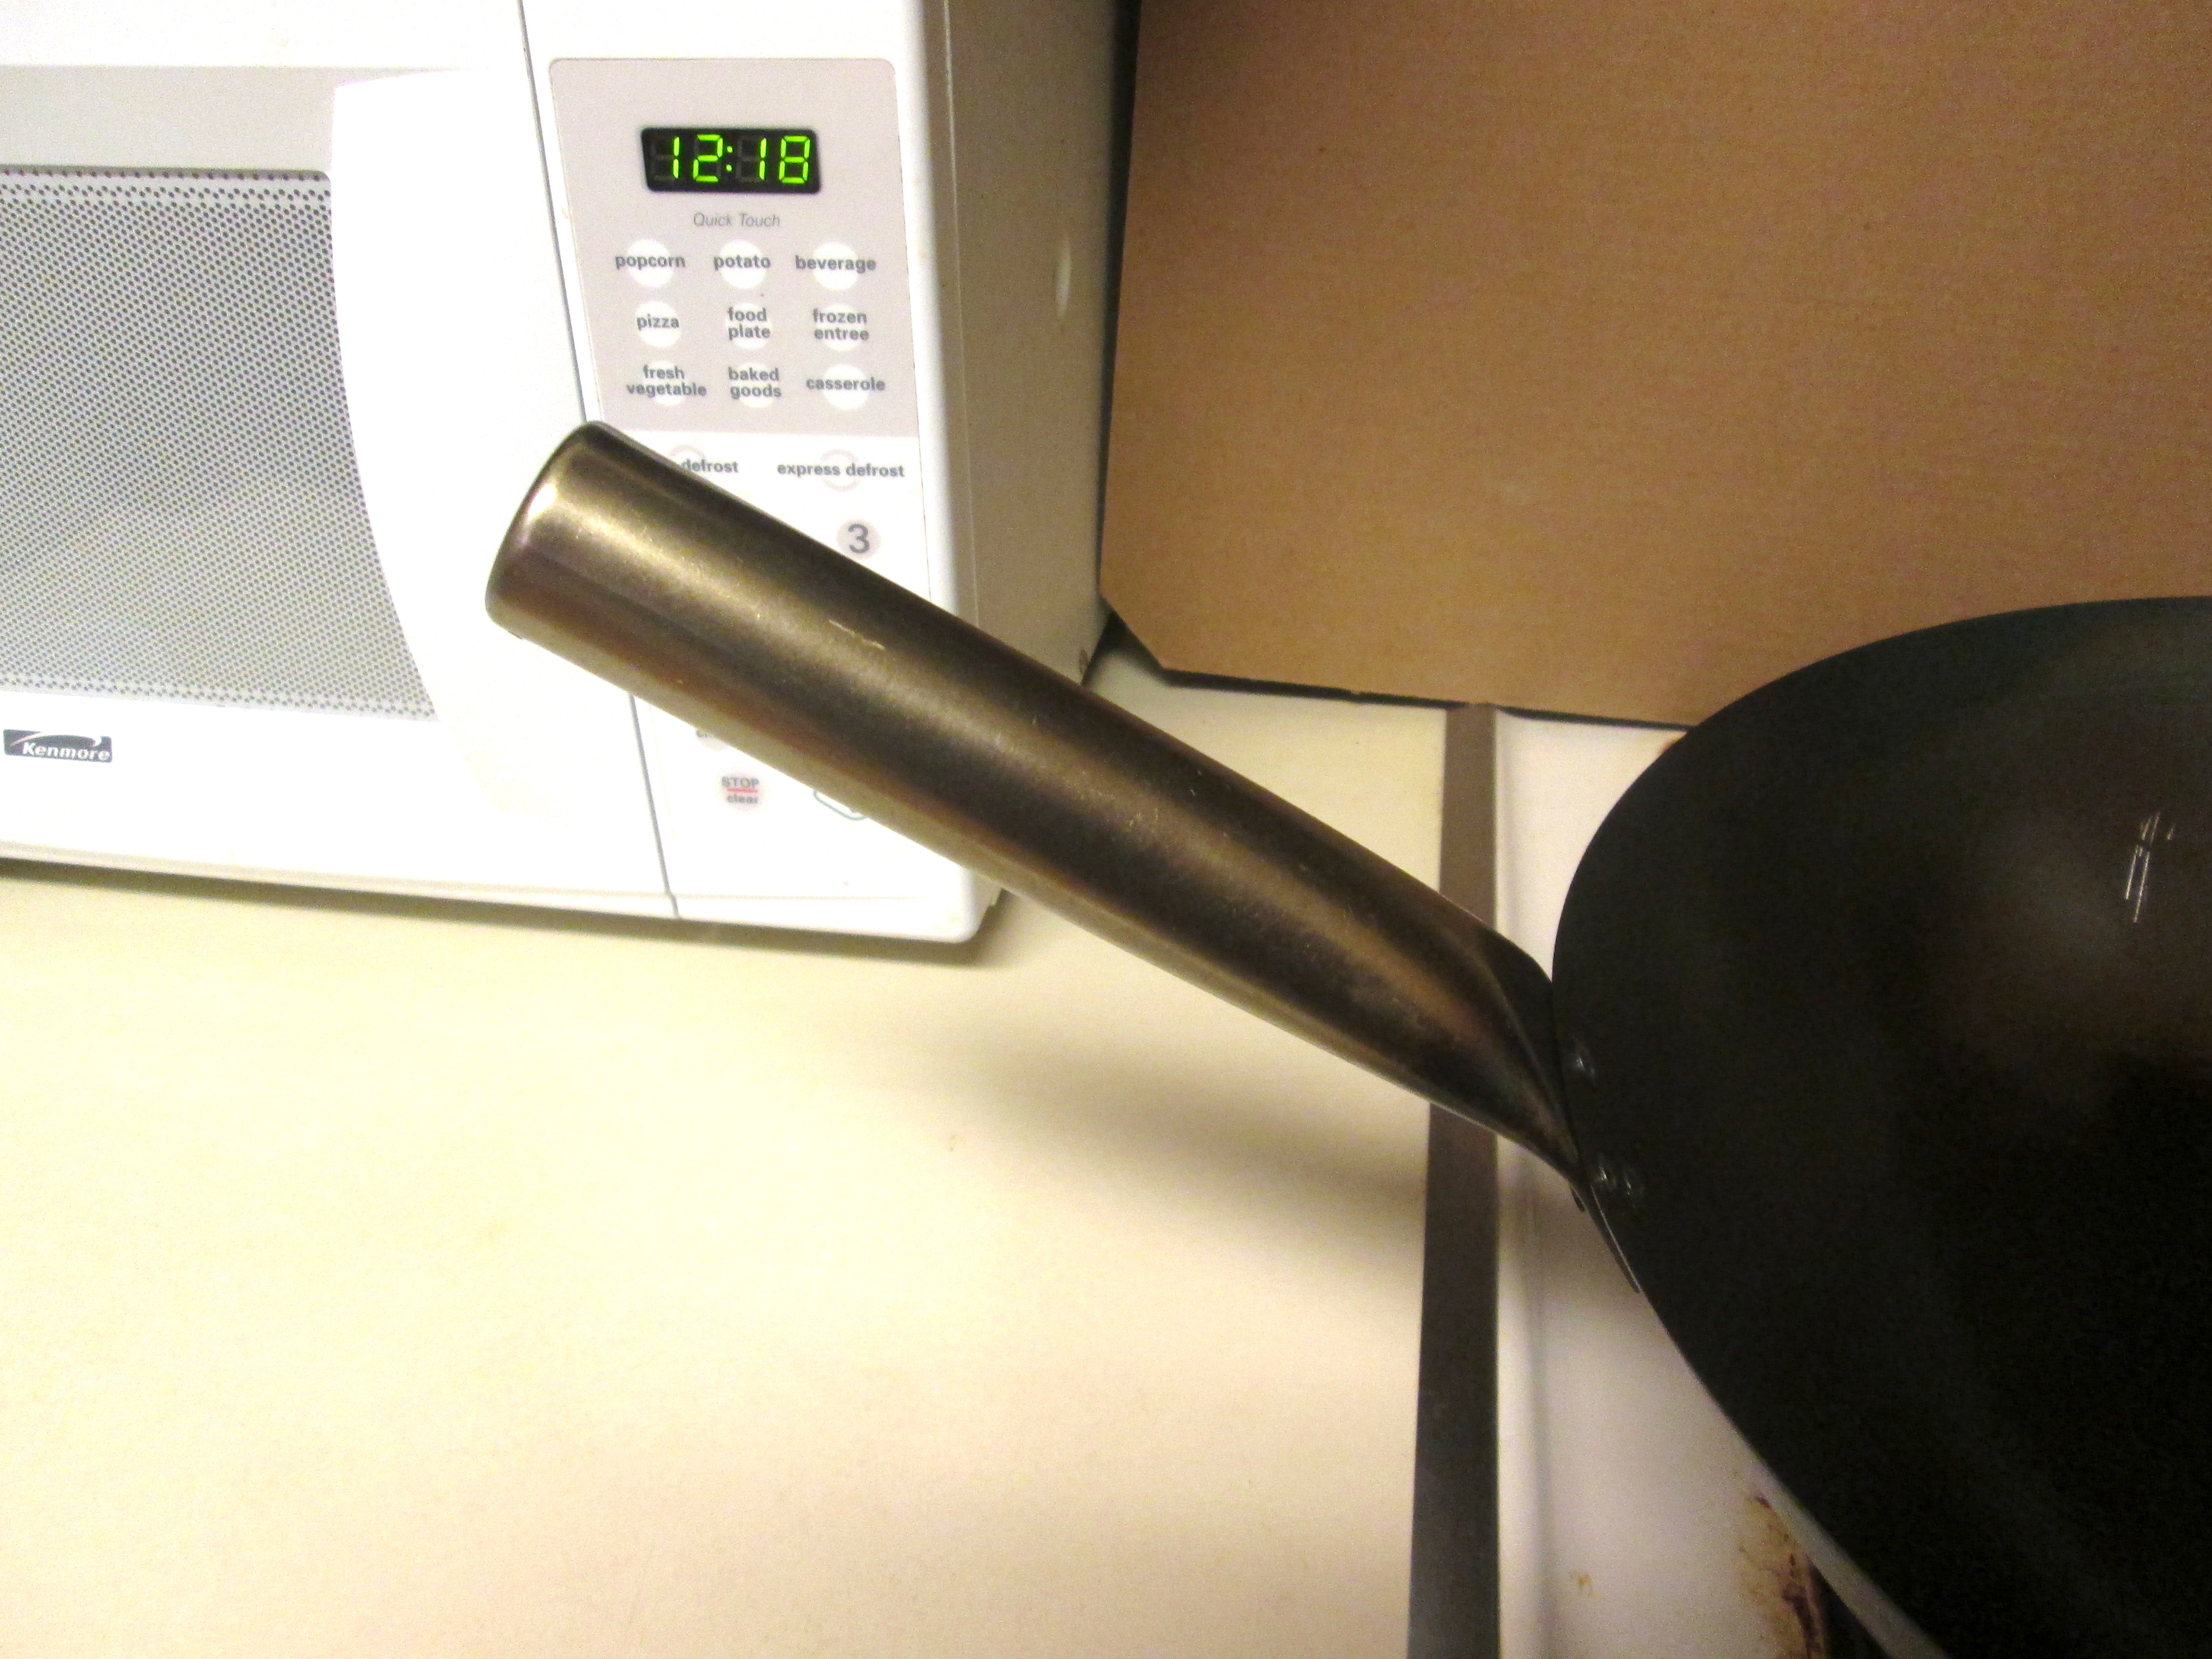
a wok with its long handle at the 9 o’clock position (which is proper for someone who is right-handed)
However, there are a few other important considerations to keep in mind. One is the position of the wok as you stir-fry—that is, how the wok is set upon the wok ring, the placement of the wok handle, and how to move or not move the wok during the stir-frying process. If you are using a Cantonese style wok, which has two symmetrical ear handles, then, the ears should be positioned—one at 9 o’clock and the other at 3 o’clock (if using clock positions as a reference). If your wok has a handle of some sort, the handle should be at 9 o’clock (and the smaller “ear” handle, if there is one, at 3 o’clock) for those who are right-handed. The opposite would be true for those who are left-handed. Optimally, the wok handle shouldn’t be jutting out at you at the 6 o’clock position and obstructing access to the wok’s interior.
For many, this may seem counterintuitive—especially, for those with a pow wok. The temptation is to have the handle perpendicular to your body and to use the handle to agitate the wok, lifting it, while flipping and tossing the contents abruptly. This, after all, is the famed “pow” action after which the pow wok is named. However, stir-frying with such pow action is a really inefficient way to stir-fry. This is because lifting the wok and taking it away from the flame, even for intermittent spurts, reduces the temperature of the wok and minimizes the benefit of having the concentrated flame that the WokMon provides. Only by leaving the wok alone on its wok ring and allowing it to have undisturbed contact with the flame can the WokMon’s potential be realized. To lift the wok and remove it from the flame is counterproductive.

pow action in full force: wok off the burner, contents being agitated and flipped, and oil vapor igniting a giant flare up (photo courtesy of Pearl Wok Restaurant)
The pow action, which many stir-frying enthusiasts have etched in their mind, is really a feature of restaurant cooking—a glamorized feature, if you will, that’s impractical for home cooks. Traditionally, Chinese chefs, rather than favoring the flat, curve-headed wok spatula (wok chaun), have almost always employed the wok ladle (hauk) instead. The wok ladle allows chefs, who must work rapidly (with speed being at a premium), the advantage of being able to dip into adjacent containers of pre-arranged ingredients at their wok station (a Chinese chef’s “mise en place” if you will)—ranging from salt, MSG, soy sauce, and chicken stock—in the blink of an eye and incorporating them into whatever they’re stir-frying with fluid spooning movements. Then, in a flash, with the same wok ladle, they can stir the ingredients in the wok and plate it up with a scooping action (from the wok to the plate or the carryout box as the case may be). But, since the ladle isn’t flat, flipping the contents is very difficult because it’s hard to lift the food. The pow action compensates for the lack of a flat wok spatula. Agitating the wok with the pow action essentially flips the contents without the use of a cooking utensil. Furthermore, lifting the wok and allowing the flames underneath to lap upwards from the edge of the wok burner often creates a burst of fire as the aforementioned flame ignites the oil vapor that’s present in the wok. It’s an undeniable show for the eyes!
In the home kitchen, such bursts of fire are impractical—if not dangerous. Besides, even with the WokMon, pow action is unlikely to create those familiar flare-ups because the WokMon flame is centralized. The wok burners in Chinese restaurants, in contrast, shoot flames up around a circular perimeter so that the edge of the wok, emitting vapor, can easily catch fire. This is not the case at home. Additionally, the wok burner in the restaurant kitchen is positioned significantly lower to the body so that, with the wok set in place, the top of the wok is about waist high to allow for easy manipulation of the wok and efficient access to the interior contents. At home, accounting for the height of the stove, the specialized WokMon wok ring, the height of a 14” wok, for instance, the top of the wok is nearly chest high. That’s just not conducive for any pow action.
—————————————————————————————————————————-
Recipes
Michael Alan
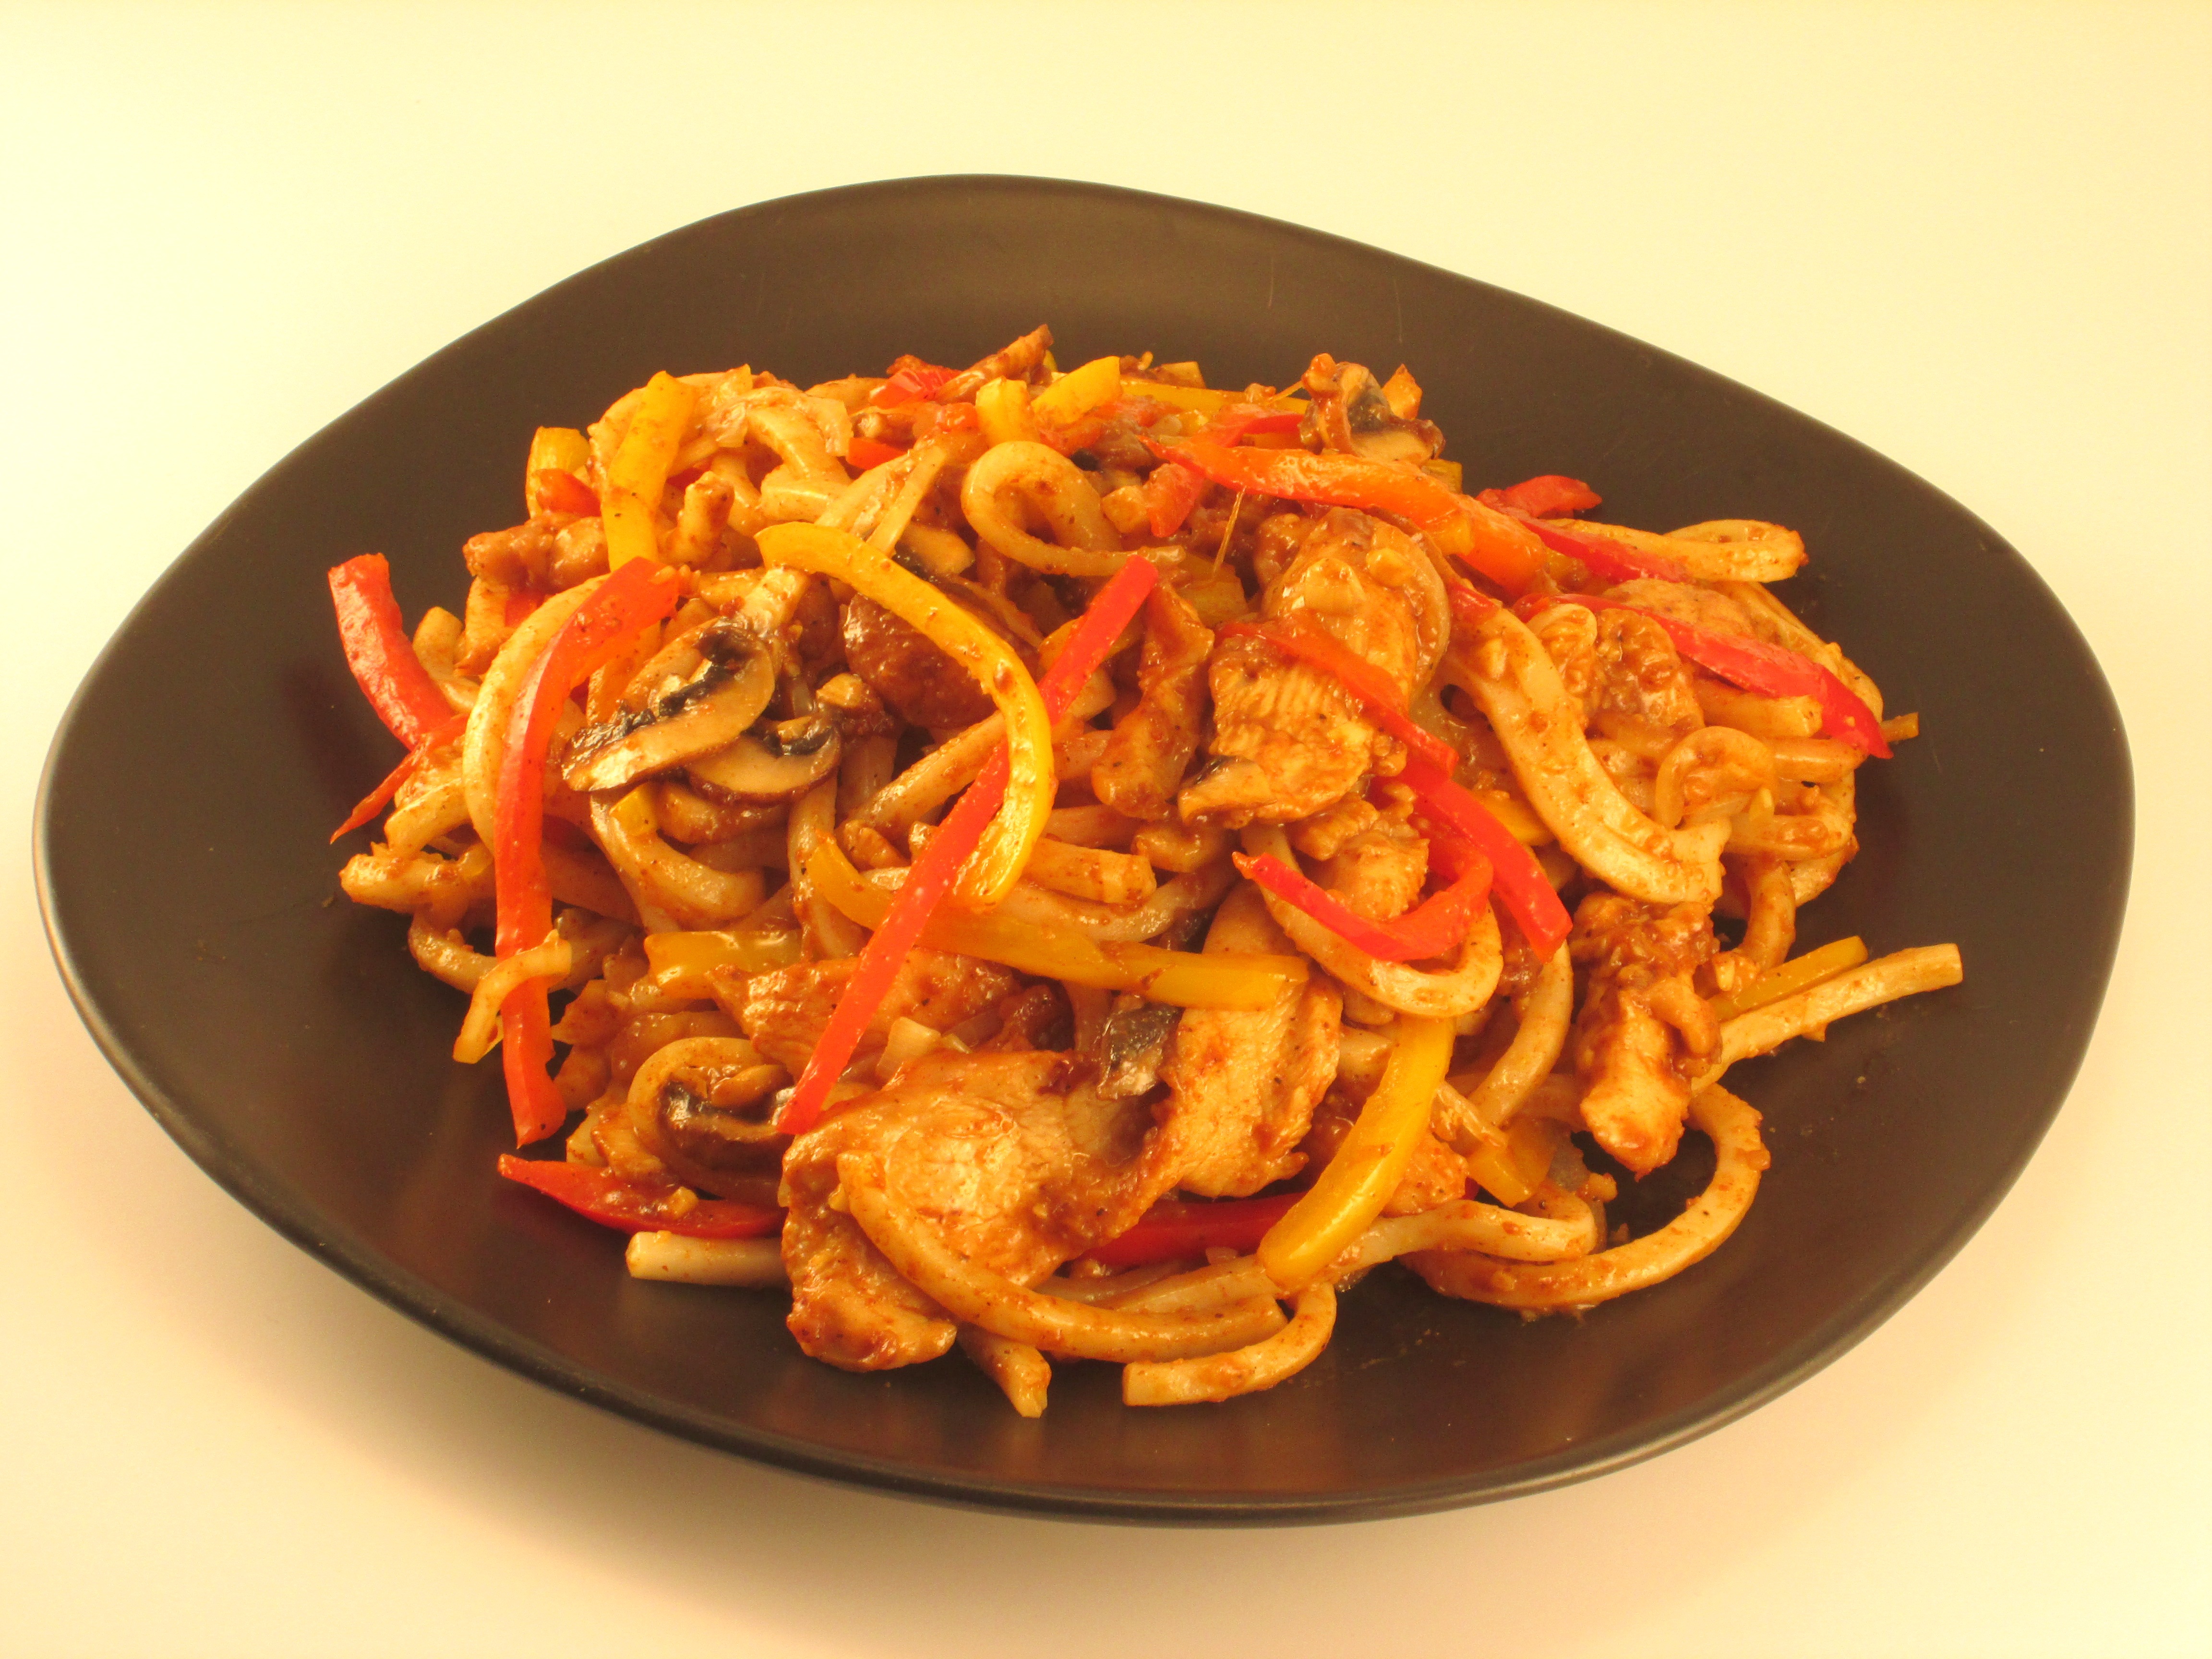
Vietnamese Red Curry Chicken with Udon Noodles (two servings)
Growing up in Michigan, I didn’t eat a lot of curry; but, once I moved away and was exposed to different foods, I became a big fan of curry (particularly, Thai and Jamaican). Vietnamese red curry, which is relatively mild, caught my eye one day while I was at an Asian market. Not only did its color grab my attention but the fact that it contains cinnamon really intrigued me as well. Its inclusion gives the curry a distinct flavor profile. The udon noodles add a unique twist and lightness to this dish that balances the vibrant flavor of the curry sauce.
Main Ingredients:
1 (preferably organic) chicken breast (about 8 oz.) cut into thin strips
1 small red bell pepper cut into julienned strips (yielding about 3 oz.)
1 small yellow bell pepper cut into julienned strips (yielding about 3 oz.)
½ cup of onion (small-sized, sliced)
2 cloves of garlic (minced)
3 baby Portobello mushrooms (sliced)
16 ounces of Japanese-style udon noodles (preferably Twin Marquis brand)
1 tablespoon of oil (preferably peanut oil)
Chicken Marinade:
2 tablespoons of sesame oil
1 tablespoon of soy sauce
1 tablespoon of rice wine (or dry sherry)
2 teaspoons of corn starch
Vietnamese Curry Sauce:
2 tablespoons of chicken broth (canned, preferably low sodium)
1 tablespoon of soy sauce
1 tablespoon of rice wine (or dry sherry)
1 tablespoon of dark brown sugar
1 teaspoon of black pepper
1 tablespoon of Vietnamese red curry powder (preferably Asian Boy E.B.Q. brand)

Directions:
Preparing the Udon Noodles:
Bring 8 cups of water to a boil in a pot. Put the udon noodles in once the water is boiling, stirring occasionally, and drain into a colander (after about 3 minutes of cooking or until the noodles are al dente). Shake off excess water but don’t rinse. Place the noodles on a plate.
Marinating the Chicken:
Using a bowl, combine the ingredients for the marinade. Add in the sliced chicken breast and mix well. Allow the chicken to marinate at room temperature (about 20 minutes).
Stir-Frying:
Set up the Wokmon and heat the wok until it begins to smoke (about 1 ½ minutes). Drizzle in the oil (ensuring that the oil covers a large enough area on the wok to accommodate the chicken). Add the chicken to the wok. Spread the pieces out over the surface with a metal wok spatula (or wooden spoon) and don’t disturb so that the chicken may sear (about 30 seconds). Then, stir the chicken. Using the wok spatula, make sure to loosen any pieces clinging to the wok’s surface. Allow the meat to cook evenly. However, don’t fully cook the chicken at this point.
Next, add the julienned red and yellow pepper and stir to mix them with the chicken (about 30 seconds). Then, add in the onions and mix well (about 30 seconds). Add, the garlic, the mushrooms, and incorporate similarly. Drizzle in the Vietnamese curry sauce and incorporate it. Stir continuously. Once the sauce is thoroughly integrated with the meat and vegetables and heated sufficiently (about 20 – 30 seconds), plate the contents onto the udon noodles and serve.
—————————————————————————————————————————-
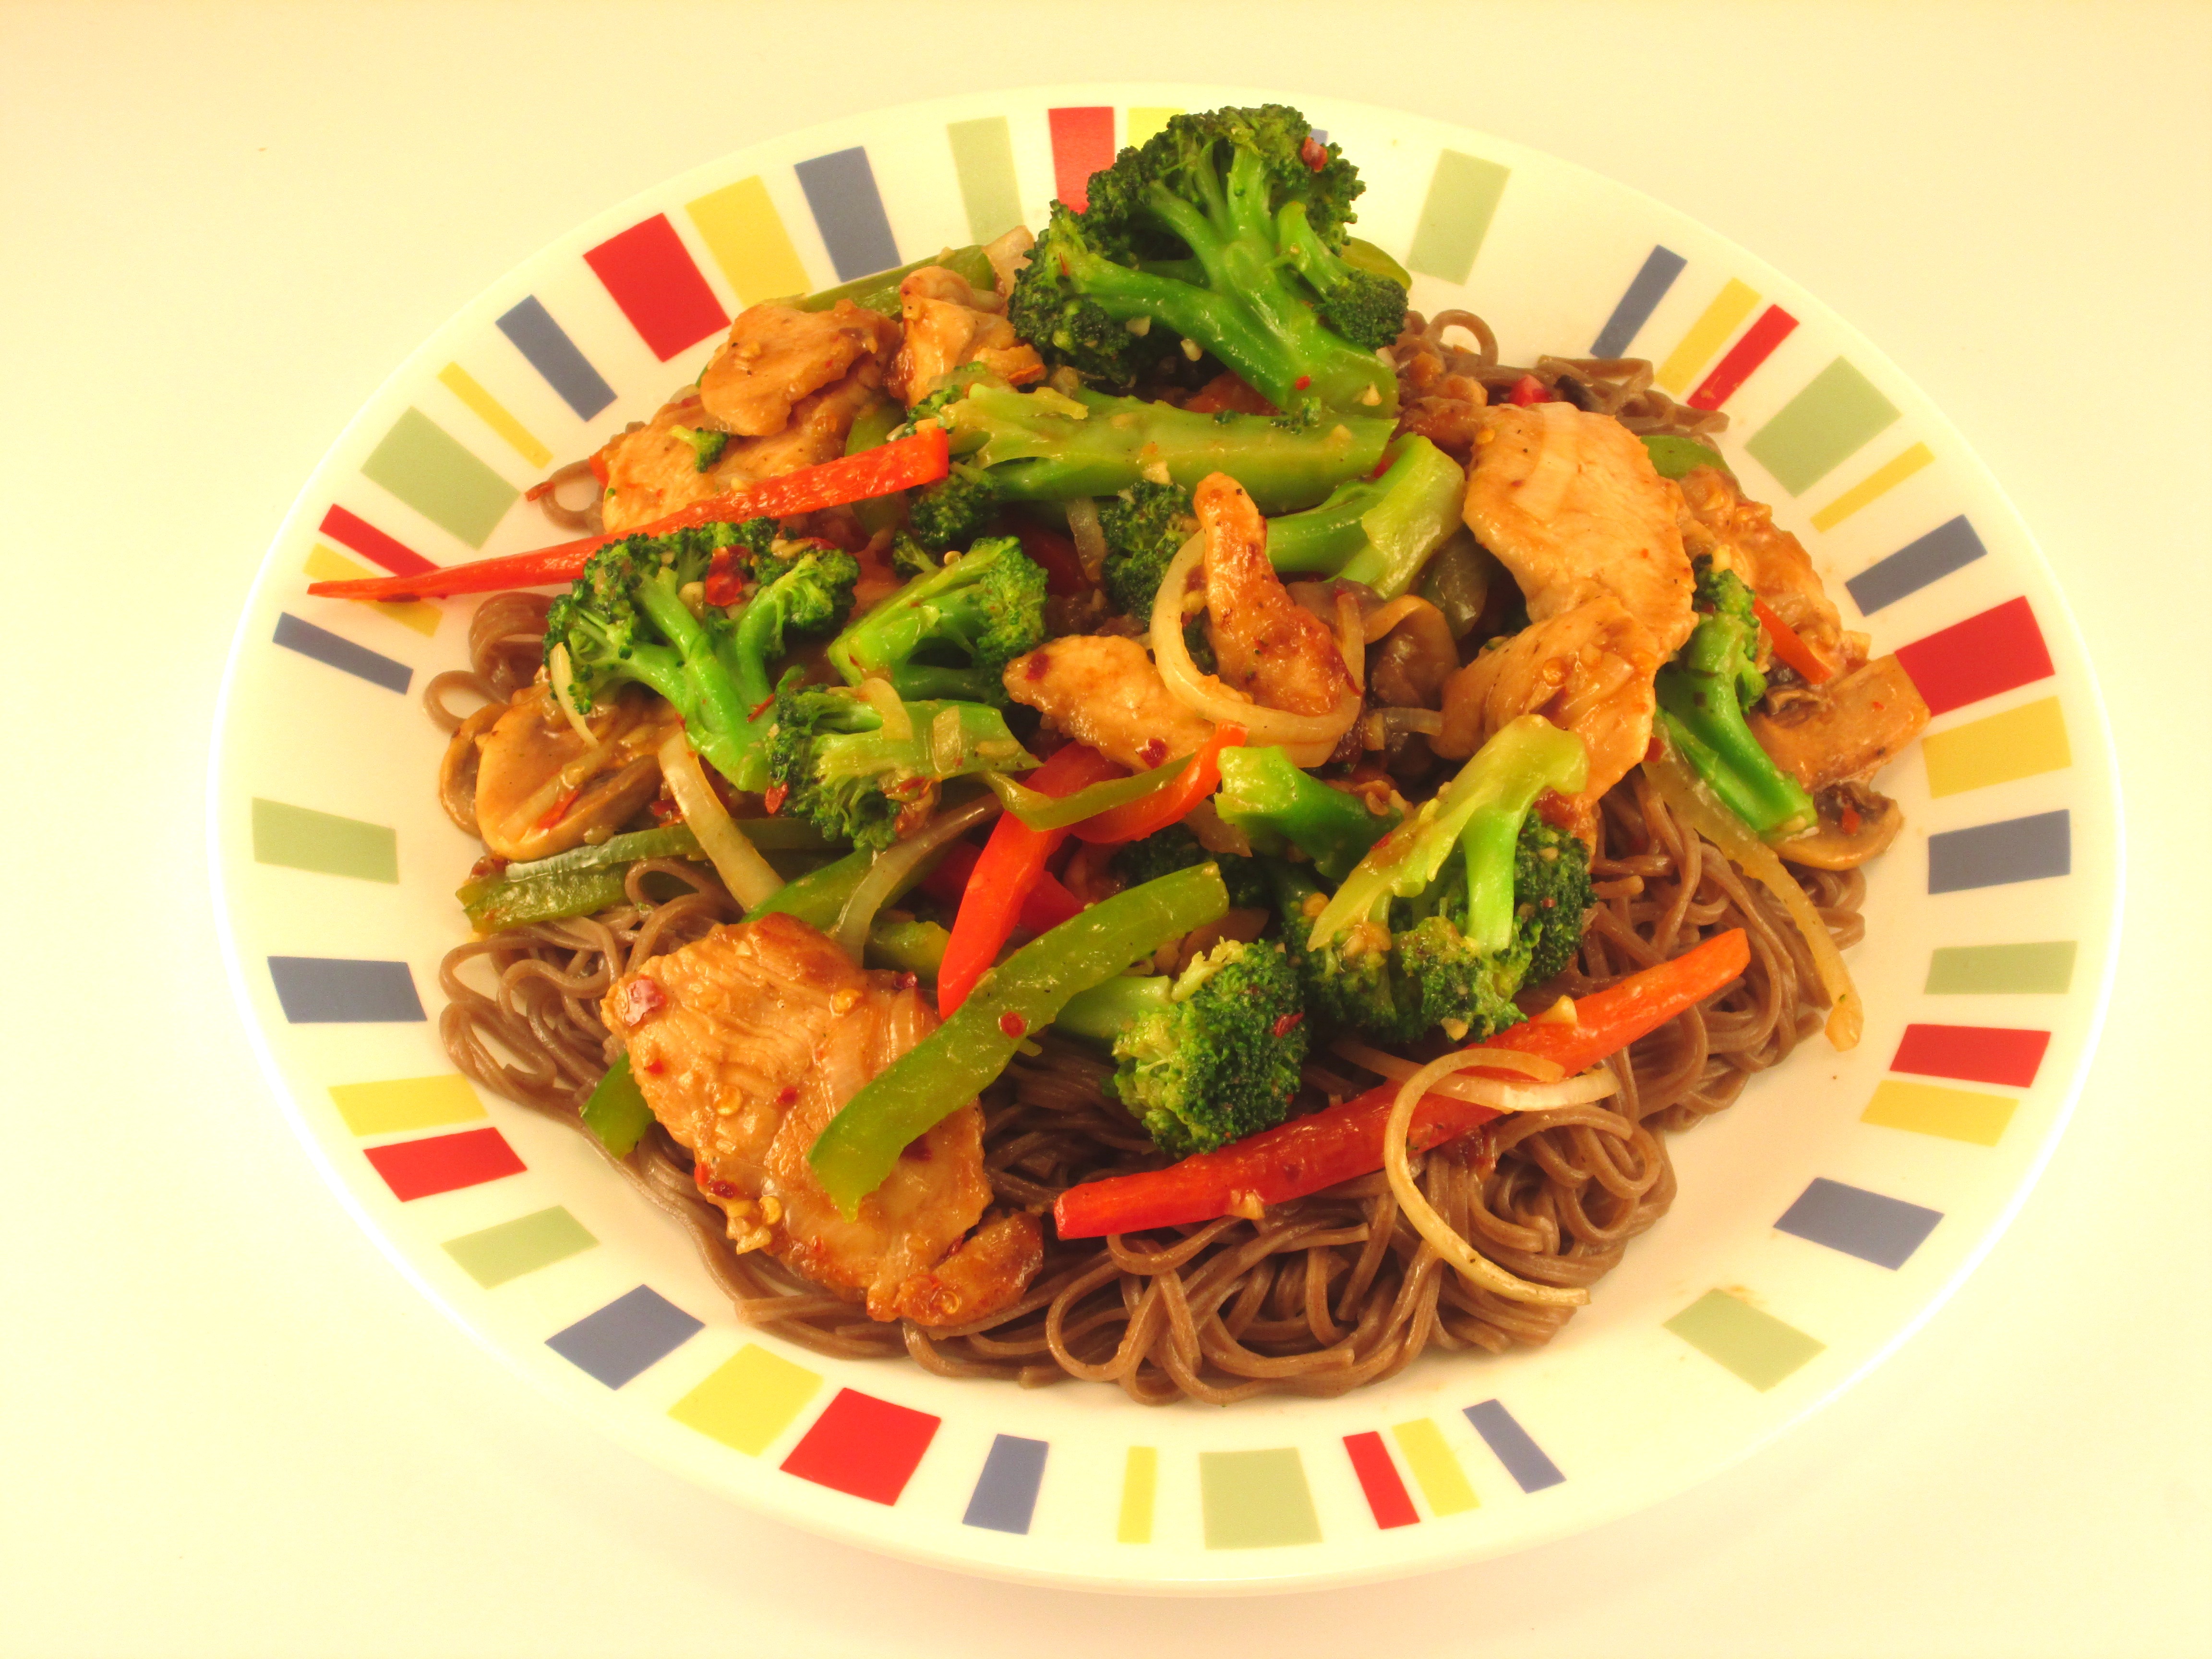
Spicy Chicken Stir Fry with Japanese Soba Noodles (two servings)
For those wanting a bit more kick but not something overbearingly spicy, this recipe, which includes crushed red chili, flakes—something most home cooks might toss on their pizza—gets the job done nicely. Also, the inclusion of broccoli adds a bit more body to the dish as well with its crisp texture and crunch and nicely complements the chicken. Served on healthy buckwheat noodles that absorb the sauce, this is a light, spicy, yet substantive dish that you won’t feel guilty about eating.
Main Ingredients:
1 (preferably organic) chicken breast (about 8 oz.) cut into thin strips
1 small red bell pepper cut into julienned strips (yielding about 3 oz.)
1 small green bell pepper cut into julienned strips (yielding about 3 oz.)
2 cups of broccoli florets (blanched/shocked with cold water)
½ cup of onion (small-sized, sliced)
1 cup of white button mushrooms (sliced)
16 ounces (or two bundles) of Japanese-style buckwheat noodles
1 inch of ginger (skinned/minced)
2 cloves of garlic (minced)
2 tablespoons of oil (preferably peanut oil)
Chicken Marinade:
2 tablespoons of sesame oil
1 tablespoon of soy sauce
1 tablespoon of rice wine (or dry sherry)
2 teaspoons of corn starch
Spicy Stir-Fry Sauce:
2 tablespoons of chicken broth (canned)
2 tablespoons of soy sauce
1 tablespoon of sesame oil
1 tablespoon of rice wine (or dry sherry)
1 tablespoon of corn starch
1 teaspoon of black pepper
1 teaspoon of crushed red chili flakes
Directions:
Preparing the Broccoli:
Bring 8 cups of water to a boil in pot. Place the broccoli florets into the pot, stirring occasionally, and cook (about 2 minutes or until the florets have lost their rawness but not to the point where they have lost their crunch). Monitor carefully so the broccoli doesn’t overcook and become soft.
Drain in a colander and immediately run cold water over the florets to stop the cooking process (as residual heat will continue to cook the broccoli). Dig around and underneath the broccoli to ensure that all of the florets come in contact with the cold water. Once the broccoli is no longer hot (but warm or room temperature), set the florets aside and allow them to dry before stir-frying.
Preparing the Soba Noodles:
Bring 8 cups of water to a boil in a pot. Immerse the buckwheat noodles in the boiling water. Turn down the flame to medium, stirring occasionally, and drain into a colander (after 5 – 6 minutes of cooking or until the noodles are al dente). Don’t rinse and set aside.
Marinating the Chicken:
Using a bowl, combine the ingredients for the marinade. Add in the sliced chicken breast and mix well. Allow the chicken to marinate at room temperature (about 20 minutes).
Stir-Frying:
Set up the Wokmon and heat the wok until it begins to smoke (about 1 ½ minutes). Drizzle in the oil (ensuring that the oil covers a large enough area on the wok to accommodate the chicken). Add the chicken to the wok. Spread the pieces out over the surface with a metal wok spatula (or wooden spoon) and allow the chicken to sear (about 30 seconds). Then, agitate and stir the chicken until the pieces have mostly cooked through but not all the way to complete doneness.
Toss in the red and green julienned peppers and blend them with the chicken (about 30 seconds). Next, add in the ginger and garlic, mushrooms and onions, and mix (about 30 seconds). Next, add in the broccoli florets and stir in well (about 45 seconds). Drizzle in the spicy stir fry sauce and incorporate it. Stir continuously and vigorously. Once the sauce is thoroughly integrated with the meat and vegetables and heated through (about 20 – 30 seconds), plate the contents onto the soba noodles and serve.
—————————————————————————————————————————-
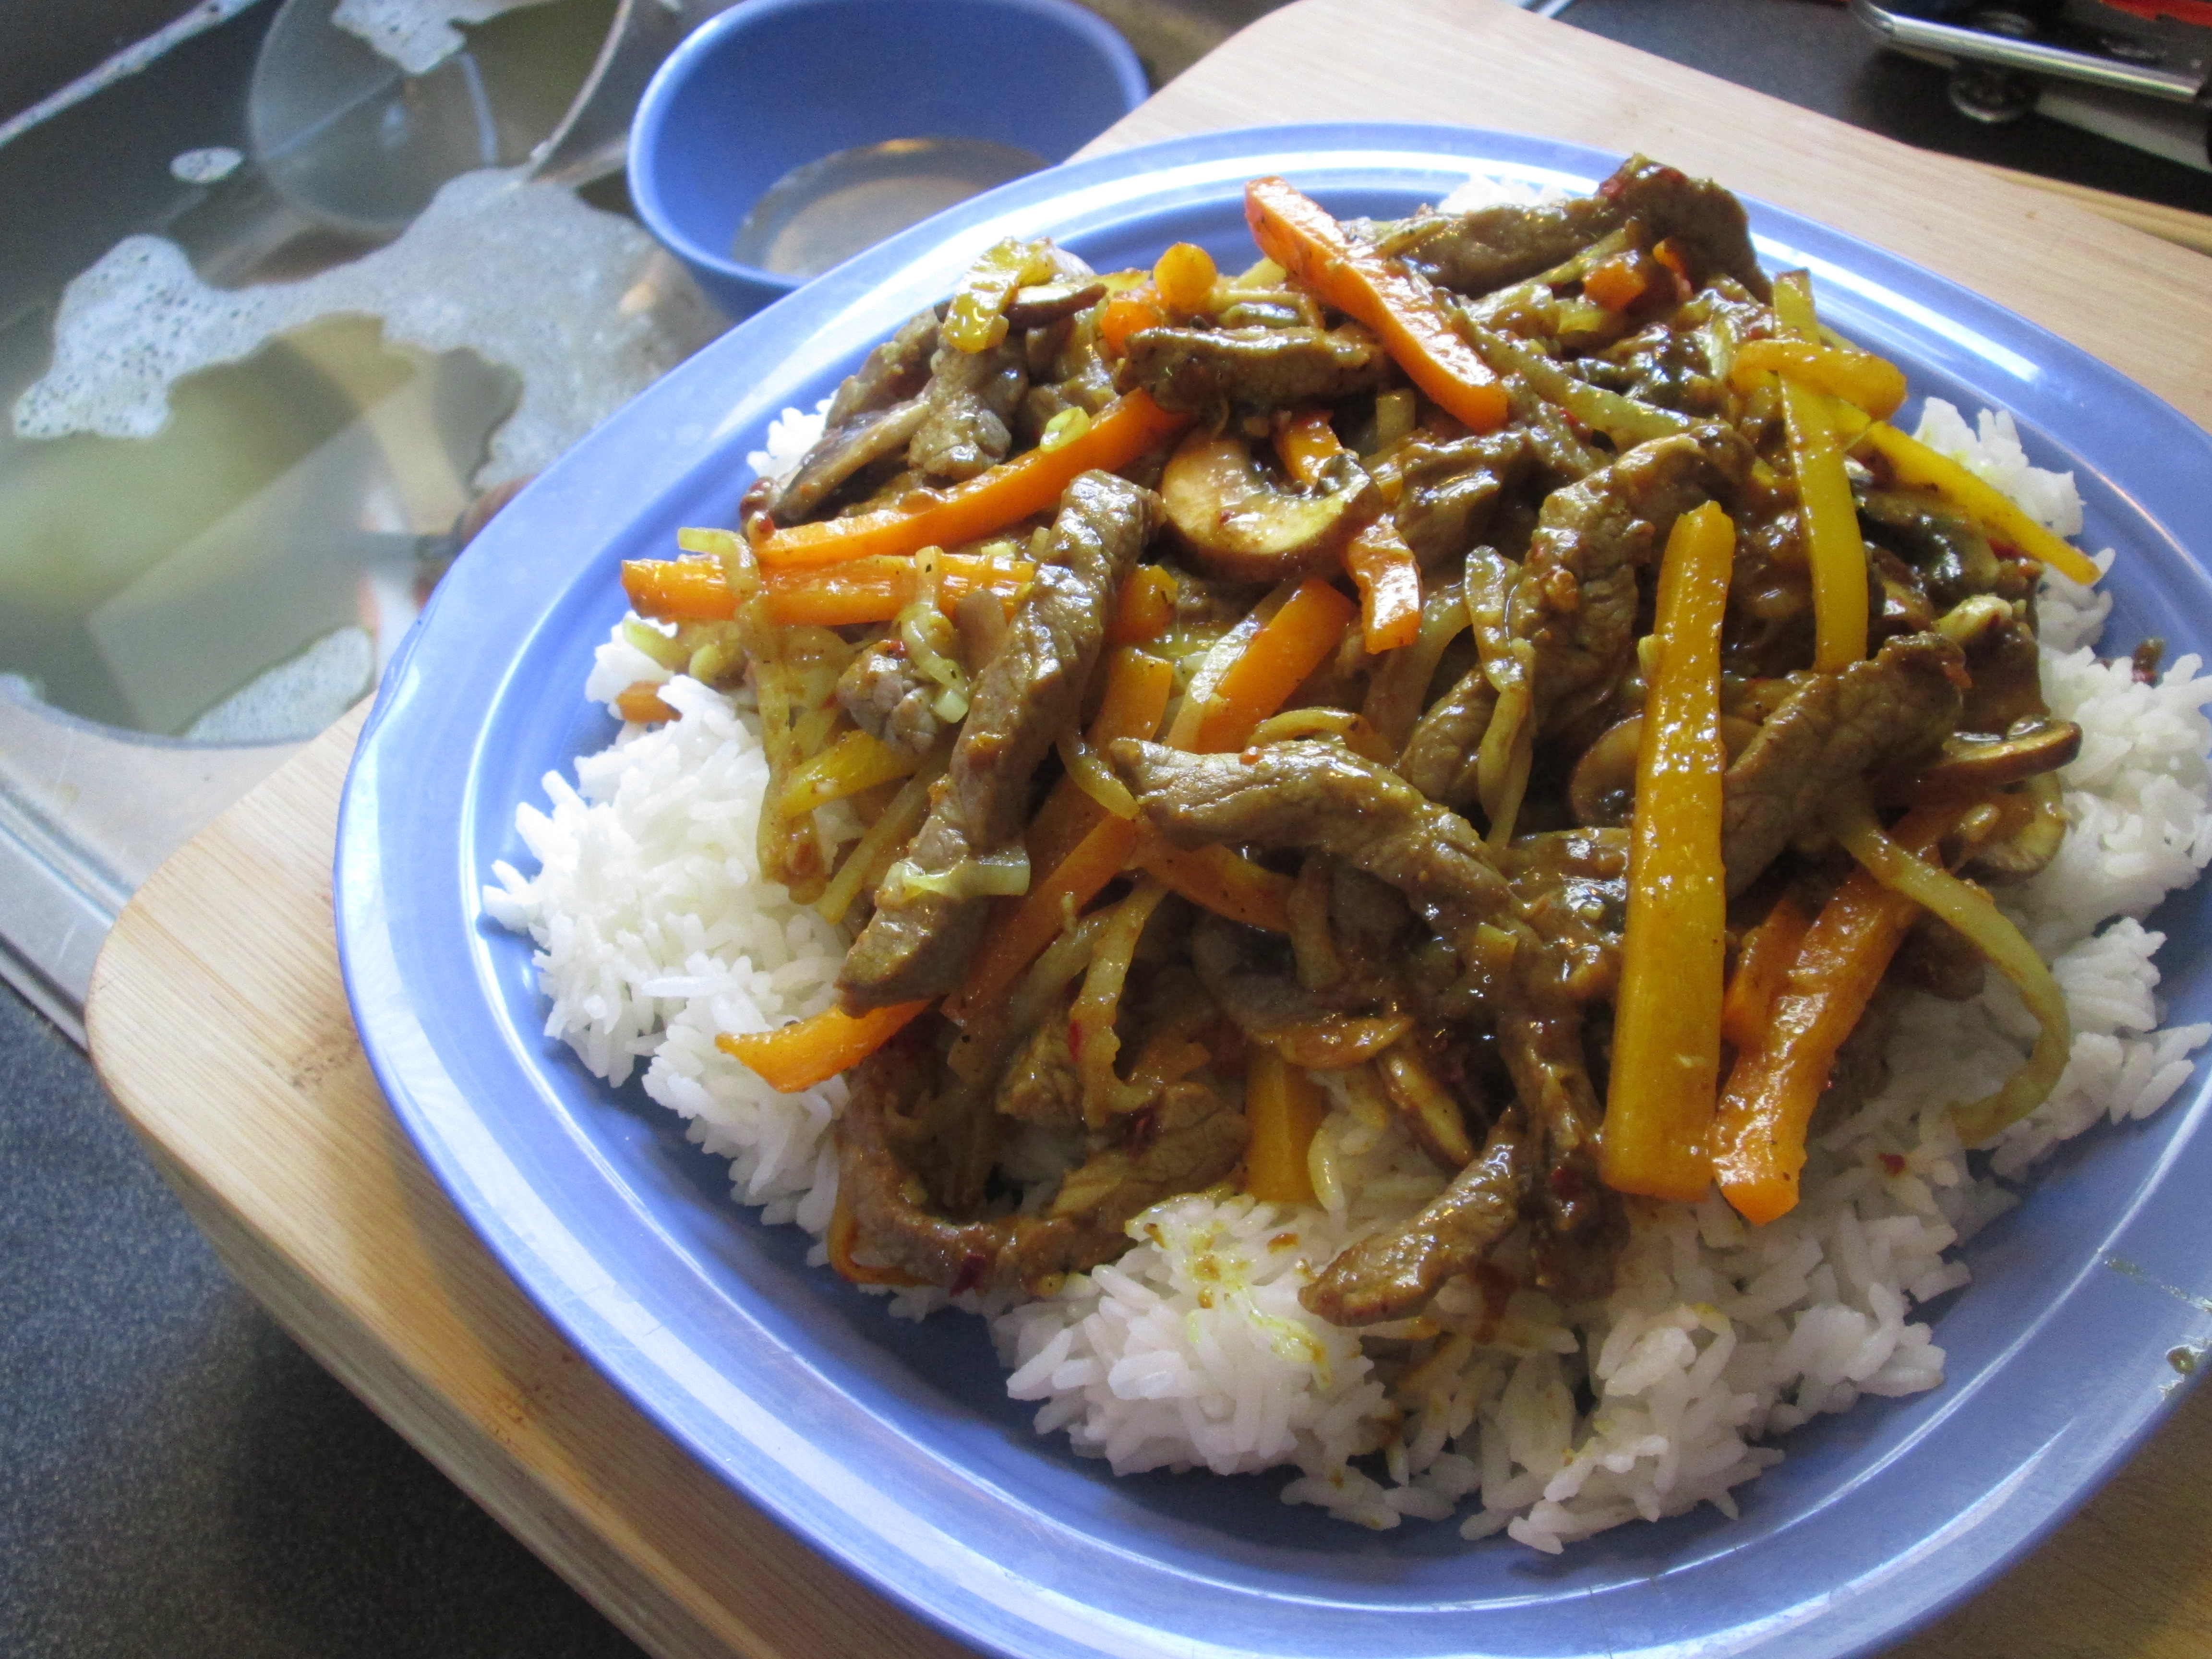
Jamaican Curry Beef Stir-Fry (two servings)
Jamaican curry powder, with notes of mustard seed, turmeric, allspice, and cayenne, provides a warmth and depth of flavor that curry lovers, like me, associate with a good curry. It’s one of my all-time favorites. Beef, as well, traditionally pairs so favorably with it. I like to make this dish when my appetite is playful. The Caribbean accent of the curry brings back memories of my first explorations of Jamaican cuisine. However, serving this dish on a familiar bed of Jasmine rice gives it a decidedly Asian touch.
Main Ingredients:
8 ounces of beef (preferably top round and organic) sliced into thin strips against the grain
1 small yellow bell pepper cut into julienned strips (yielding about 3 oz.)
1 small orange bell pepper cut into julienned strips (yielding about 3 oz.)
½ cup of onion (medium-sized, sliced)
1 cup of white button mushrooms (sliced)
2 cloves of garlic (minced)
1 tablespoon of oil (preferably peanut oil)
Beef Marinade:
2 tablespoons of sesame oil
1 tablespoon of soy sauce
1 tablespoon of rice wine (or dry sherry)
2 teaspoons of corn starch
Jamaican Curry Stir-Fry Sauce:
2 tablespoons of beef broth (canned)
1 tablespoon of soy sauce
1 tablespoon of rice wine (or dry sherry)
1 tablespoon of Jamaican curry powder (preferably Grace brand)
1 teaspoon of black pepper
1 teaspoon of crushed red chili flakes
Directions:
Marinating the Beef:
Using a bowl, combine the ingredients for the marinade. Add in the sliced beef and mix well. With a spoon, massage the marinade into the beef. Allow the beef to marinate at room temperature (about 20 minutes).
Stir-Frying:
Set up the WokMon and heat the wok until it begins to smoke (about 1 ½ minutes). Drizzle in the oil (ensuring that the oil covers a large enough area on the wok to accommodate the beef). Distribute the oil with your wok spatula if necessary. Add the beef to the wok. Spread the pieces out over the surface with a metal wok spatula (or wooden spoon) and let the beef sear (about 30 seconds). Afterwards, stir the beef around and introduce the other ingredients while the beef is still not fully done (pinkish to brown).
Add the yellow and orange peppers and mix into the beef (about 30 seconds). Then, add in the garlic, mushrooms and onions, and mix well (about 30 seconds). Drizzle in the spicy Jamaican curry sauce, stir well, and distribute evenly. Once the sauce is thoroughly integrated with the meat and vegetables and the contents of the wok has been stirred continuously (about 20 – 30 seconds), plate the contents onto a bed of steamed white jasmine rice and serve.
—————————————————————————————————————————-
Glen Lee
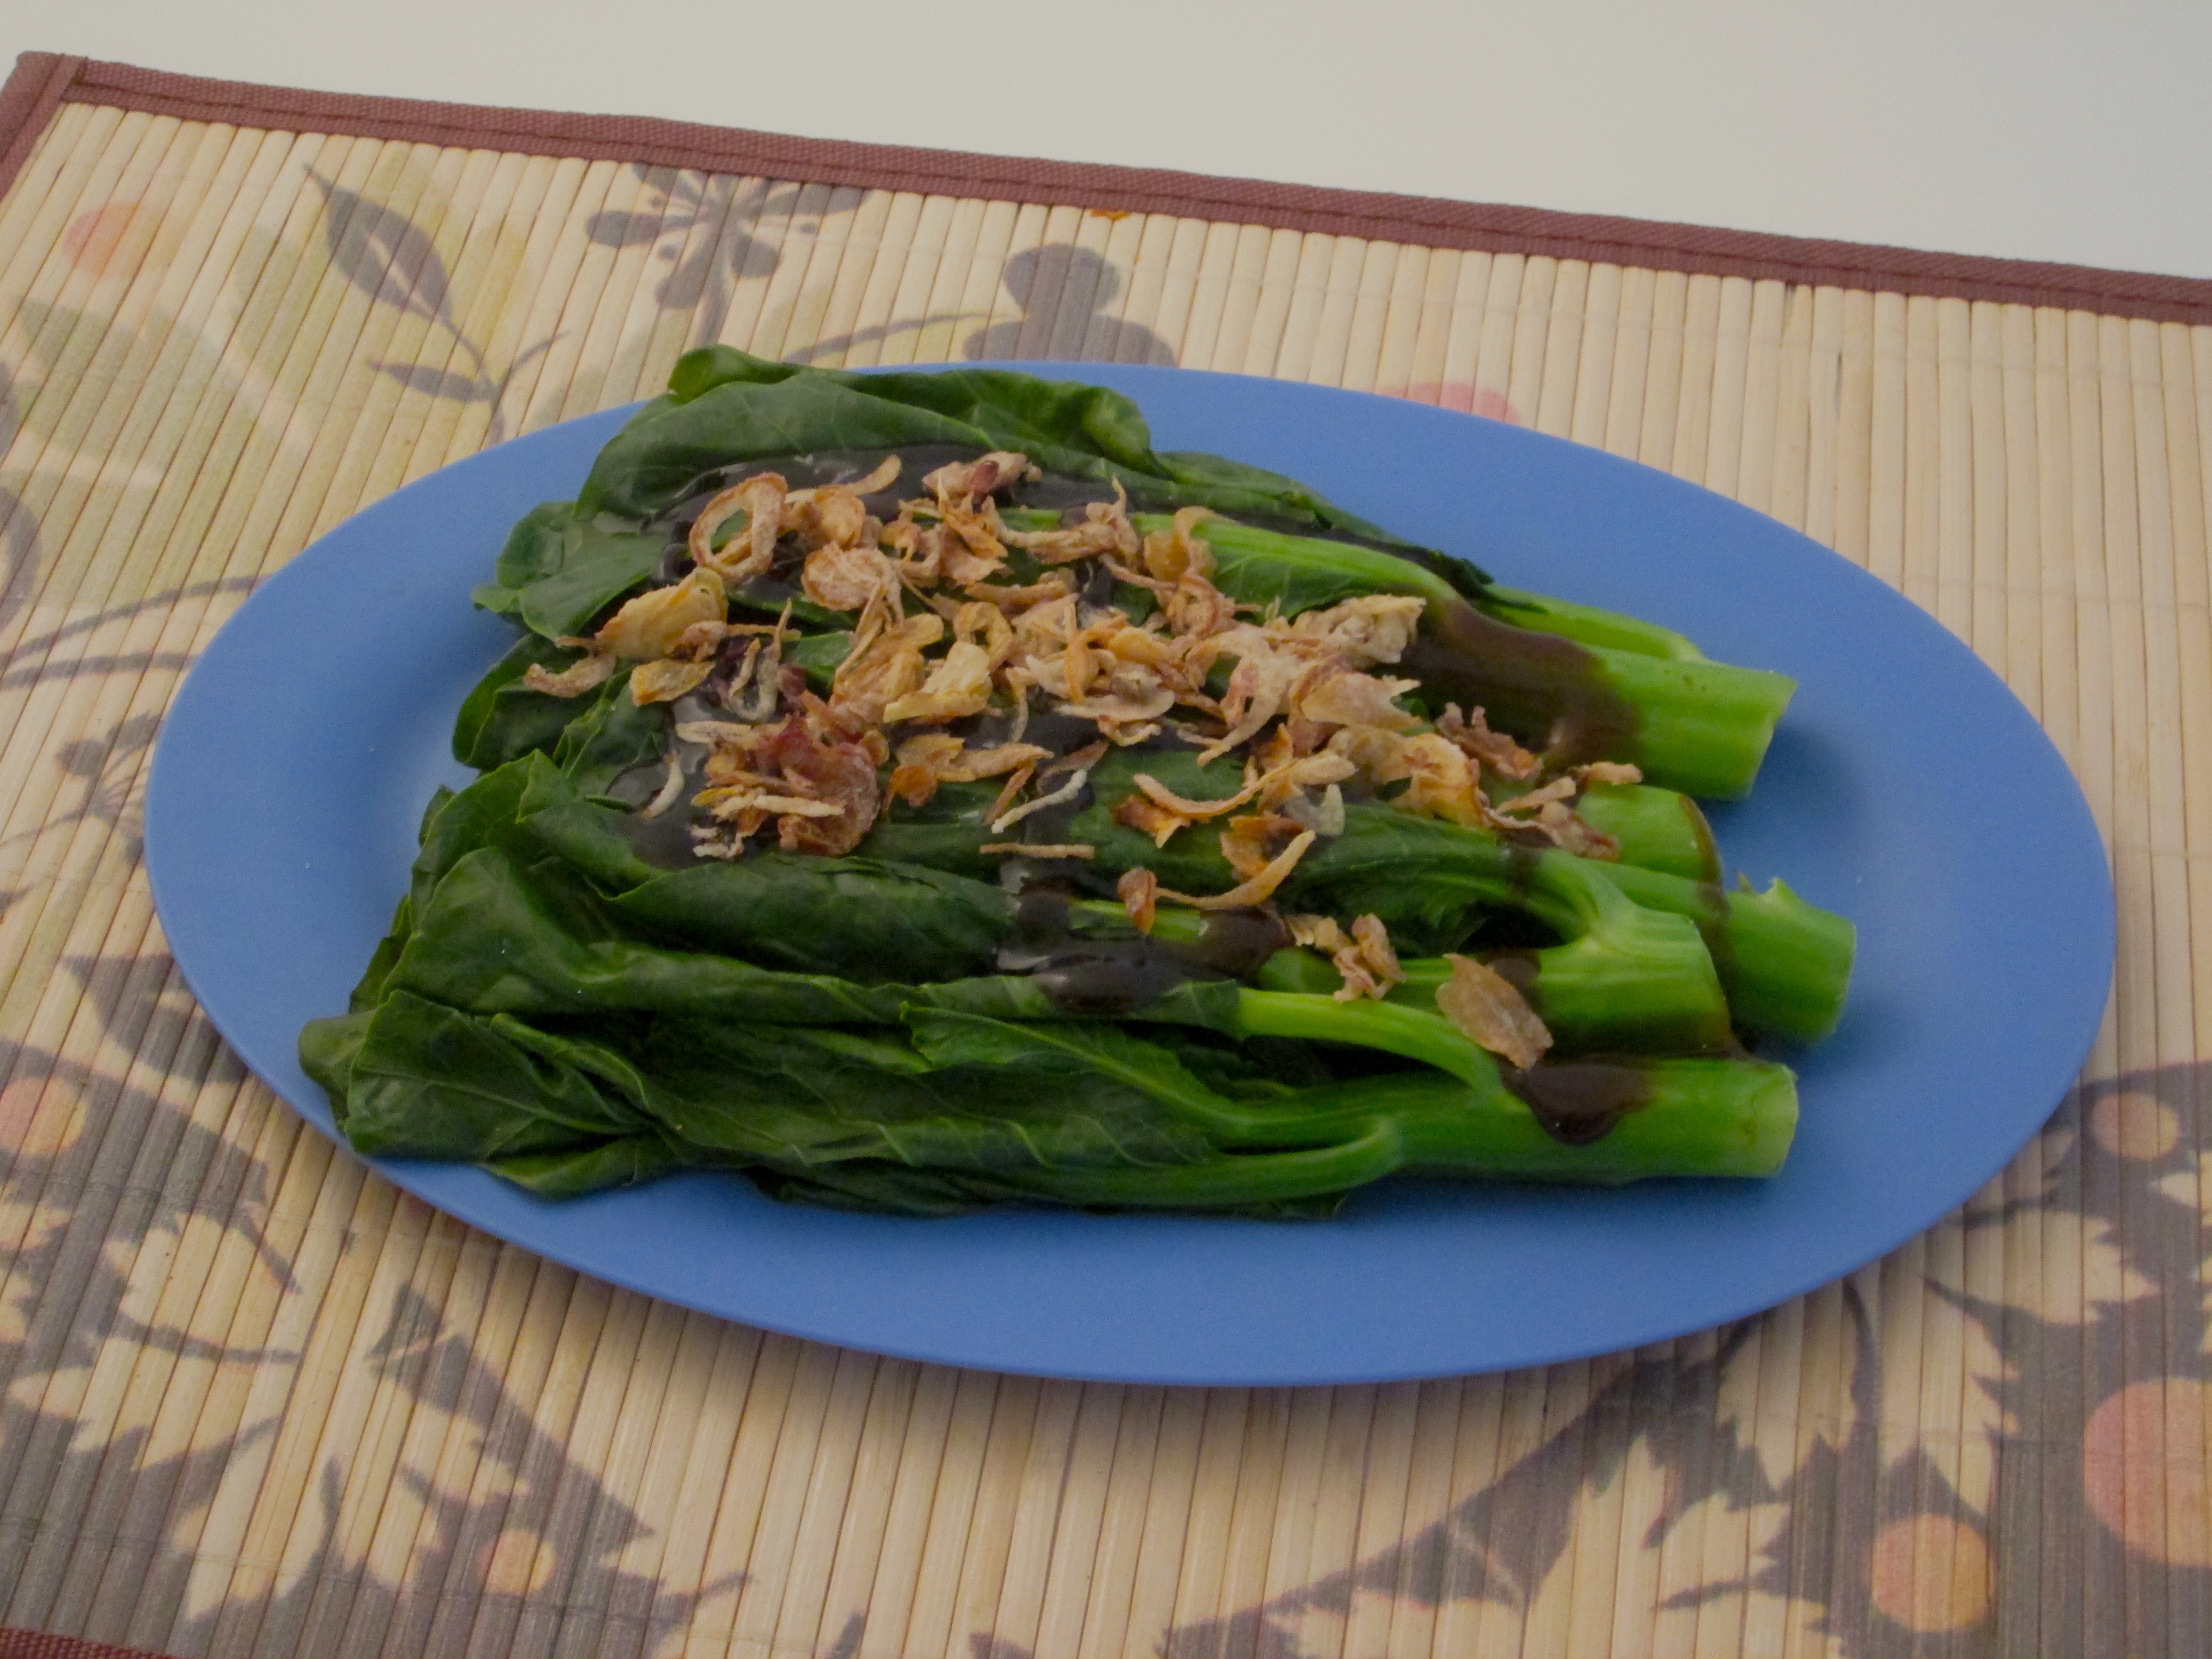
Steamed Chinese Broccoli (two servings)
Chinese broccoli, more slender and delicate than its Western counterpart, is a ubiquitous green vegetable—both in restaurants and in the home kitchen. Growing up in a Cantonese family and, frankly, dining out on Chinese food over the years, I’ve encountered Chinese broccoli singularly prepared this way on countless occasions. With its clean flavors and crispness, it is usually paired with meat and seafood of all varieties. It can’t help but provide balance to a meal.
Ingredients:
8 ounces of Chinese broccoli (1 bunch) with rough ends of stalks cut off diagonally
2 tablespoons of oyster sauce (preferably Lee Kum Kee brand)
½ teaspoon of sesame oil
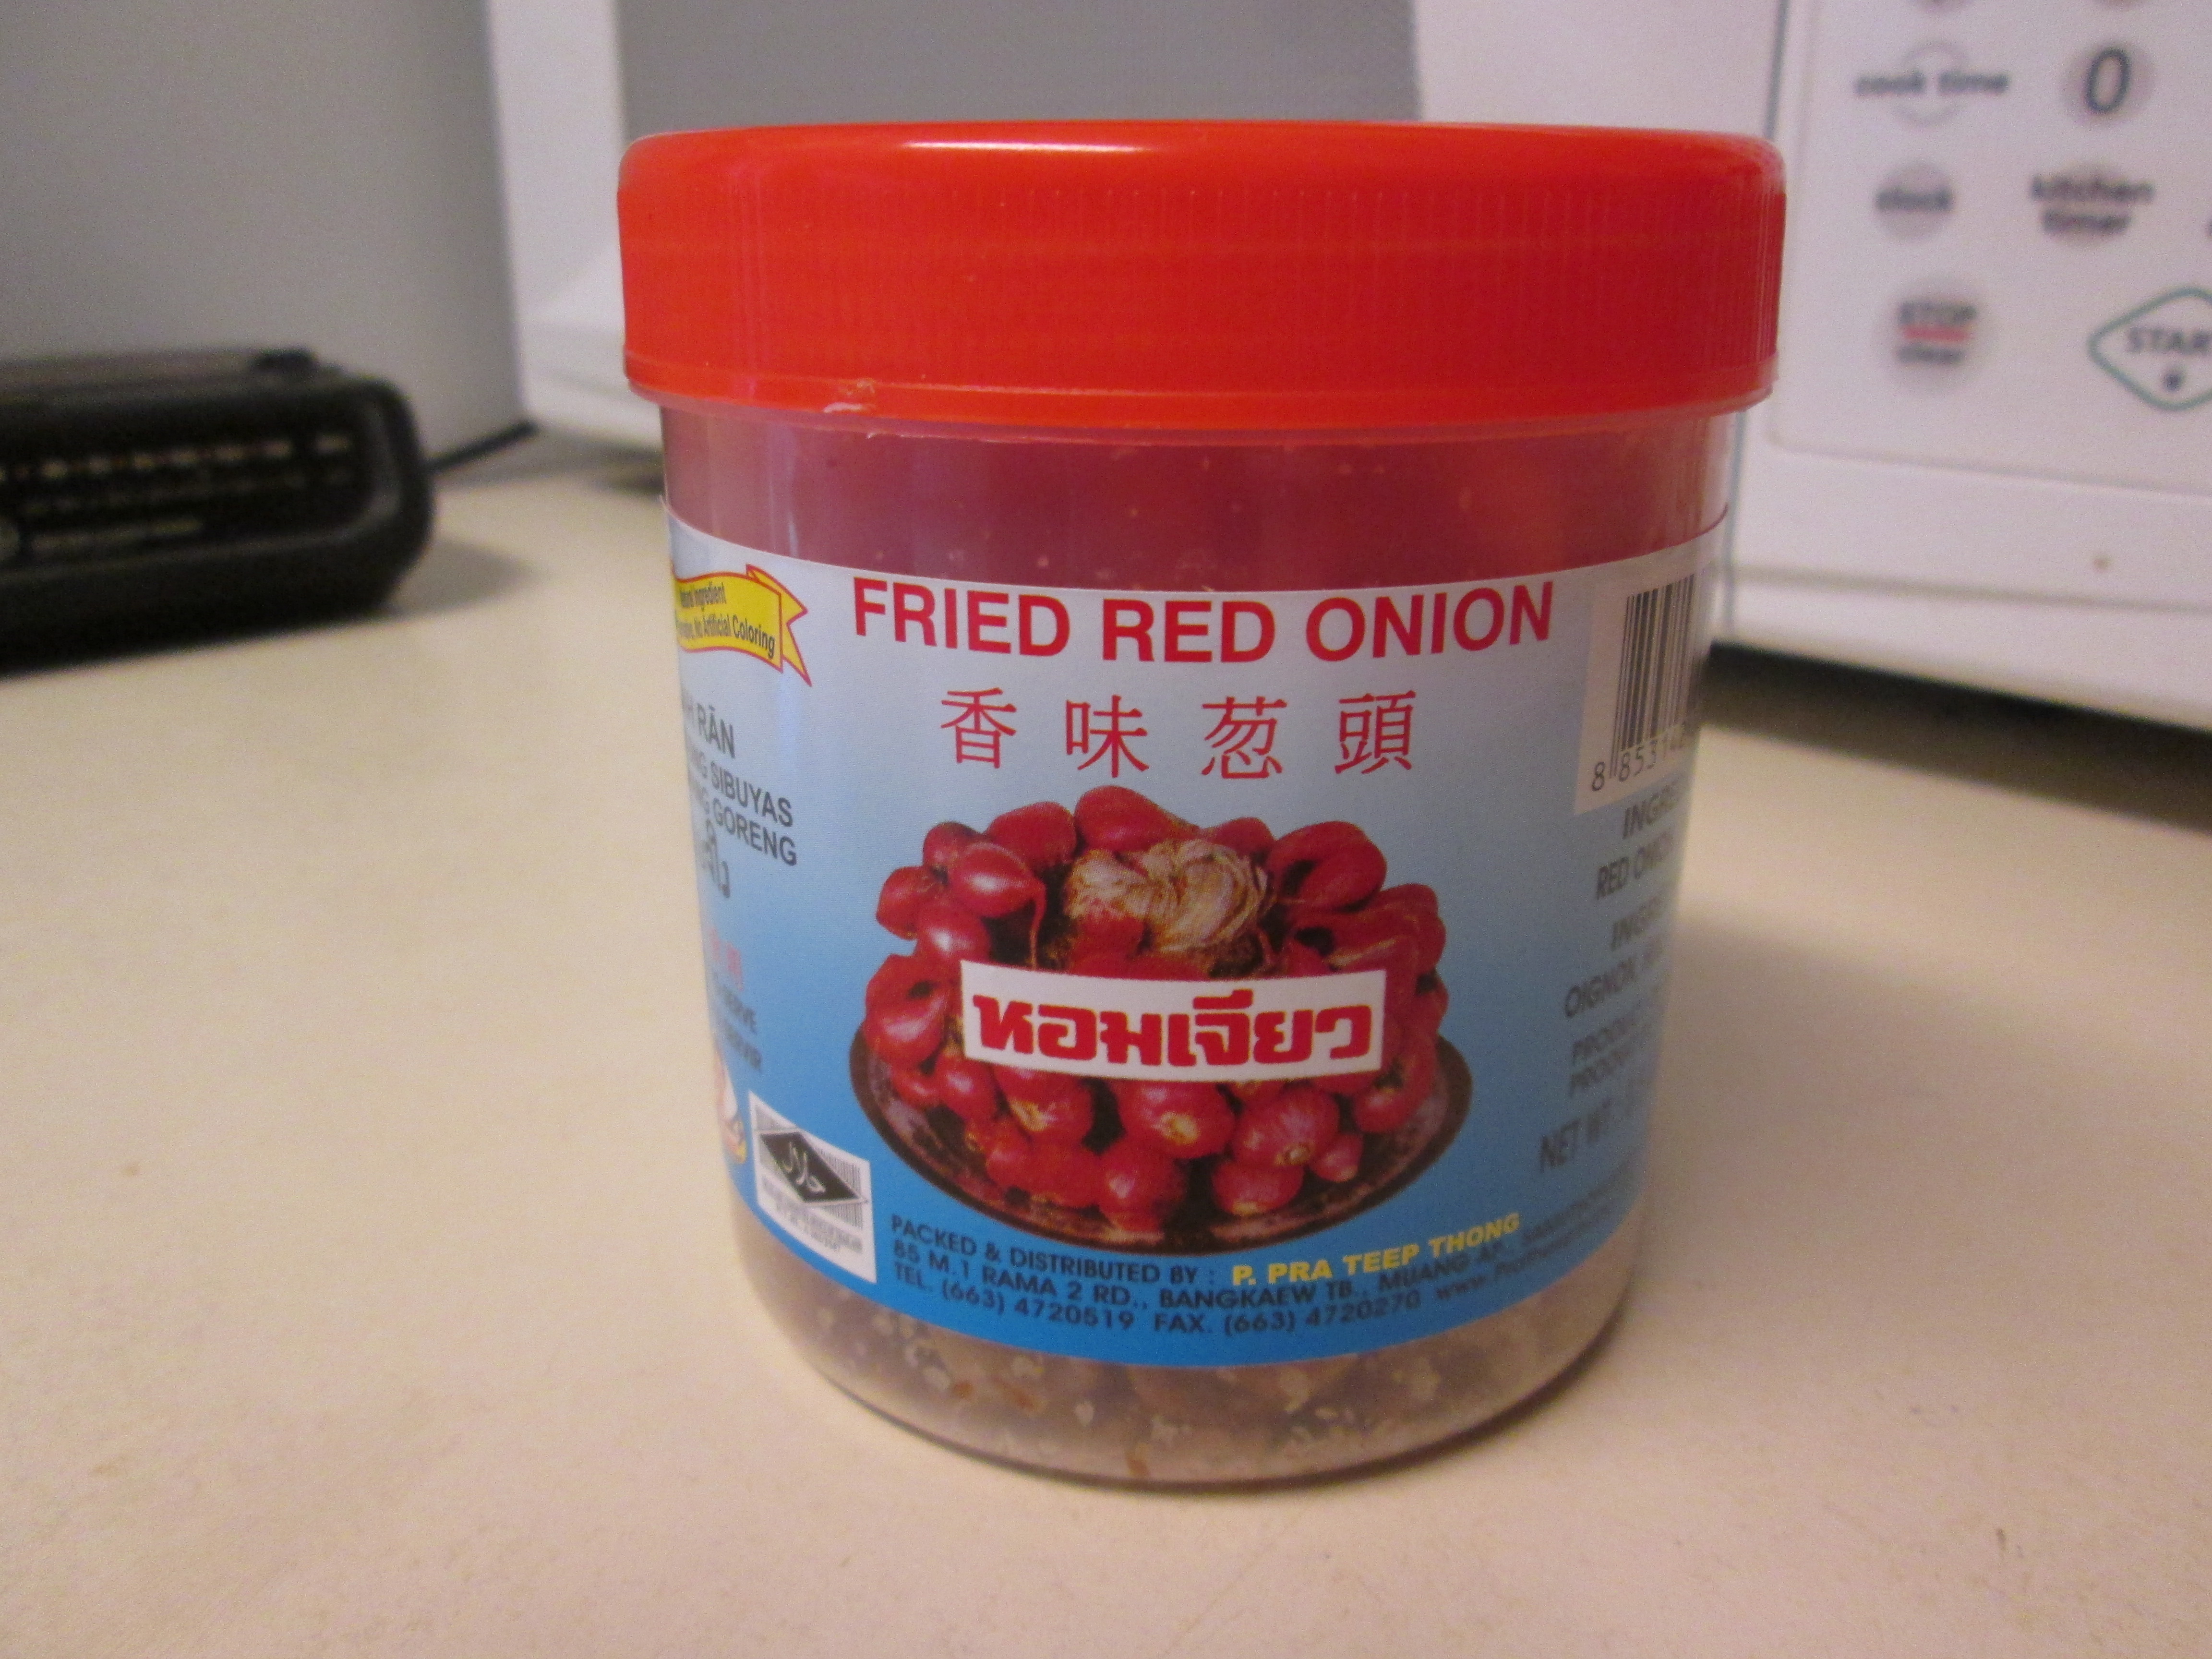
1 ½ tablespoons of fried shallots (also called “fried red onions,” which are sold fried in plastic canisters at Asian grocery stores)
Directions:
Preparing the Chinese Broccoli:
Trim the ends off of each stalk as necessary with a knife (such as a paring knife) by cutting off any part of the outer layer of the broccoli that has frayed, is too knobby, thick, or tough. Also, check the leaves. Discard any that are discolored or wilted.
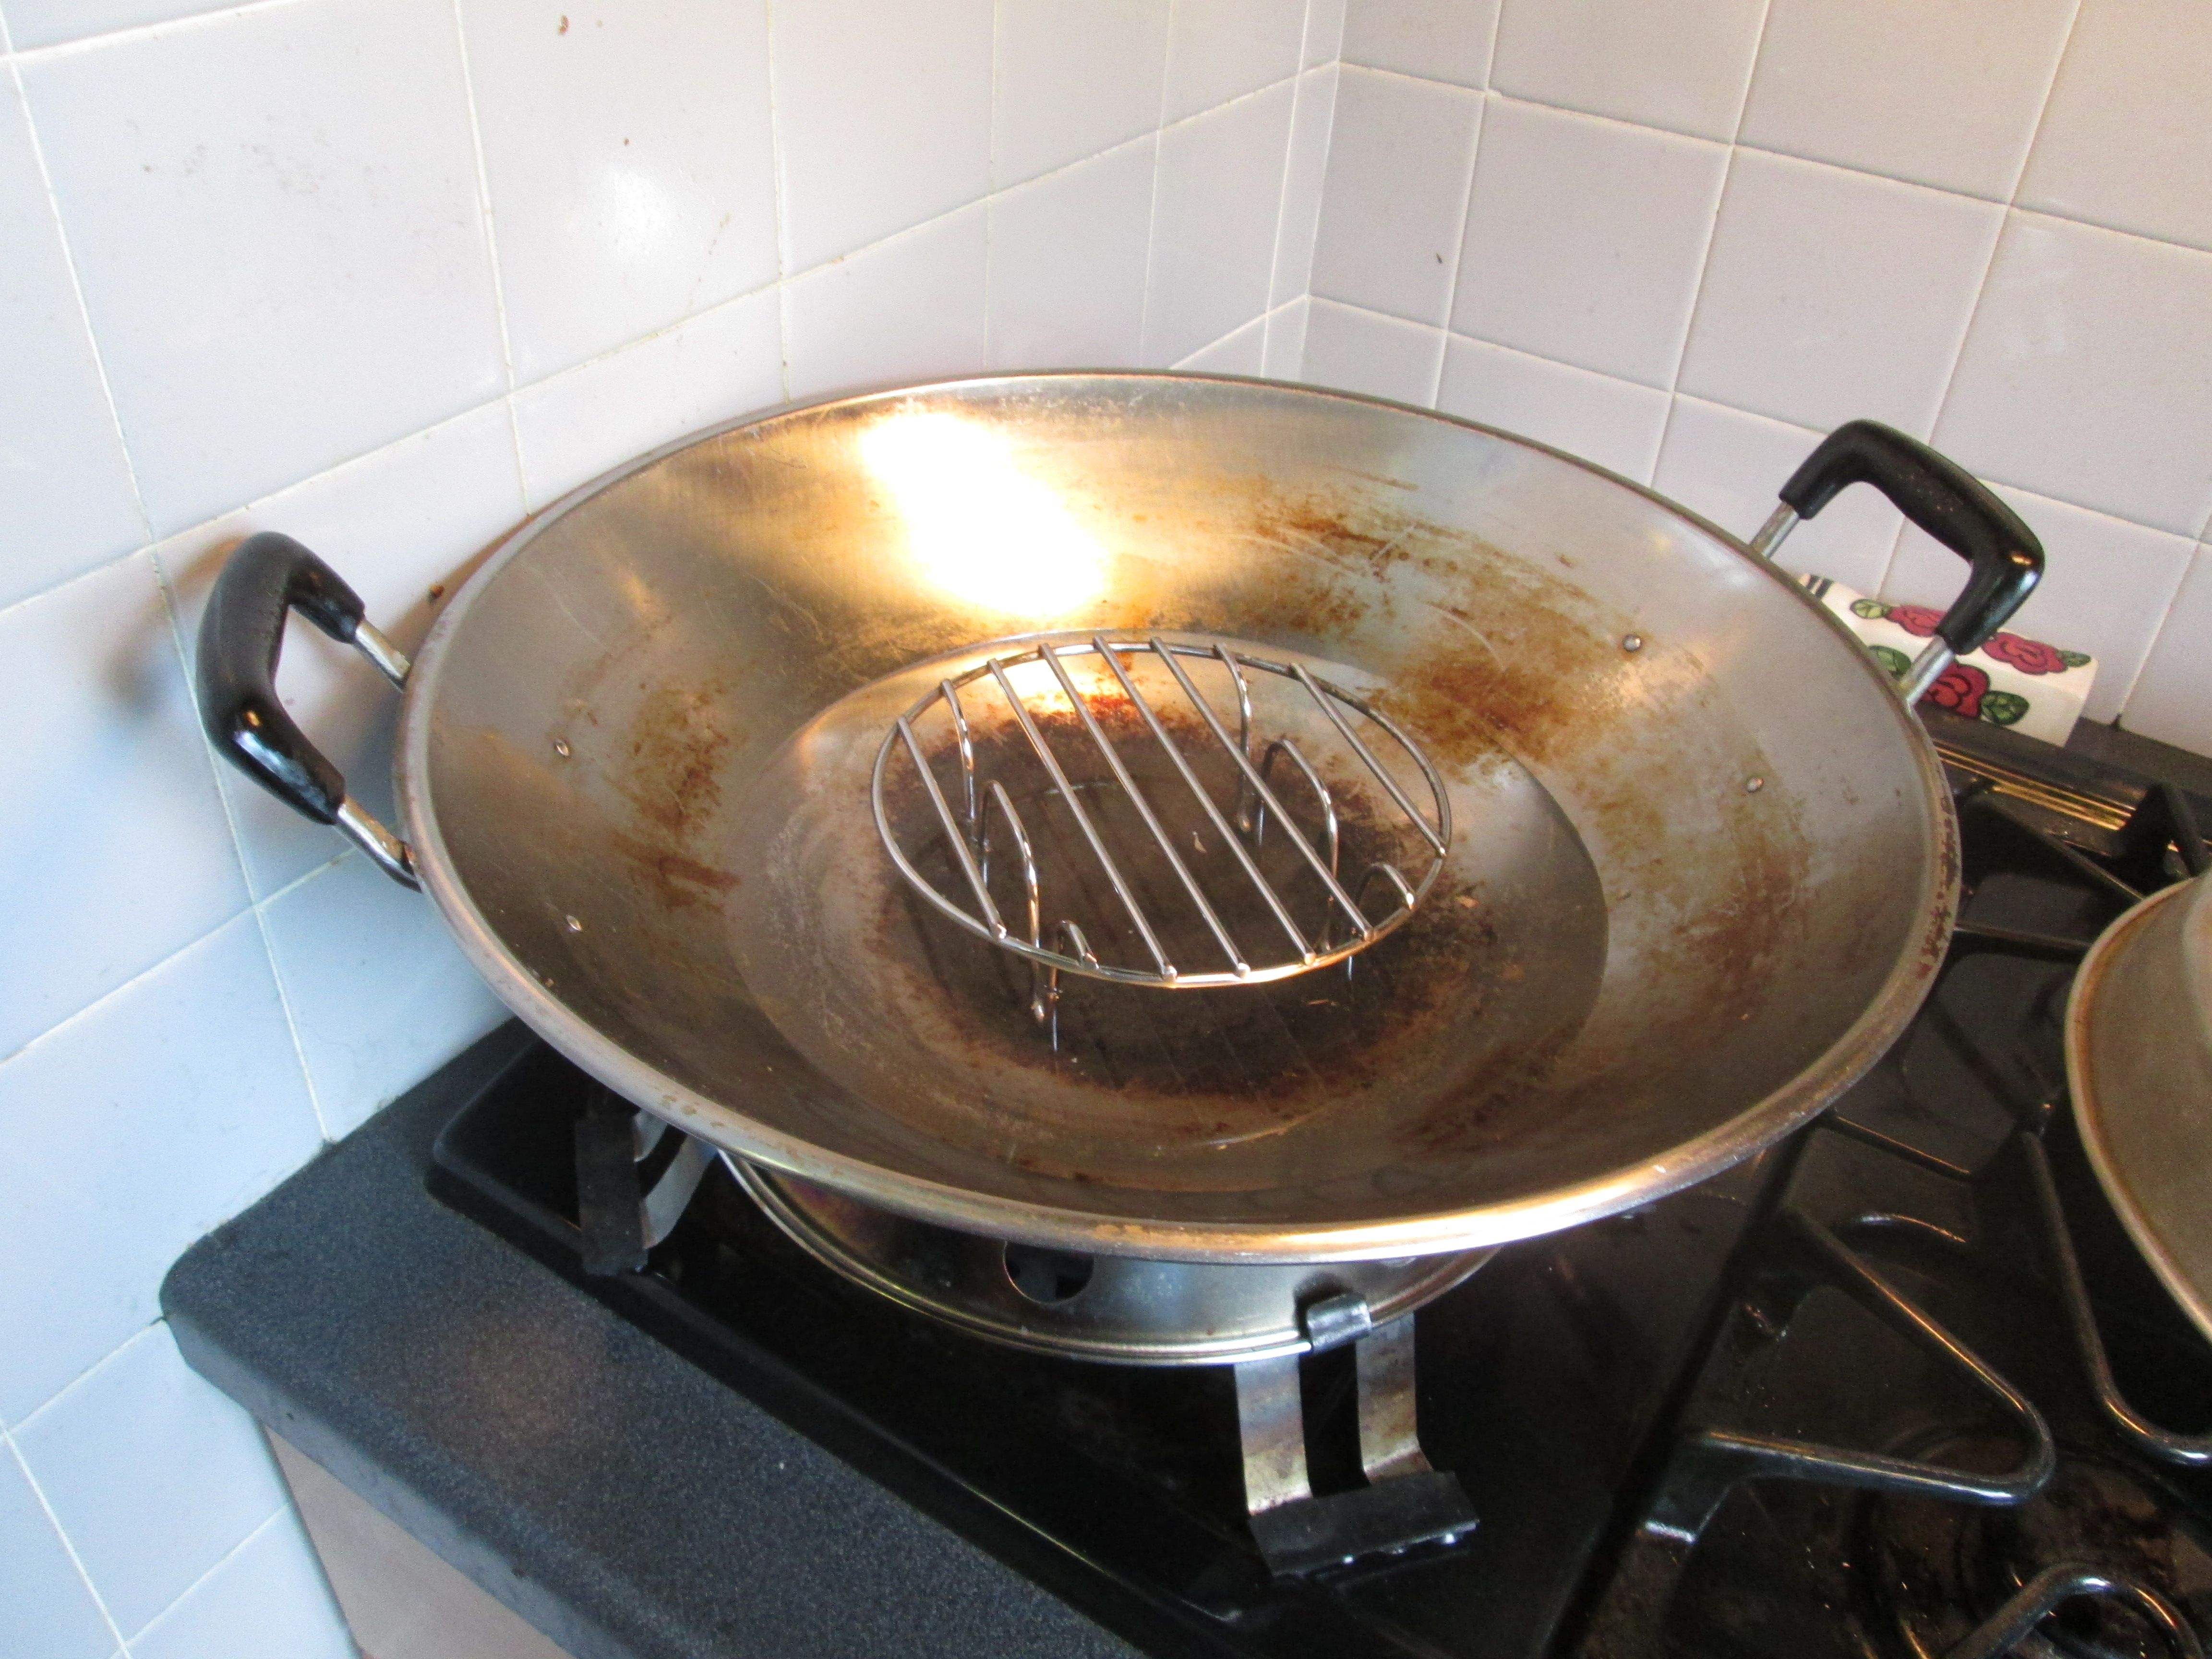
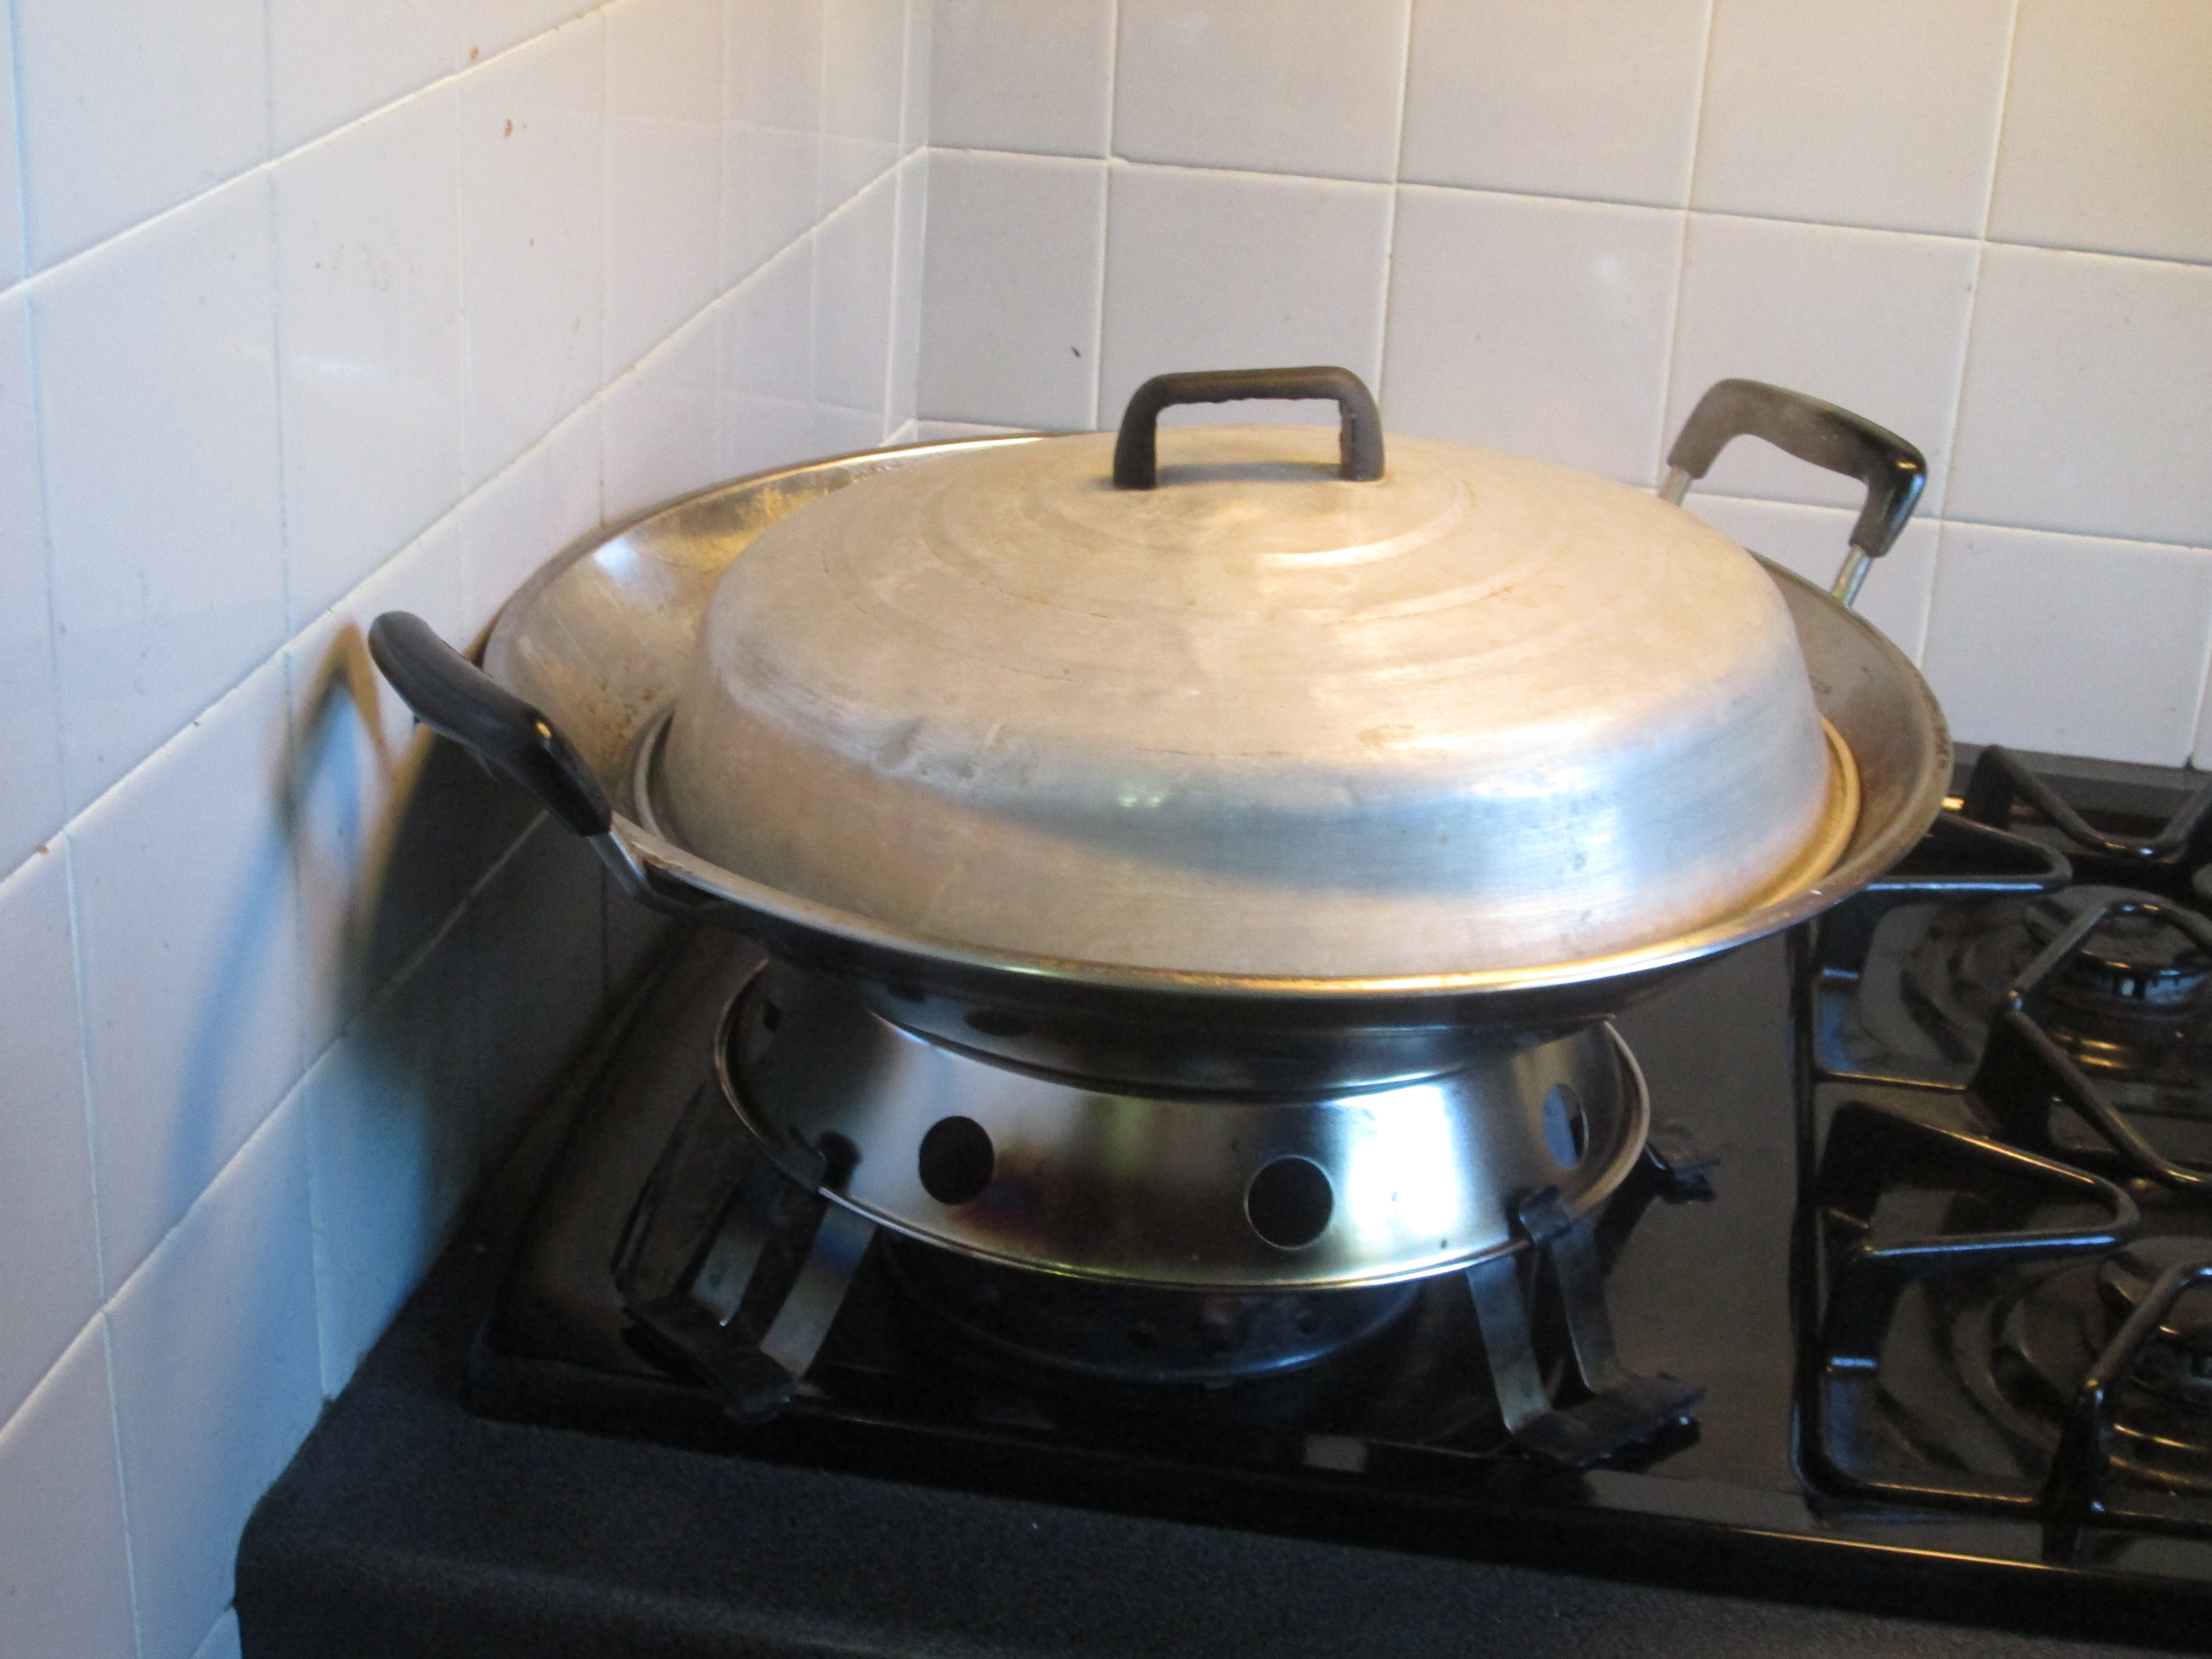
Steaming:
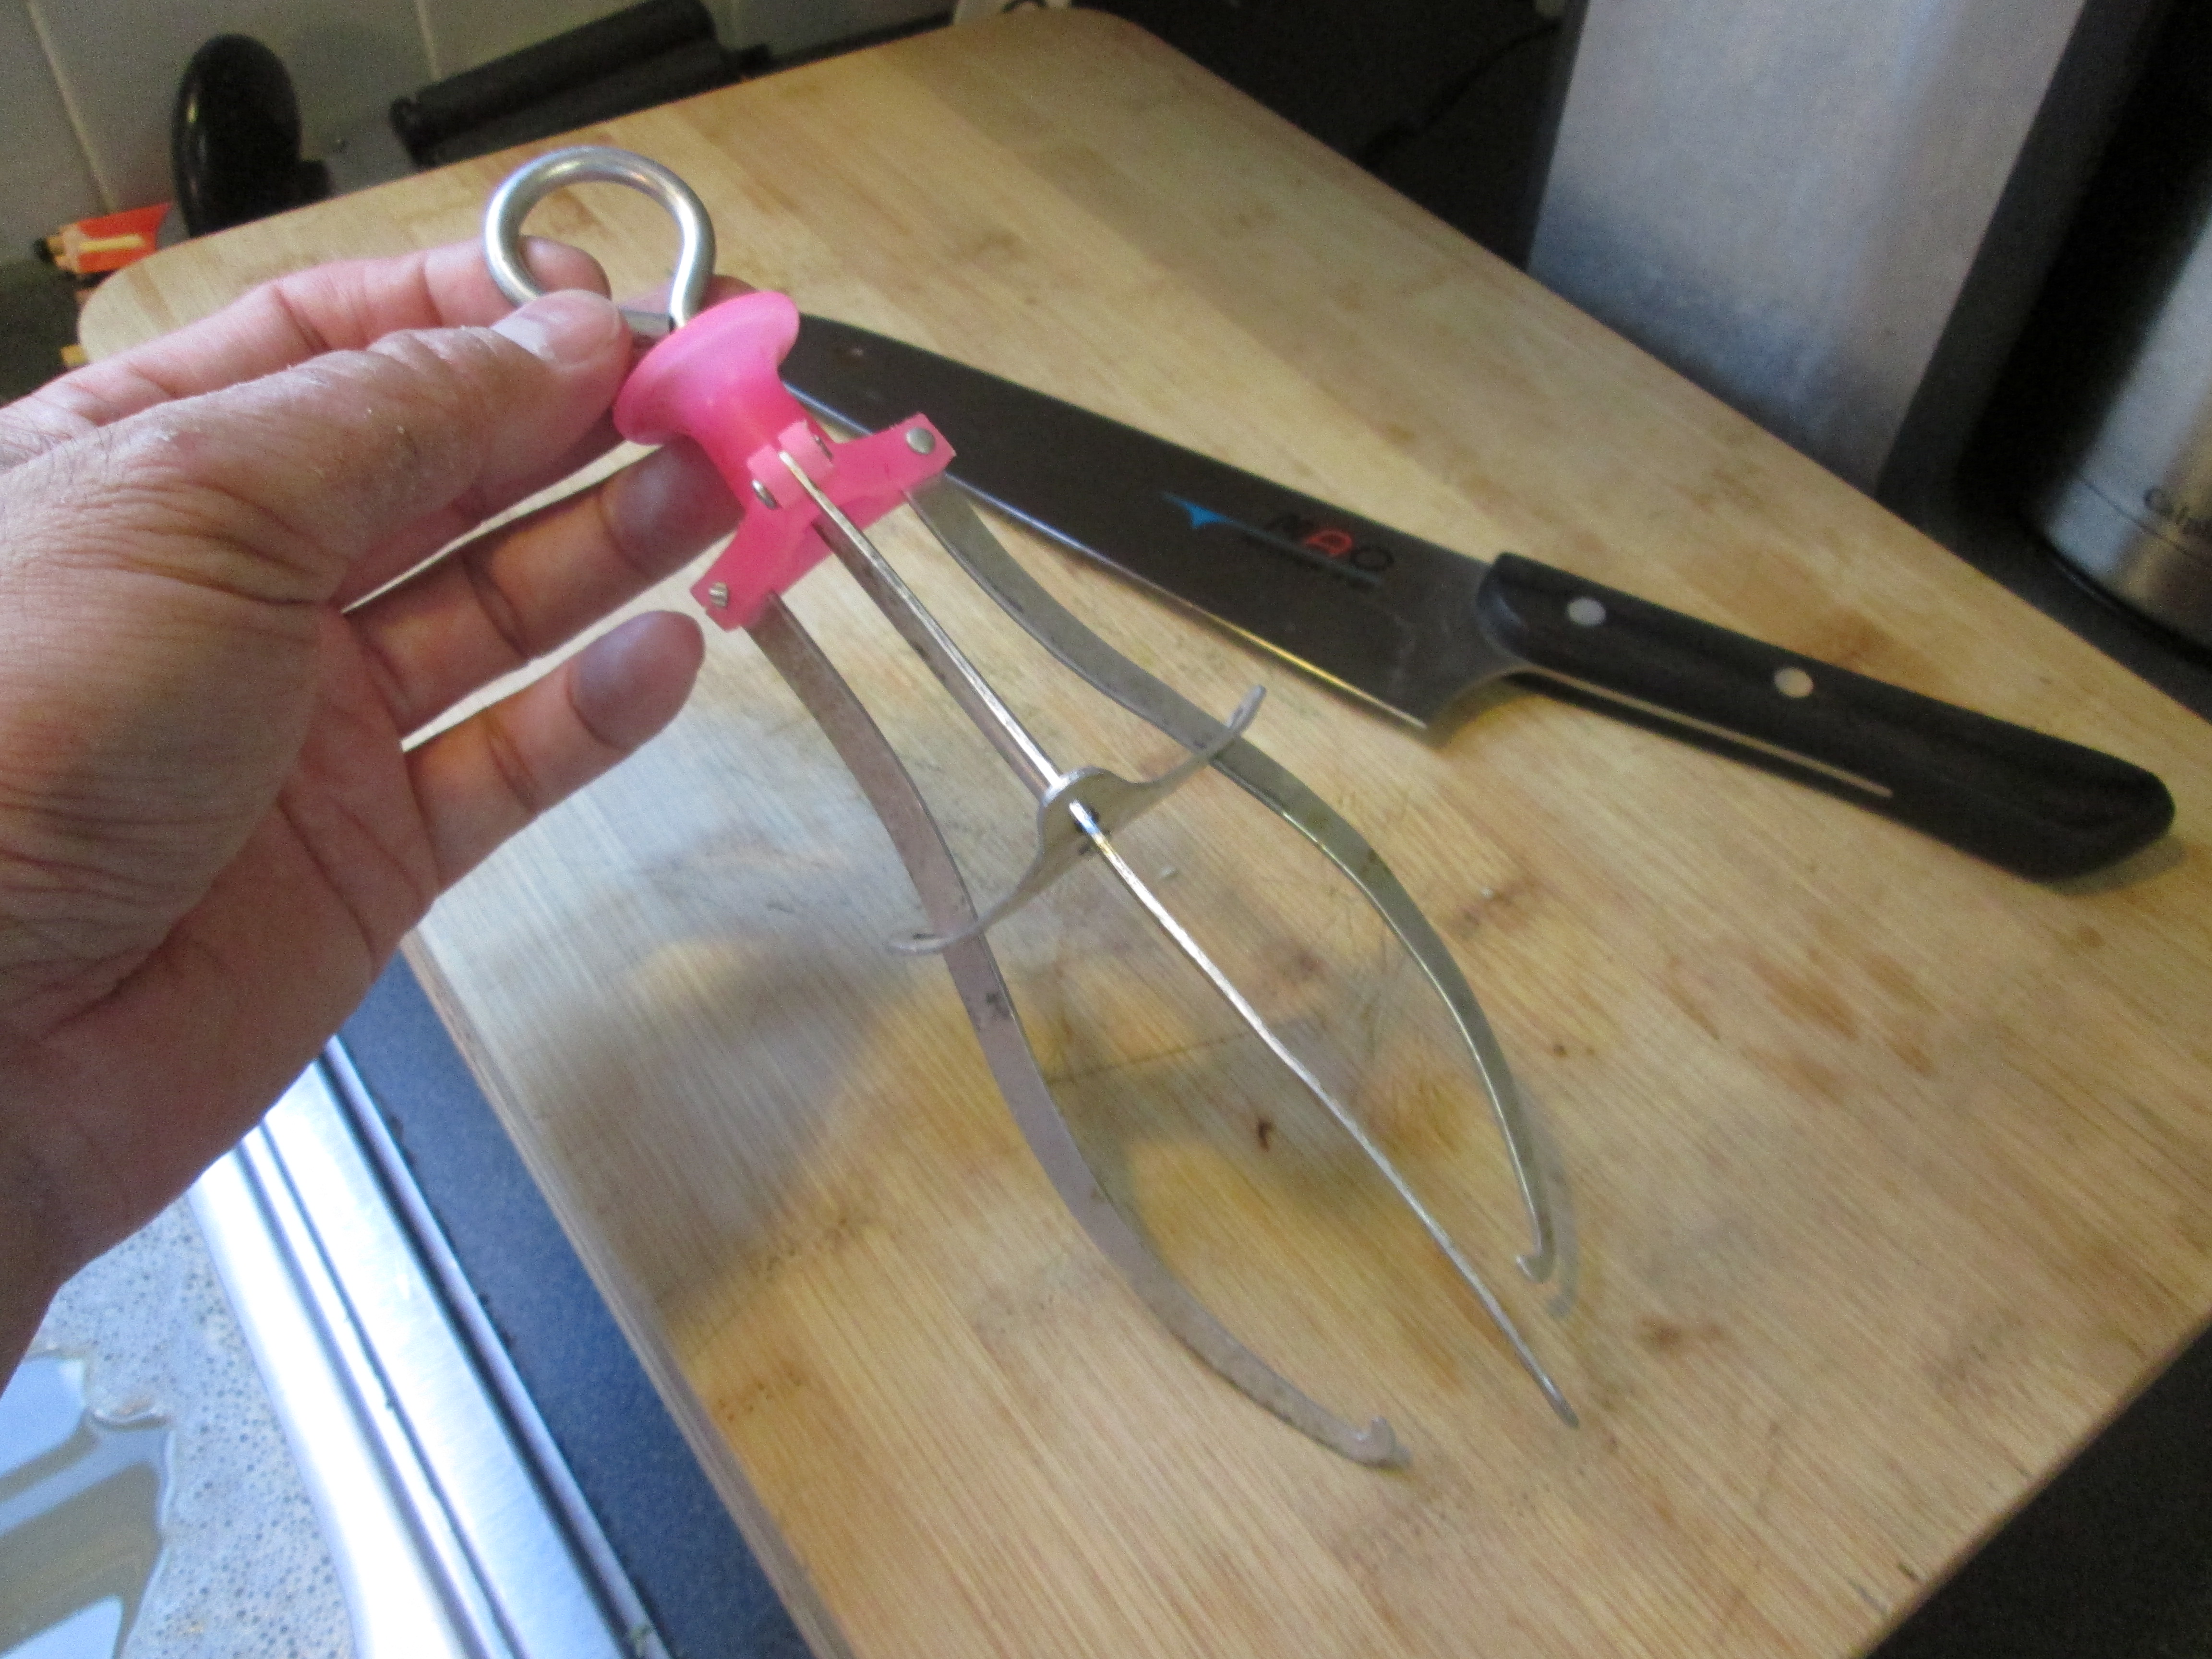
a Chinese grasper (used to lift a dish out of a hot steamer)
Set up the Wokmon. Place a metal or bamboo steamer rack inside the wok and heat 3 cups of water on high heat (about 4 ½ minutes or until vigorous steam is achieved). Turn the setting down to medium heat, place the Chinese broccoli into the wok on a heat-resistant plate, cover the wok, and allow the broccoli to steam (about 4 minutes or until al dente). Monitor the time well so that the broccoli doesn’t overcook and lose its crispness or bright green color.
Once done, remove the plate (either with an oven mitt or a Chinese grasper). Drain the water that will have gathered on the broccoli and plate. Adjust and shift the stalks of broccoli to create a uniform appearance and drizzle the oyster sauce over them (ensuring that ribbons of sauce cover the surface of the broccoli). Do not oversauce. Drizzle the sesame oil similarly. Garnish with fried shallots.
—————————————————————————————————————————-
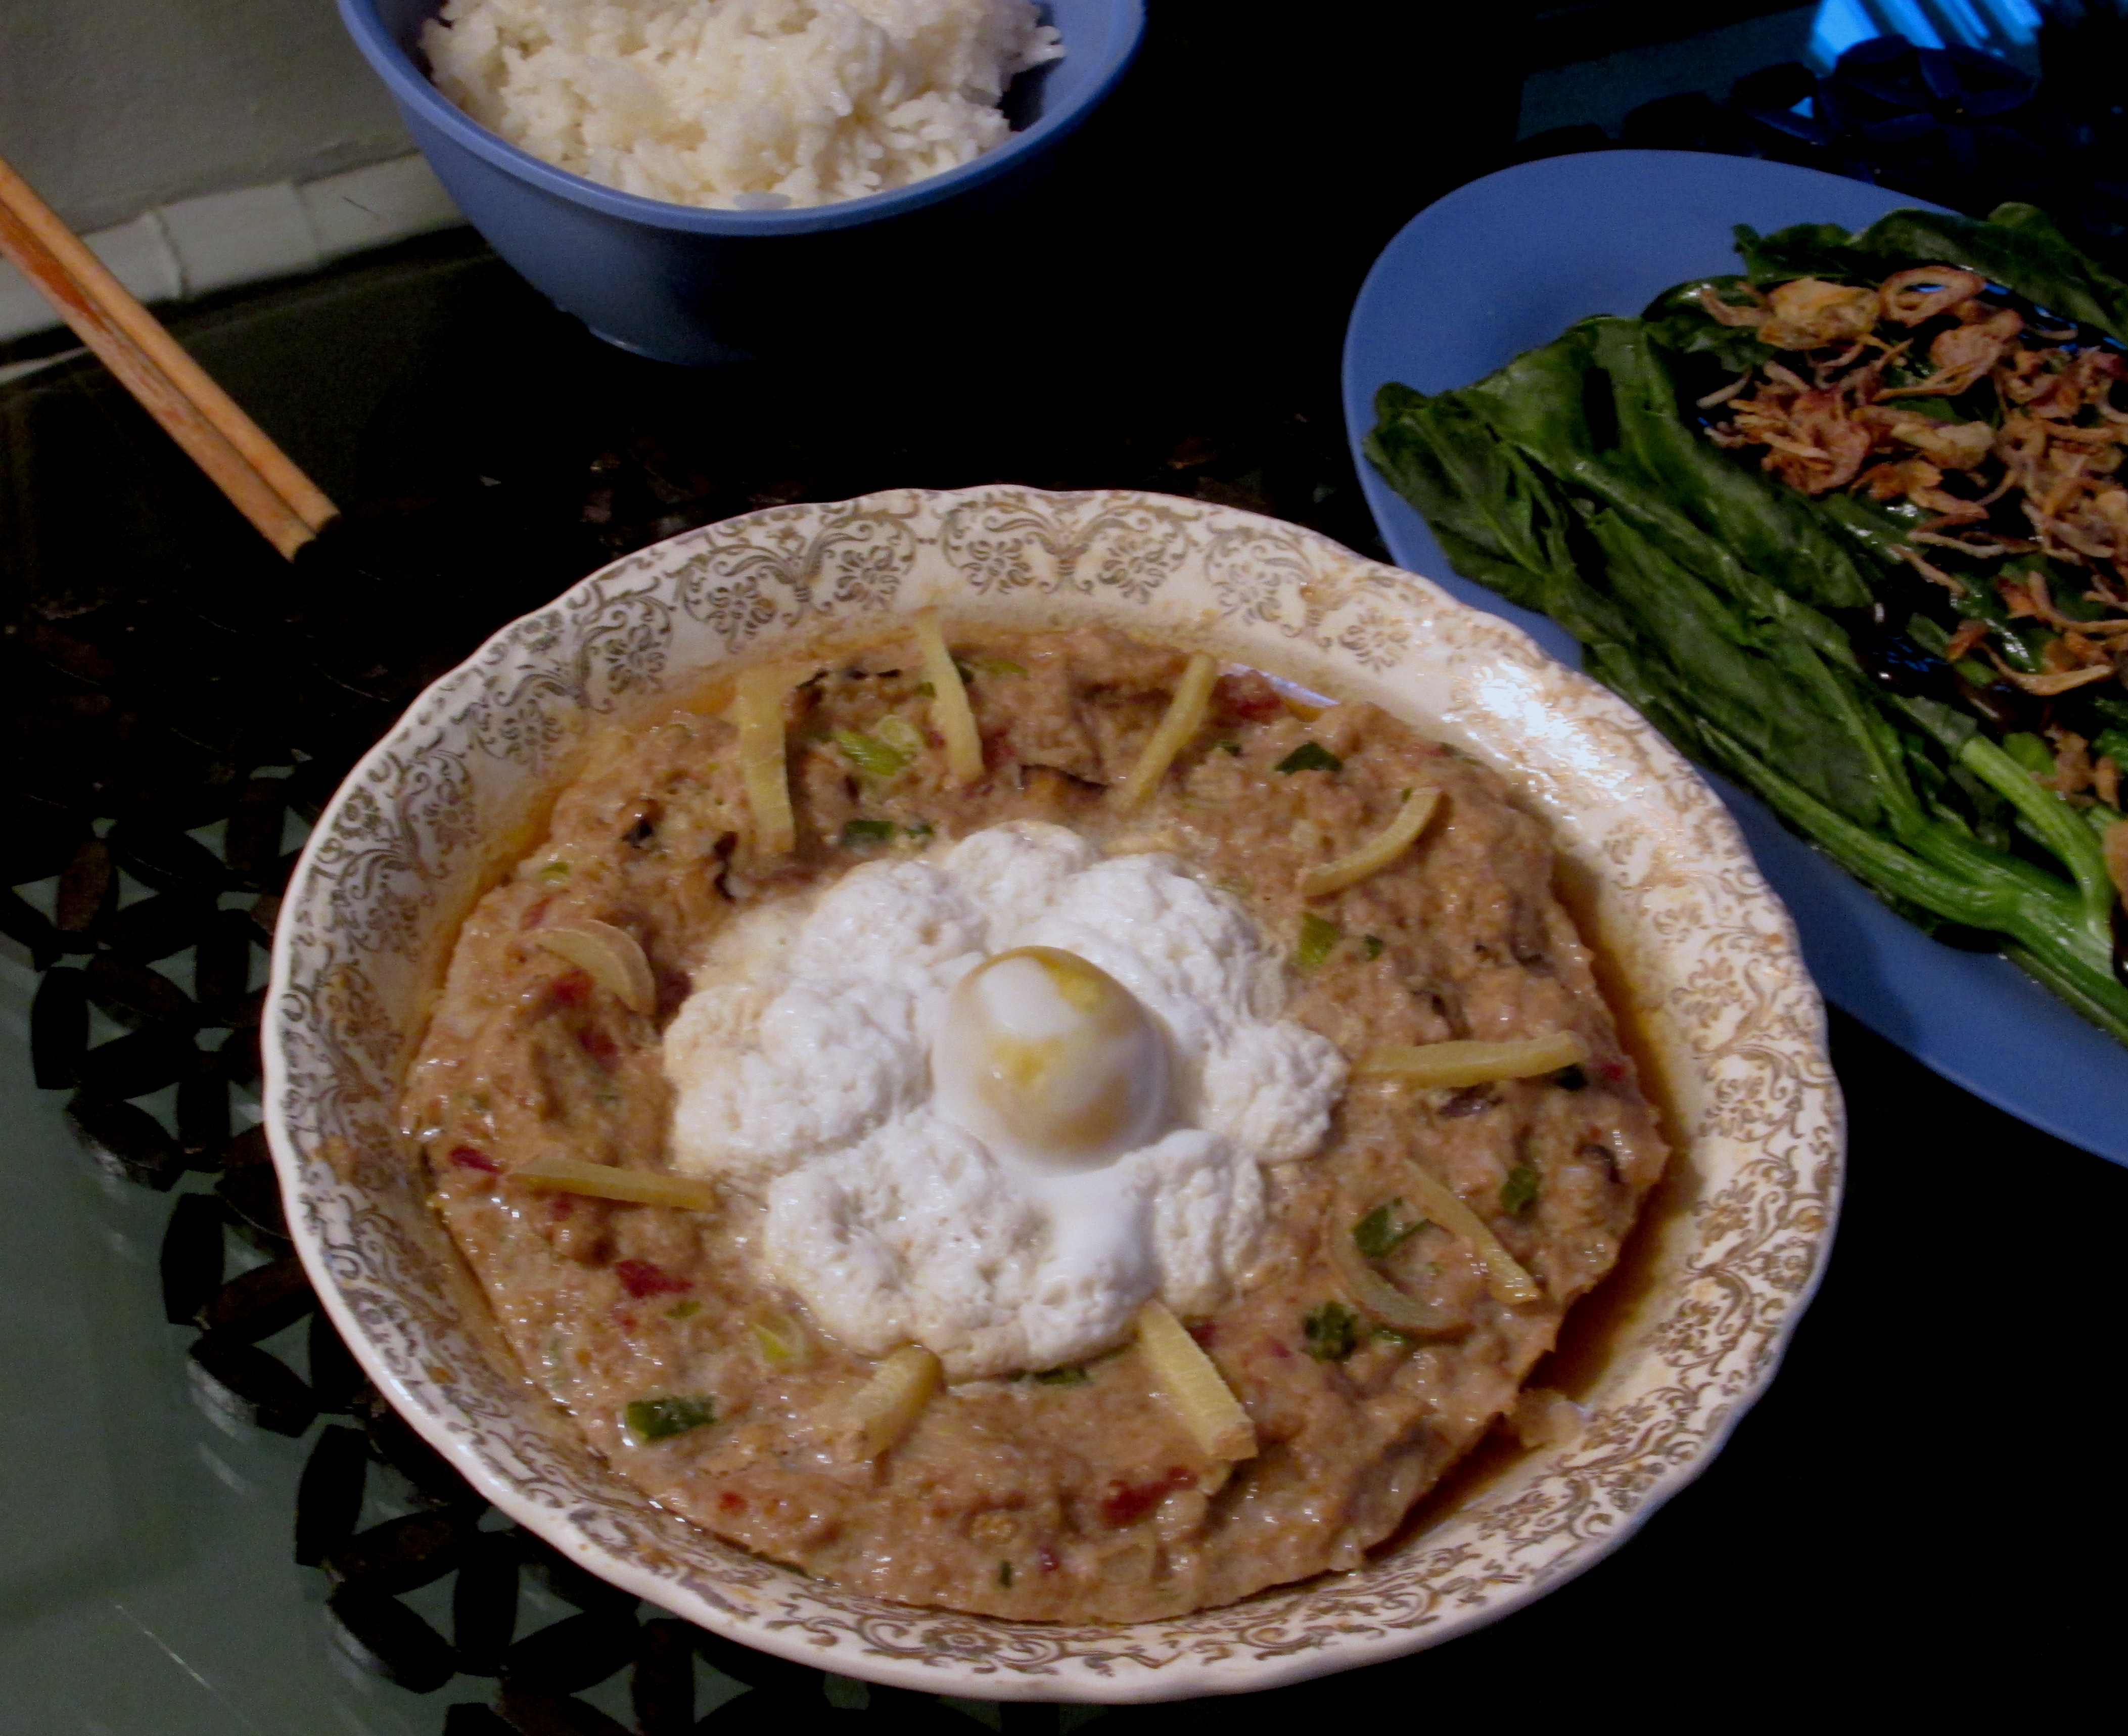
Chinese Steamed Pork Meat Loaf with Salted Duck Egg (two servings)
This dish is almost always served at home rather than at restaurants; it evokes rustic, homey comfort. It’s something my mother and aunts made frequently and made well as I was growing up in Manhattan’s Chinatown. There’s a hearty, robust quality to it from the savory flavor of the pork, Chinese sausage, black mushrooms, and salted duck egg that strikes a chord with me every time. While the salted duck may seem a bit quirky, it’s common to include it on such a loaf. I present it cooked rather than raw—as many do.
Ingredients:
¾ pound of ground pork (preferably with an 80/20 fat to lean ratio)
¾ of one Chinese sausage link (preferably Kam Yen Jan brand) (cut into fine cubes)
4 small dried Chinese black mushrooms (reconstituted and finely diced)
¼ cup of white onion (finely diced)
2 stalks of spring onions (finely chopped)
10 pre-sliced coins of Chinese water chestnuts (yielding about 1 oz.)
1 egg
1 salted duck egg (raw/uncooked)
¼ inch of ginger (cut into 12 julienned matchsticks)
2 tablespoons of rice wine (or dry sherry)
2 tablespoons of oyster sauce
1 tablespoon of soy sauce
1 tablespoon of sesame oil
1 teaspoon of corn starch
½ teaspoon of white pepper
Directions:
Preparing the Chinese Black Mushrooms:
Place the dried, dehydrated mushrooms into a small bowl or container that can receive warm or hot water and where they can expand slightly. Soak the mushrooms in warm water (about 30 to 45 minutes) or in hot water (about 15 to 30 minutes) to rehydrate them. Place a plate or some other heat-resistant cover over the bowl to ensure that the mushrooms remain submerged. The mushrooms are ready once they have swelled and softened. Once ready, squeeze out any excess water from the mushroom caps, cut off the ends, and dice the caps finely.
Preparing the Ground Pork:
Place the ground pork (and the other listed ingredients—except for the ginger and salted duck egg—into a 3 quart mixing bowl or equivalent) with the wet ingredients placed in last and mix well using a wooden spoon or other suitable utensil. Once the ground pork and ingredients have been thoroughly blended together, transfer the ground pork mixture to a shallow dish for steaming.
Smooth out the mixture, ensuring that none of the pork protrudes over the limits of the dish, and create a small indentation or concave area in the center. Crack the salted duck egg and empty it into the center of the dish so that the raw yolk is positioned in the middle. Then, place the julienned ginger around the outer portion of the mixture to create a circular pattern like the twelve markings on a clock or like that of a “sun” with the ginger like “rays” radiating from it.
Steaming:
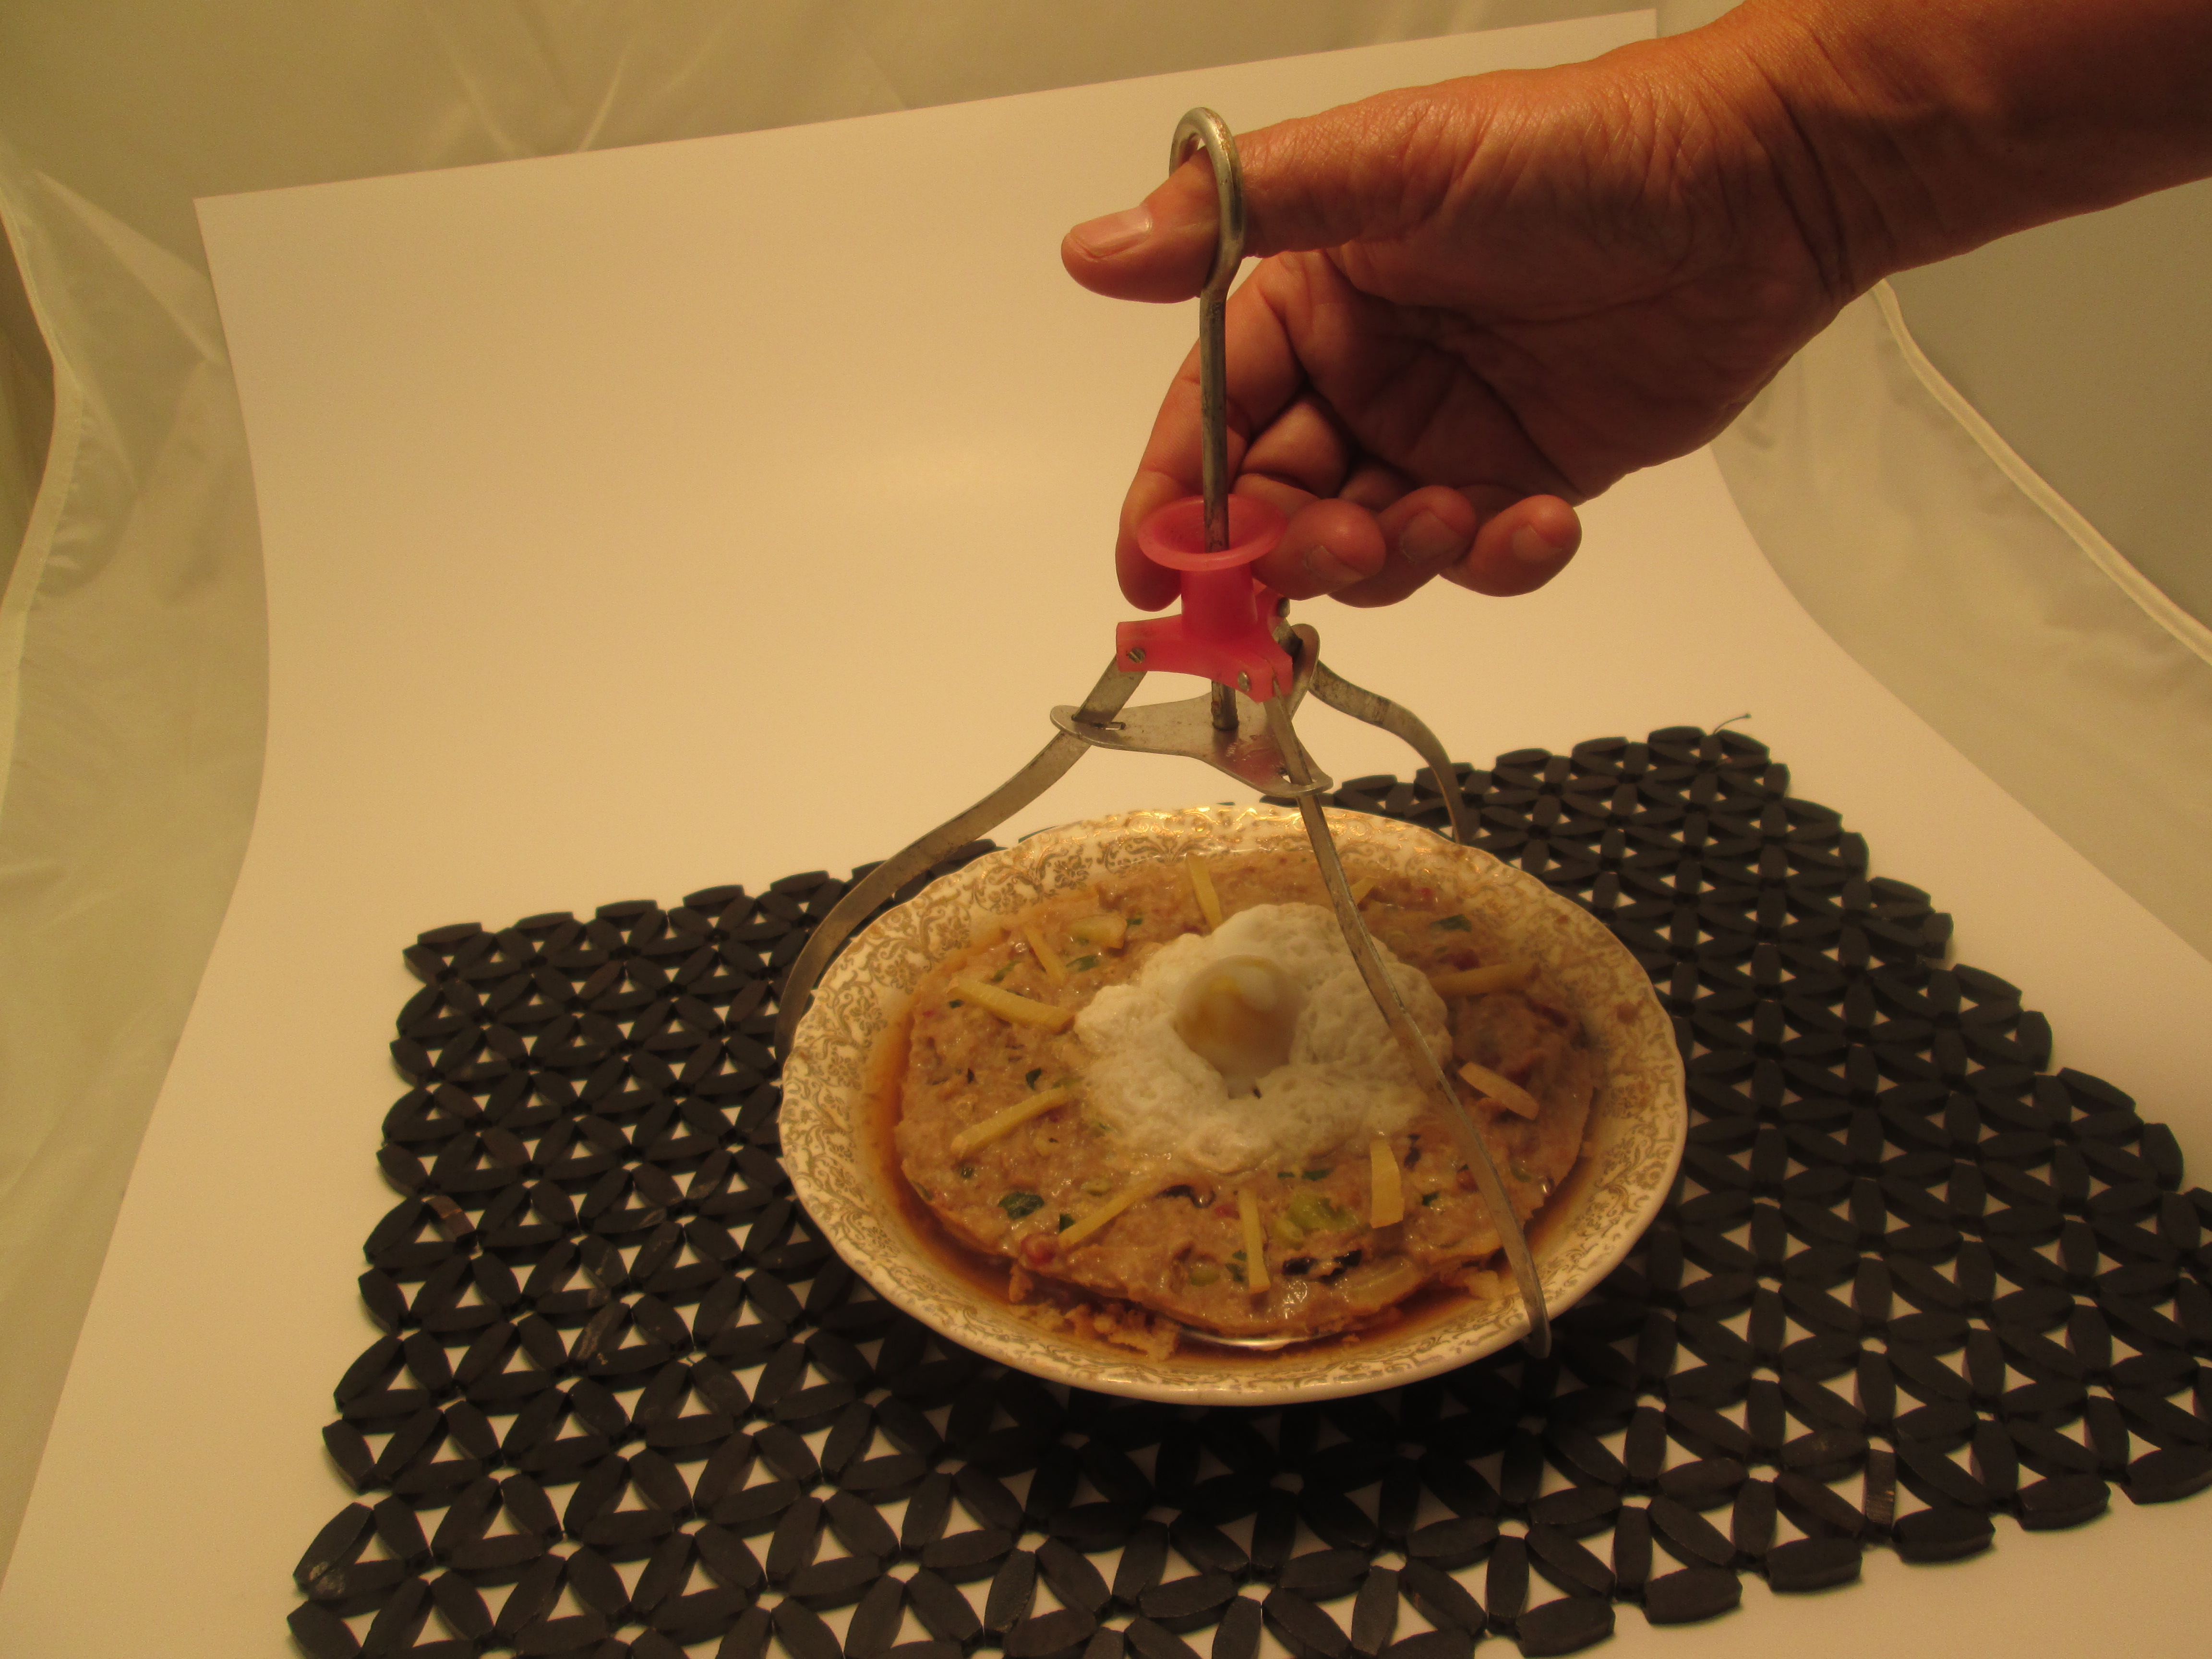
Set up the Wokmon. Place a metal or bamboo steamer rack inside the wok and heat 4 cups of water on high heat (about 4 ½ minutes or until vigorous steam is achieved). Keep the setting on high, place the ground pork mixture into the wok, cover the wok, and allow the pork to steam (about 25 minutes). Once done, remove the plate (either with an oven mitt or a Chinese grasper). Serve the pork loaf with steamed white rice.
—————————————————————————————————————————-
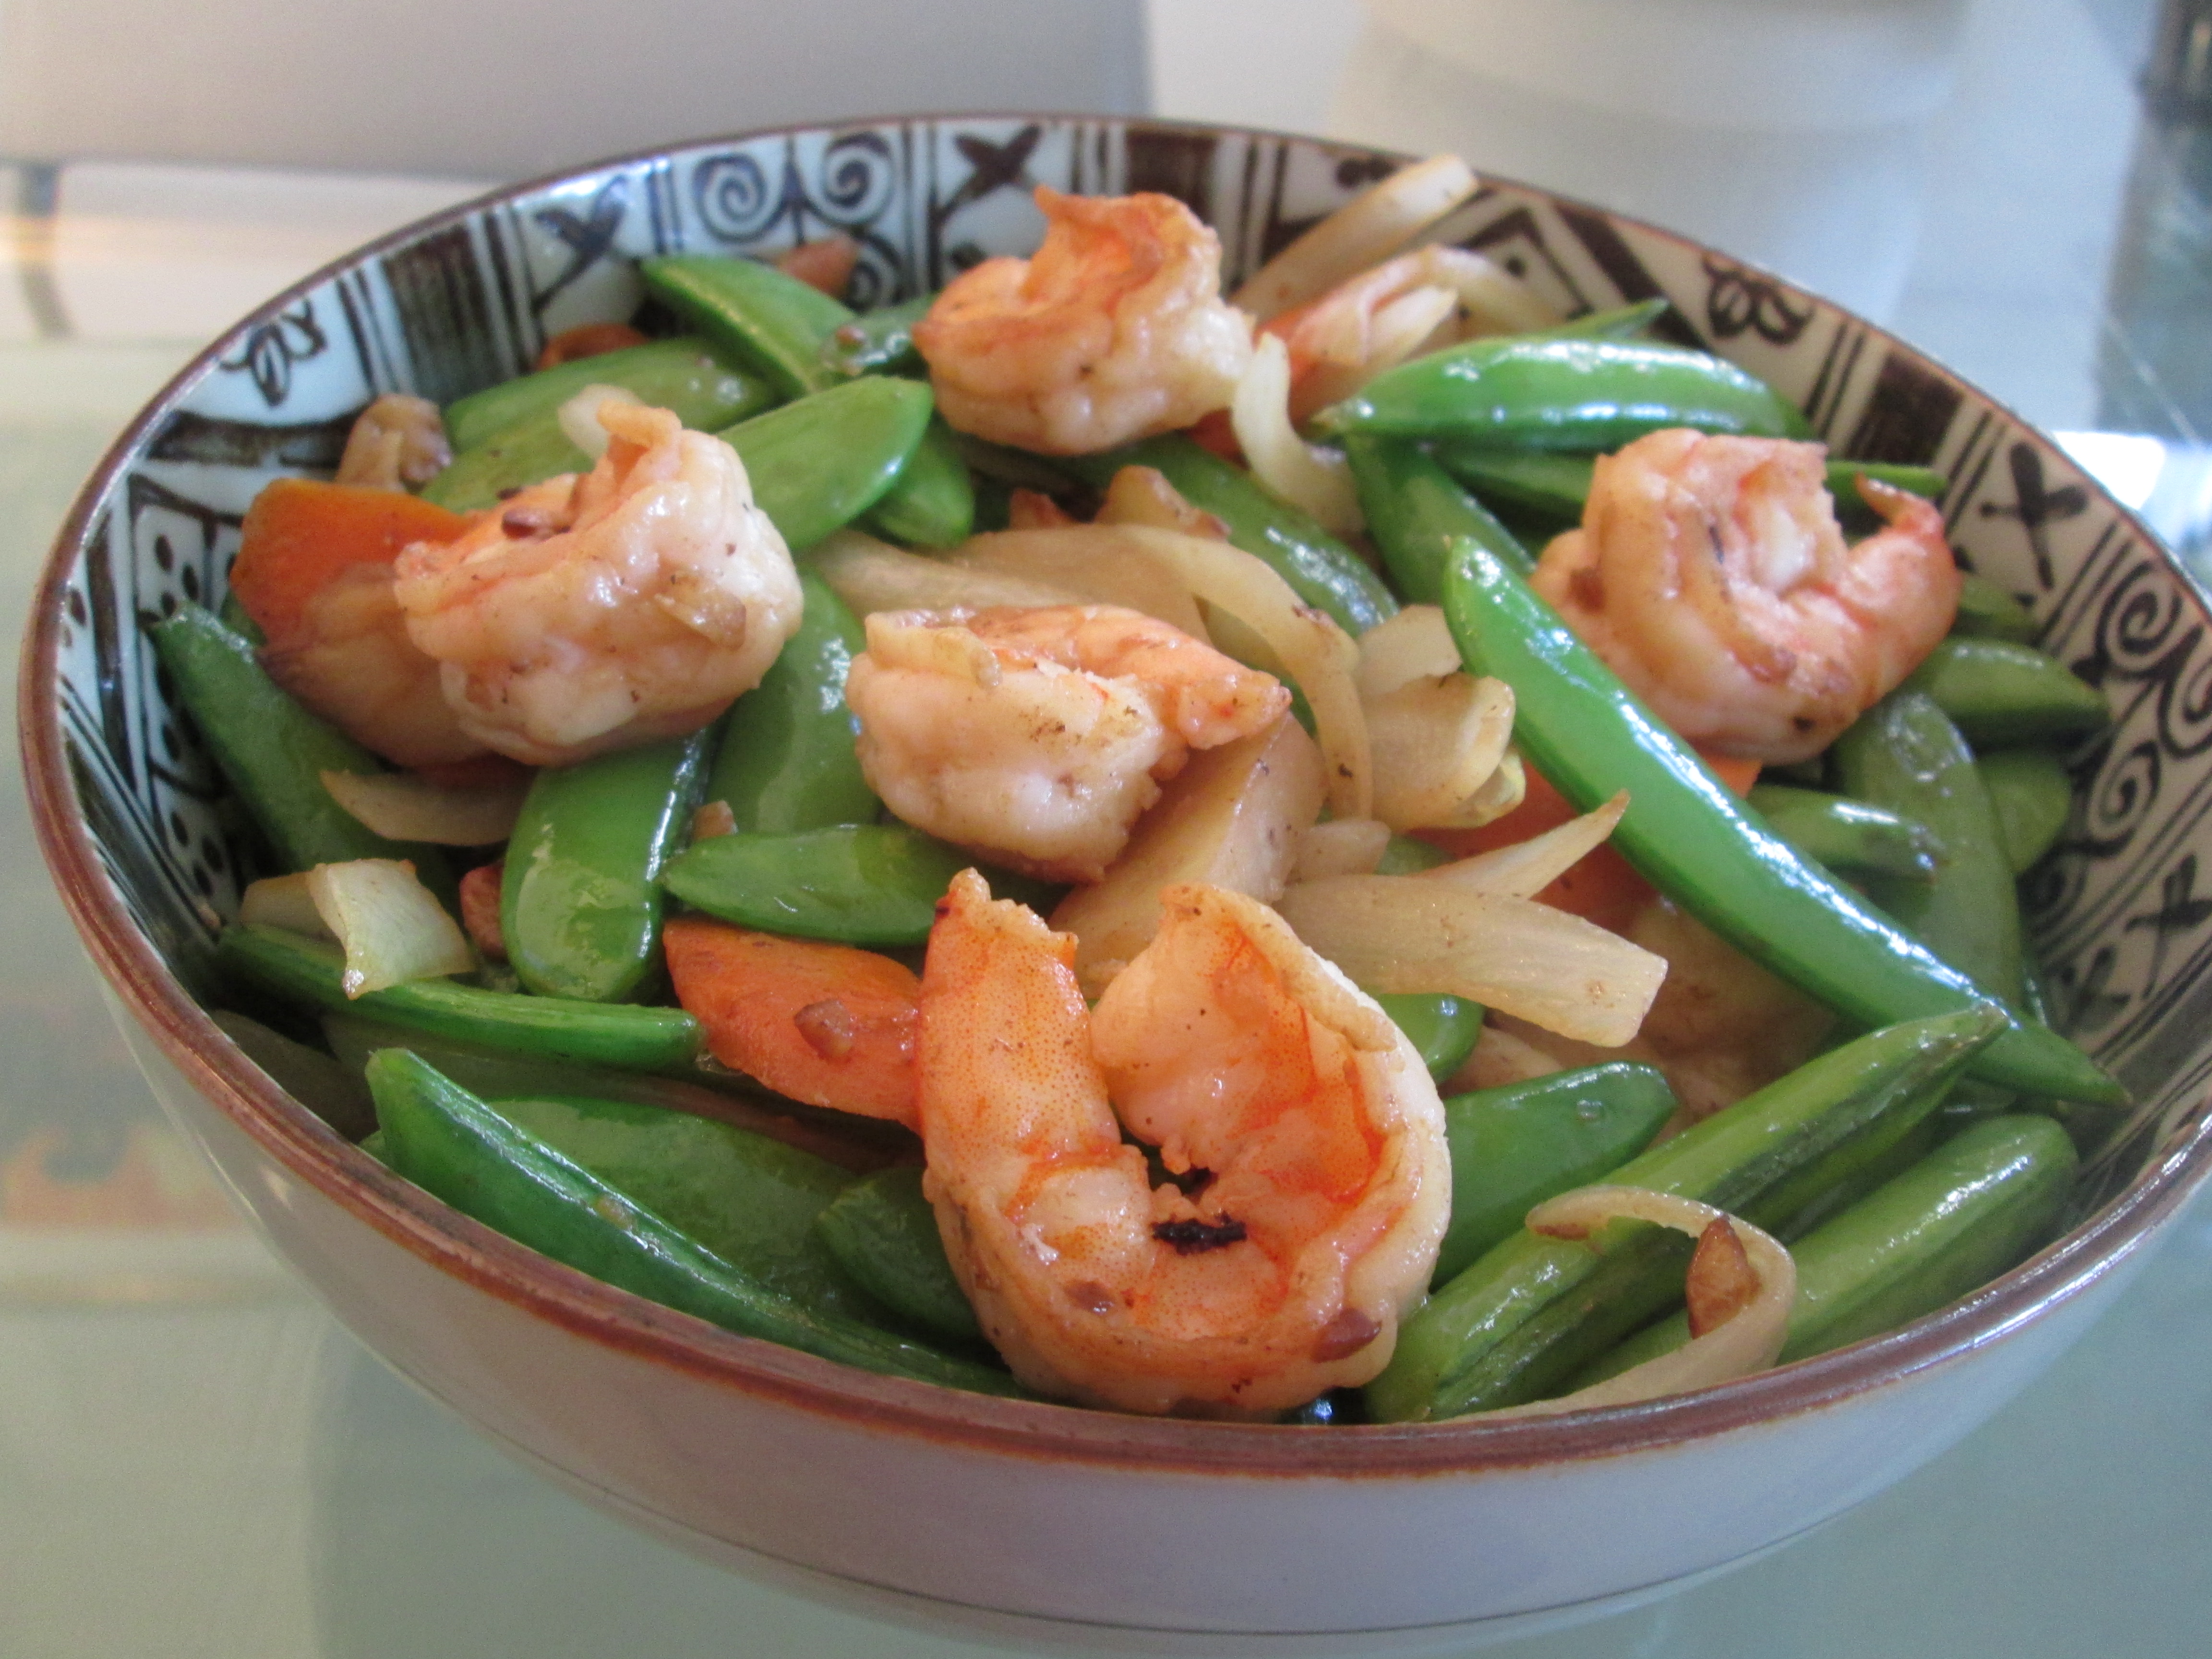
Shrimp Stir-Fry with Sugar Snap Peas (two servings)
Often, with my busy schedule, I’m in the mood for a quick stir-fry that I can make when I’m short on time or when I want a change of pace from chicken, pork, or beef. That’s where this dish comes in. I really like the insistent crunch of the sugar snap peas, which pairs so well with the texture of the shrimp. Often, this dish may be prepared with snow peas instead (as some Chinese restaurants might serve it). That substitution can be made if desired.
Main Ingredients:
7 ounces of shrimp (medium-sized, peeled, and de-veined)
2 cups of sugar snap peas (or snow peas if desired)
½ cup of onion (sliced)
½ cup of carrots (very thinly sliced into coins)
6 coins of Chinese water chestnut (preferably fresh or canned)
2 cloves of minced garlic
½ teaspoon of salt (preferably Kosher salt)
1 tablespoon of oil (preferably peanut oil)
For the Shrimp Marinade:
1 ½ tablespoons of sesame oil
1 tablespoon of soy sauce
1 tablespoon of rice wine (or dry sherry)
2 teaspoons of corn starch
Directions:
Preparing the Shrimp:
Peel the shrimp by removing the legs and shell. Hold the shrimp upright with its back facing up. Using a paring knife, score the back of the shrimp to create a shallow incision along the vein. The flesh will separate to allow access to the vein, which will have dislodged upon being scored. With the tip of the knife or your fingers, pull the vein out (trying as much as possible to take it out as one long strand). Repeat for each shrimp. Rinse all the shrimp once they have been de-veined and pat dry.
Marinating the Shrimp:
Using a small bowl, combine the ingredients for the marinade. Add in the shrimp once they have been deveined and mix well. Allow the shrimp to marinate at room temperature (about 10 to 15 minutes).
Preparing the Sugar Snap Peas and the Carrots:
Bring 4 cups of water to a boil in a pot. Place the sugar snap peas and sliced carrots into the pot and stir once. After the pods have achieved a bright, green color (about 15 – 20 seconds), take them, along with the carrots, out with a slotted spoon or simply pour the contents out into a colander. Immediately run cold water over them to stop the cooking process. Use your hands to dig under and around the pods and carrots to ensure that everything is properly cooled. Immense in ice cubes if available. Allow the pods and carrots to dry before being stir-fried.
Stir-Frying:
Set up the Wokmon and heat the wok until it begins to smoke (about 1 ½ minutes). Drizzle in the oil. Toss in the minced garlic and sprinkle in the salt. Toss in the shrimp immediately. Don’t allow the garlic to burn. Agitate the shrimp to coat them with oil and, then, spread them out on the wok’s surface with a metal wok spatula (or wooden spoon). Allow the shrimp to sear (about 15 seconds). Next, add the sugar snap peas, carrots, onions, and water chestnuts. Mix and stir vigorously (about 30 seconds). Allow to sizzle in the wok undisturbed (about 15 – 20 seconds). Give a final stir, salt to taste, and serve immediately with rice.
—————————————————————————————————————————-
Young Chow Fried Rice (two servings)
In a Chinese household, fried rice is a dish that’s made with leftovers when the sum of the parts makes more sense than reheating and eating everything separately. So, all manner of meaty morsels and veggies can end up in a fried rice dish. There are no rules, really. But, with young chow fried rice, my mom always included eggs, lettuce, and lap cheung (Chinese sausage), which we always had around the house. Some versions include shrimp; but, in the Lee household, we ate the humbler version.

Ingredients:
5 cups of cooked white jasmine rice (room temperature, leftover from at least the previous day)
3 Chinese sausage links (preferably Jan Yen Kam brand) (boiled, cut into coins)
½ cup of green peas (defrosted, not frozen)
1 cup of iceberg lettuce (shredded)
3 eggs (cracked, scrambled in a bowl)
3 stalks of spring onions (scallions) (chopped finely)
1 teaspoon of light soy sauce
1 teaspoon of salt (preferably kosher salt)
1 tablespoon of oil (preferably peanut oil)
Directions:
Preparing the White Rice:
If you don’t have leftover rice available, cook some white rice at least the night before making this recipe. Allow the rice to cool, transfer it to an airtight storage container, and refrigerate. The next day, take the rice out and allow it to come to room temperature (about 2 hours). Either using the same container or a large mixing bowl to catch the rice, use your hands to break up any clumps that may have formed.
Preparing the Chinese Sausage:
Bring 4 cups of water to a boil in a pot. Once the water is ready, lower the setting to medium and place the Chinese sausage links into the pot and allow them to cook (about 5 minutes). The links will lose its exterior redness and swell slightly. Take them from the pot, pat dry, and slice the links into coins (about 1/8 of an inch in thickness).
Stir-Frying:
Set up the Wokmon and heat the wok until it begins to smoke (about 1 ½ minutes). Drizzle in the oil. Toss in the Chinese sausage and stir. Allow the pieces to become aromatic while stirring constantly (about 10 seconds). Monitor assiduously so the sausage doesn’t burn. Then, add in the spring onions and peas and stir (about 15 seconds). Next, pour in the raw egg mixture and stir again. As the eggs cook, break up any large clumps to ensure that only bite-sized pieces (comparative in size to the peas) remain (about 30 seconds).
Add in the rice once the eggs have turned yellow. Break up any clumps and chunks with a wok spatula (or a wooden spoon) and mix well to blend all the ingredients together. Then, using the flat side of the wok spatula, pat down the mixture to create a flattened surface. Allow the rice to sear and for the heat to radiate into each grain (about 20 seconds). Then, loosen the patted-down rice and stir energetically. Swirl in the soy sauce, sprinkle in the salt, and stir. Finally, add in the shredded lettuce and incorporate well. Give a final stir-fry, mixing non-stop (about 20 – 30 seconds). Once the lettuce wilts ever so slightly, the fried rice is ready. Plate, serve, and eat immediately.
Copyright (Corbo Eng) 2014. All rights reserved.
All photos by Corbo Eng unless otherwise stated.